This panorama is the 2024 contribution for the 'Evolution' event of WorldWidePanorama.
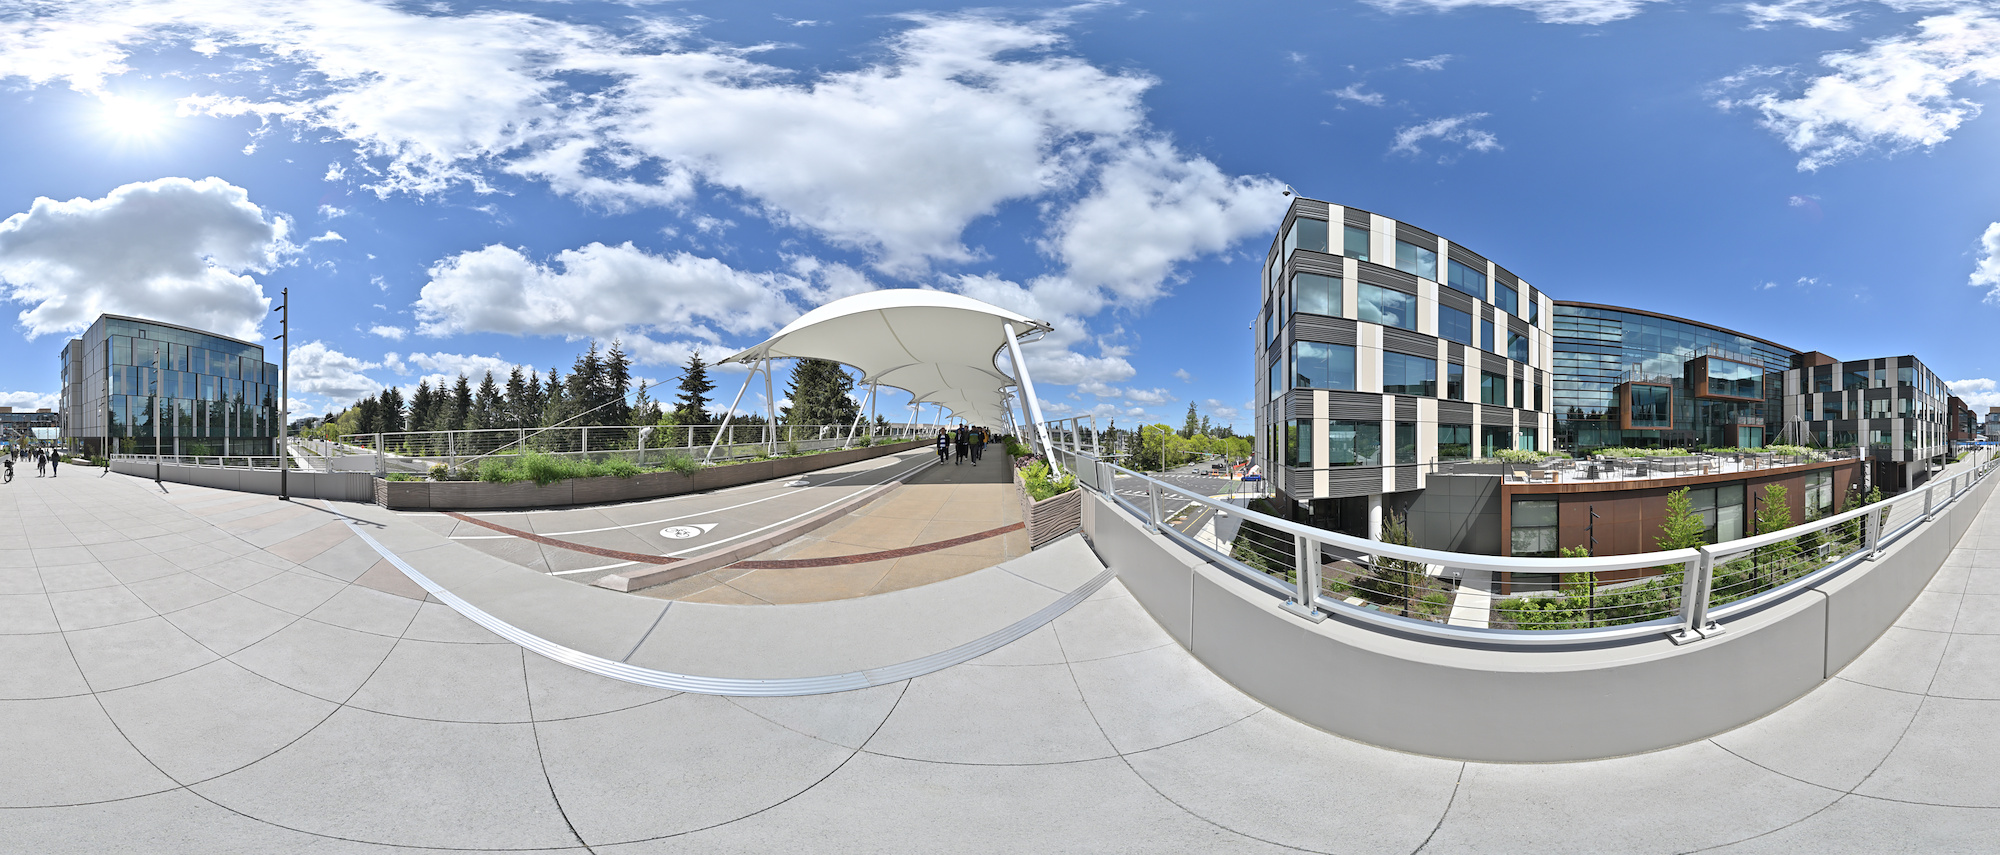
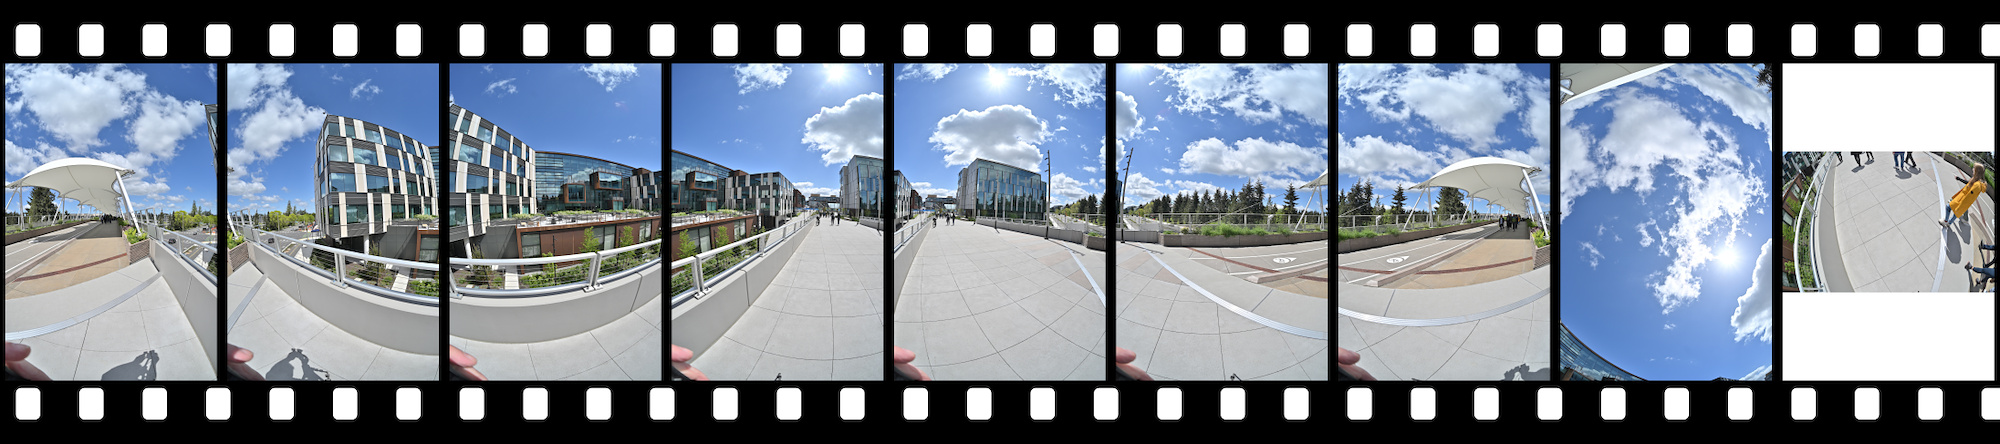
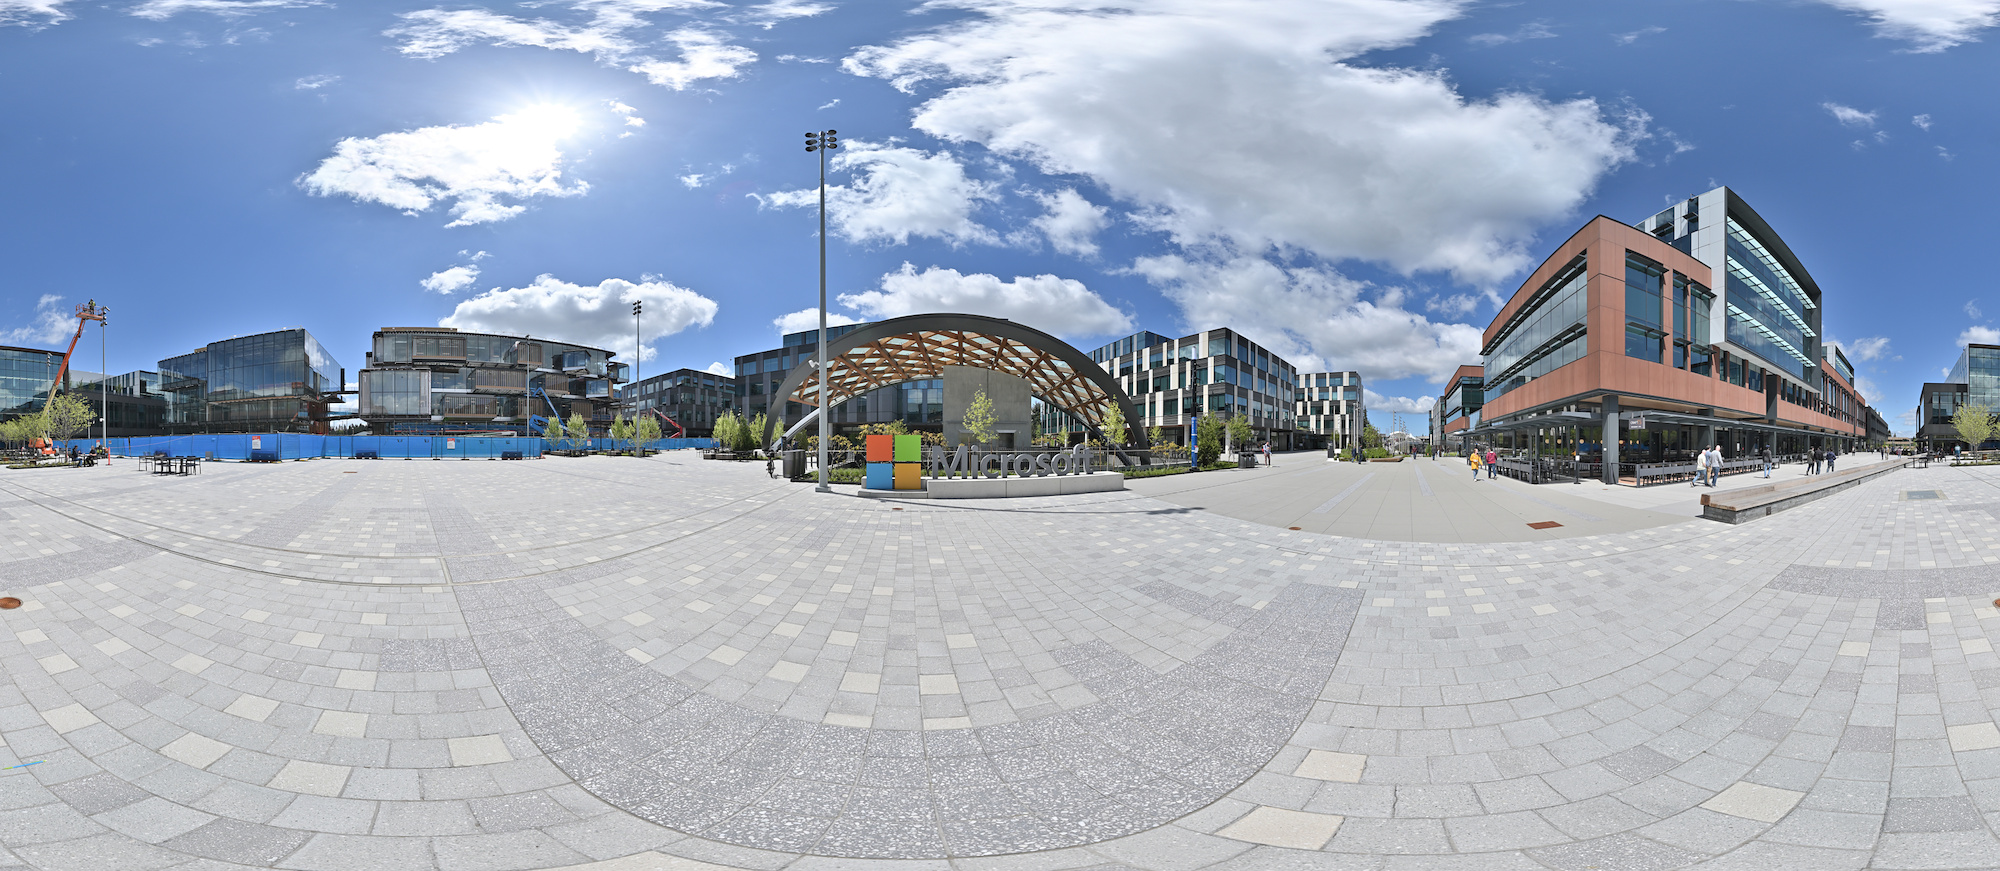
Interactive Panorama Microsoft East Campus Brücke
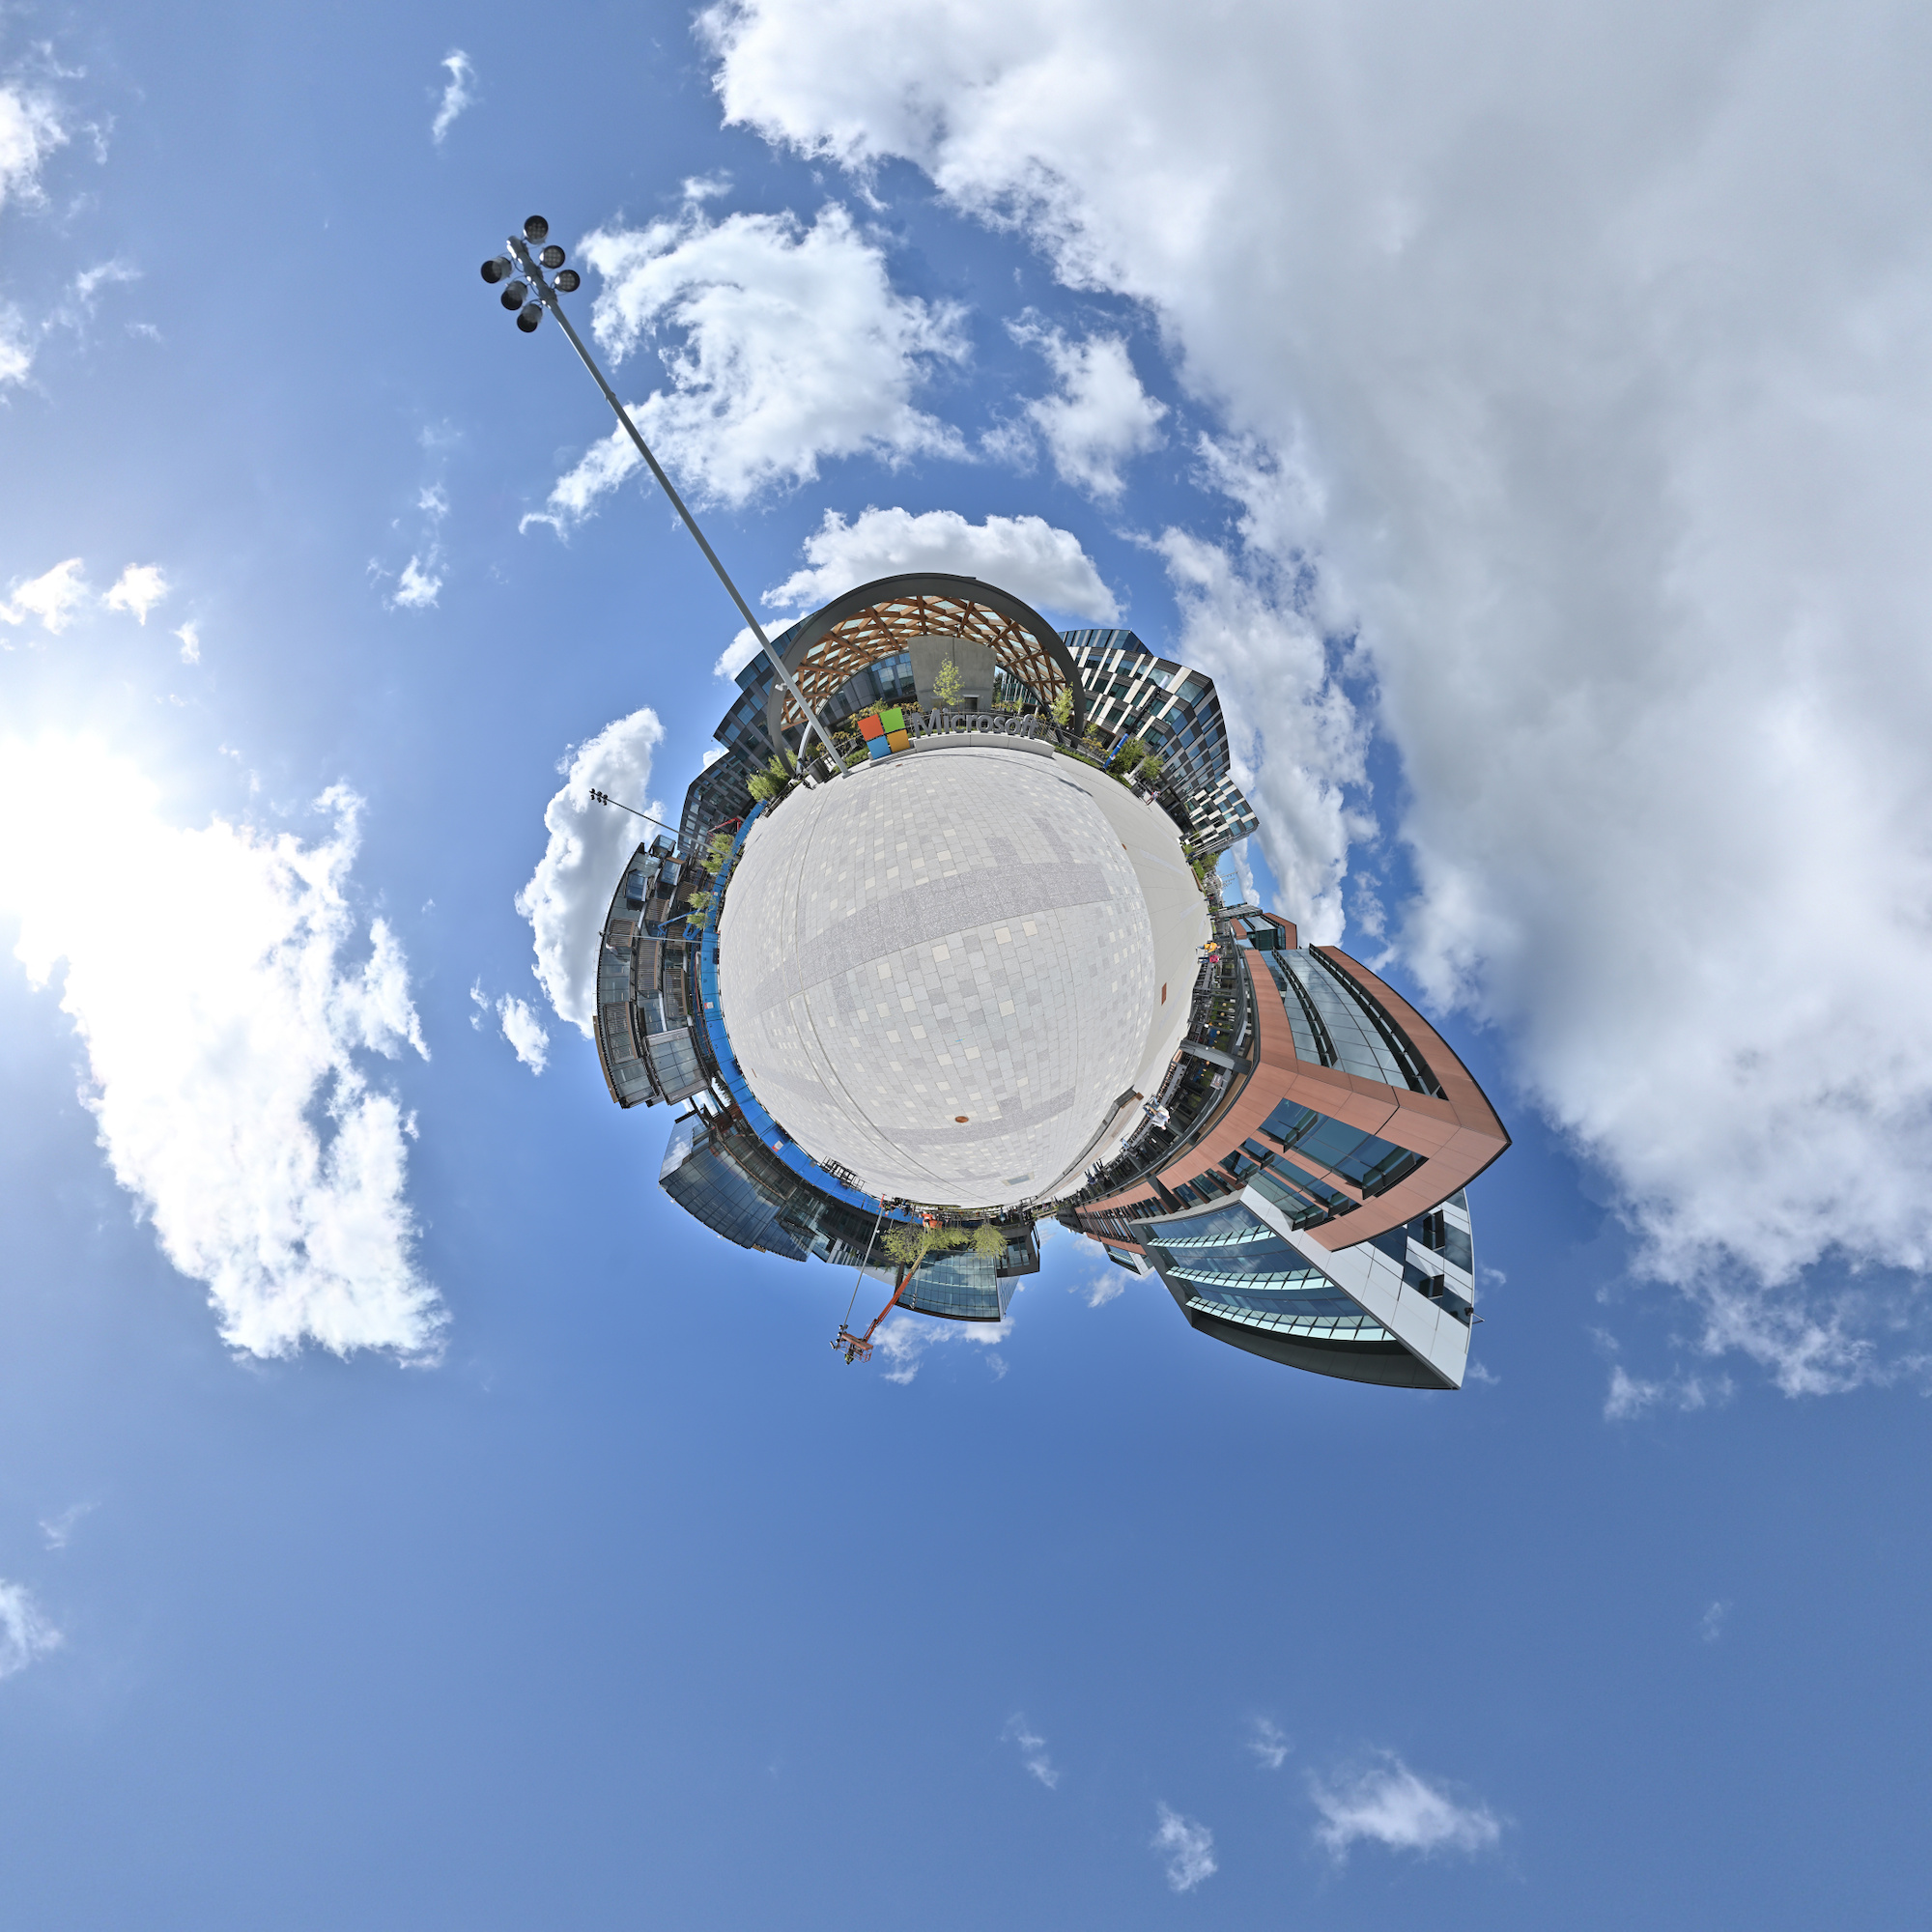
This panorama is the 2024 contribution for the '20 Years' event of WorldWidePanorama. This location was the main entrance of the old Campus.
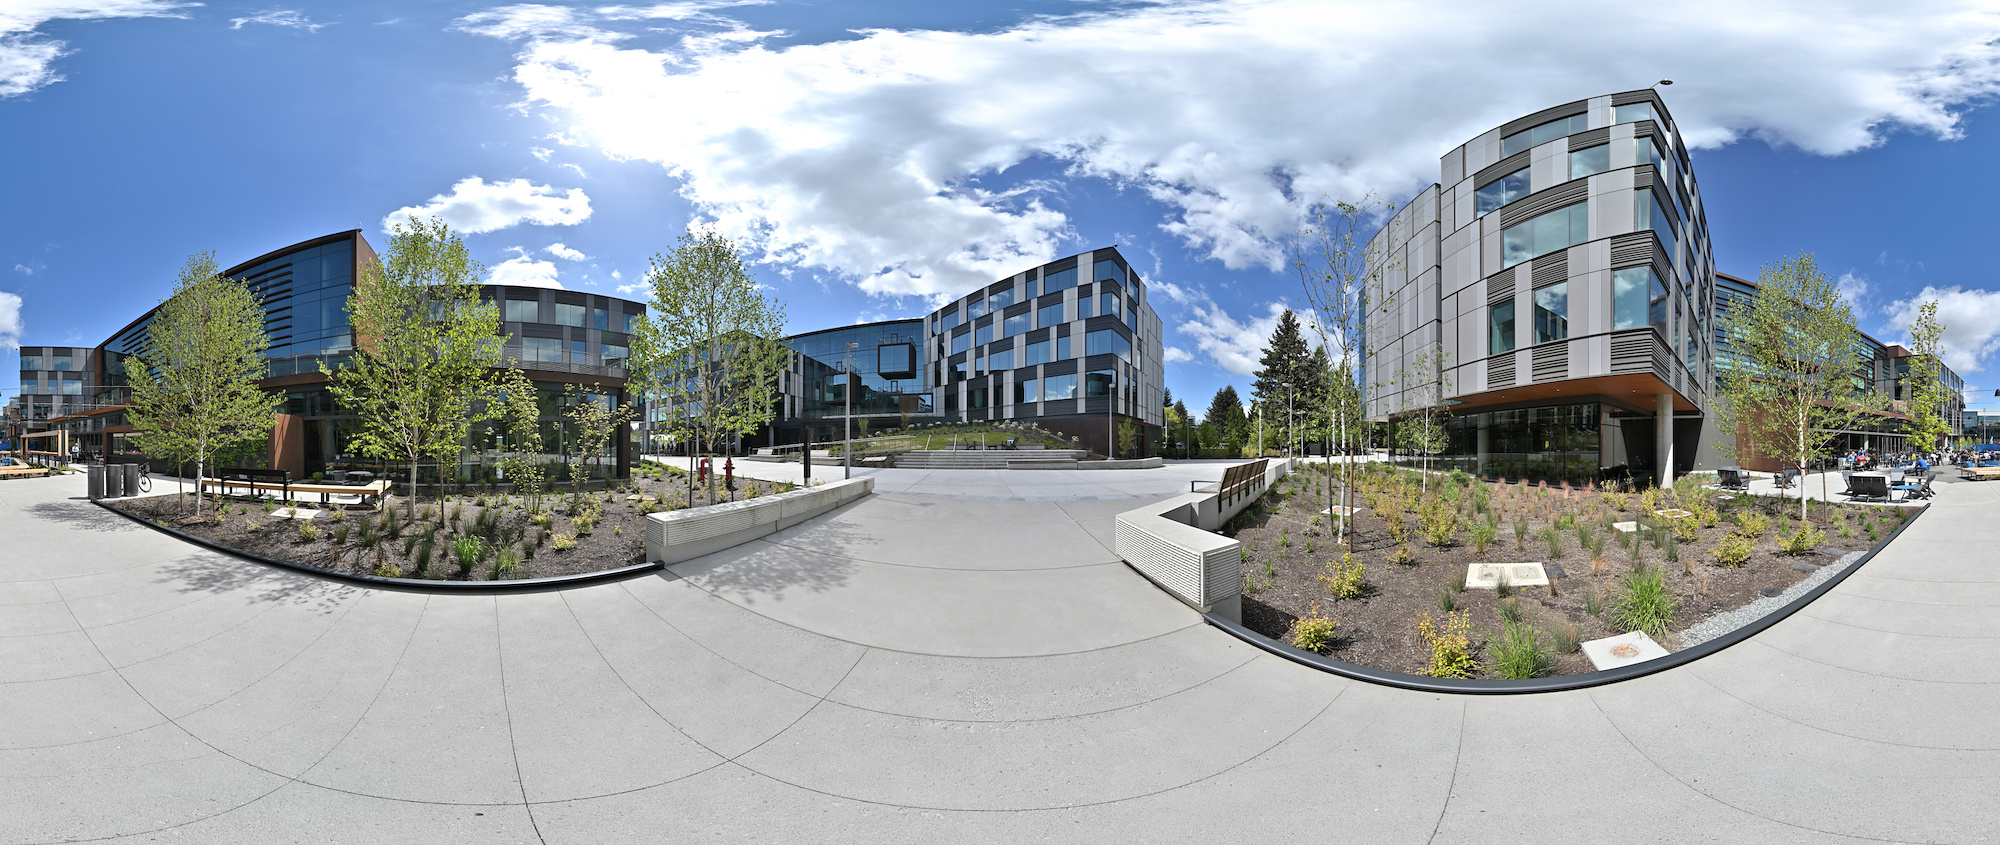
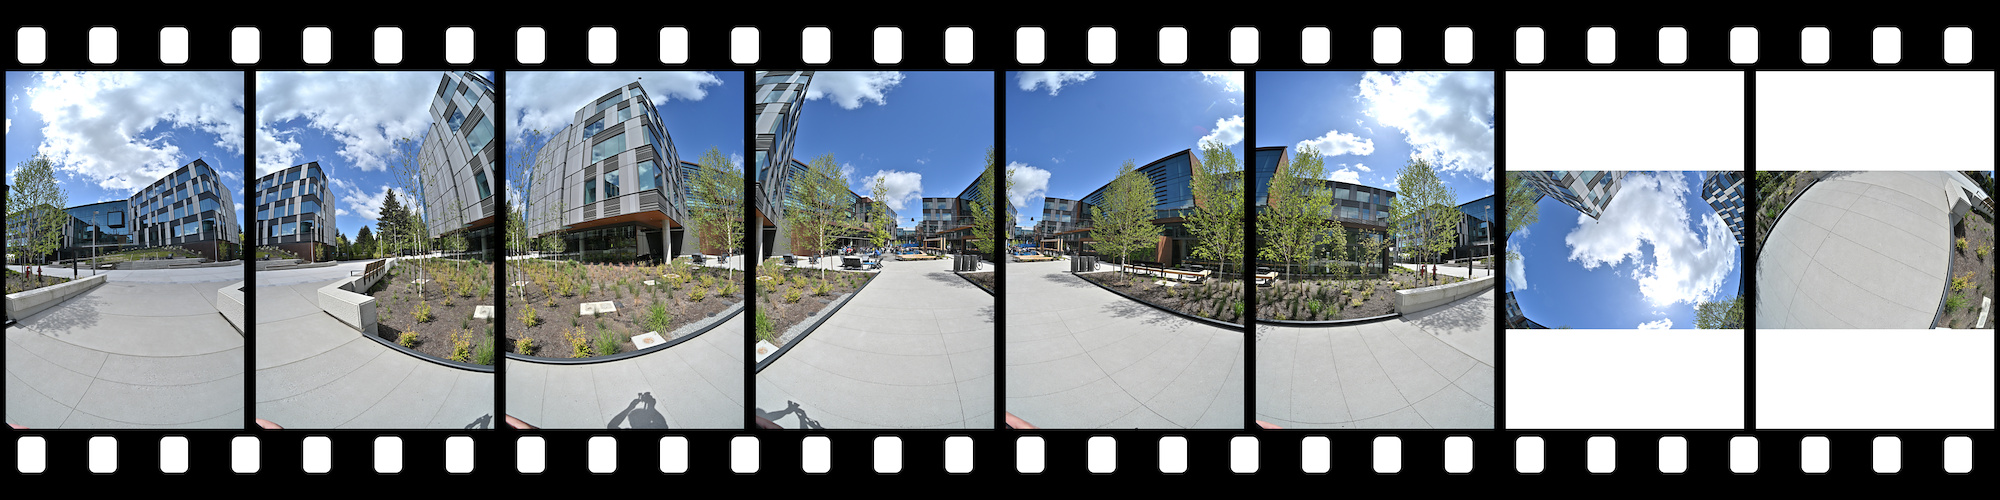
Interactive Panorama Microsoft East Campus Bldg 9,10,11

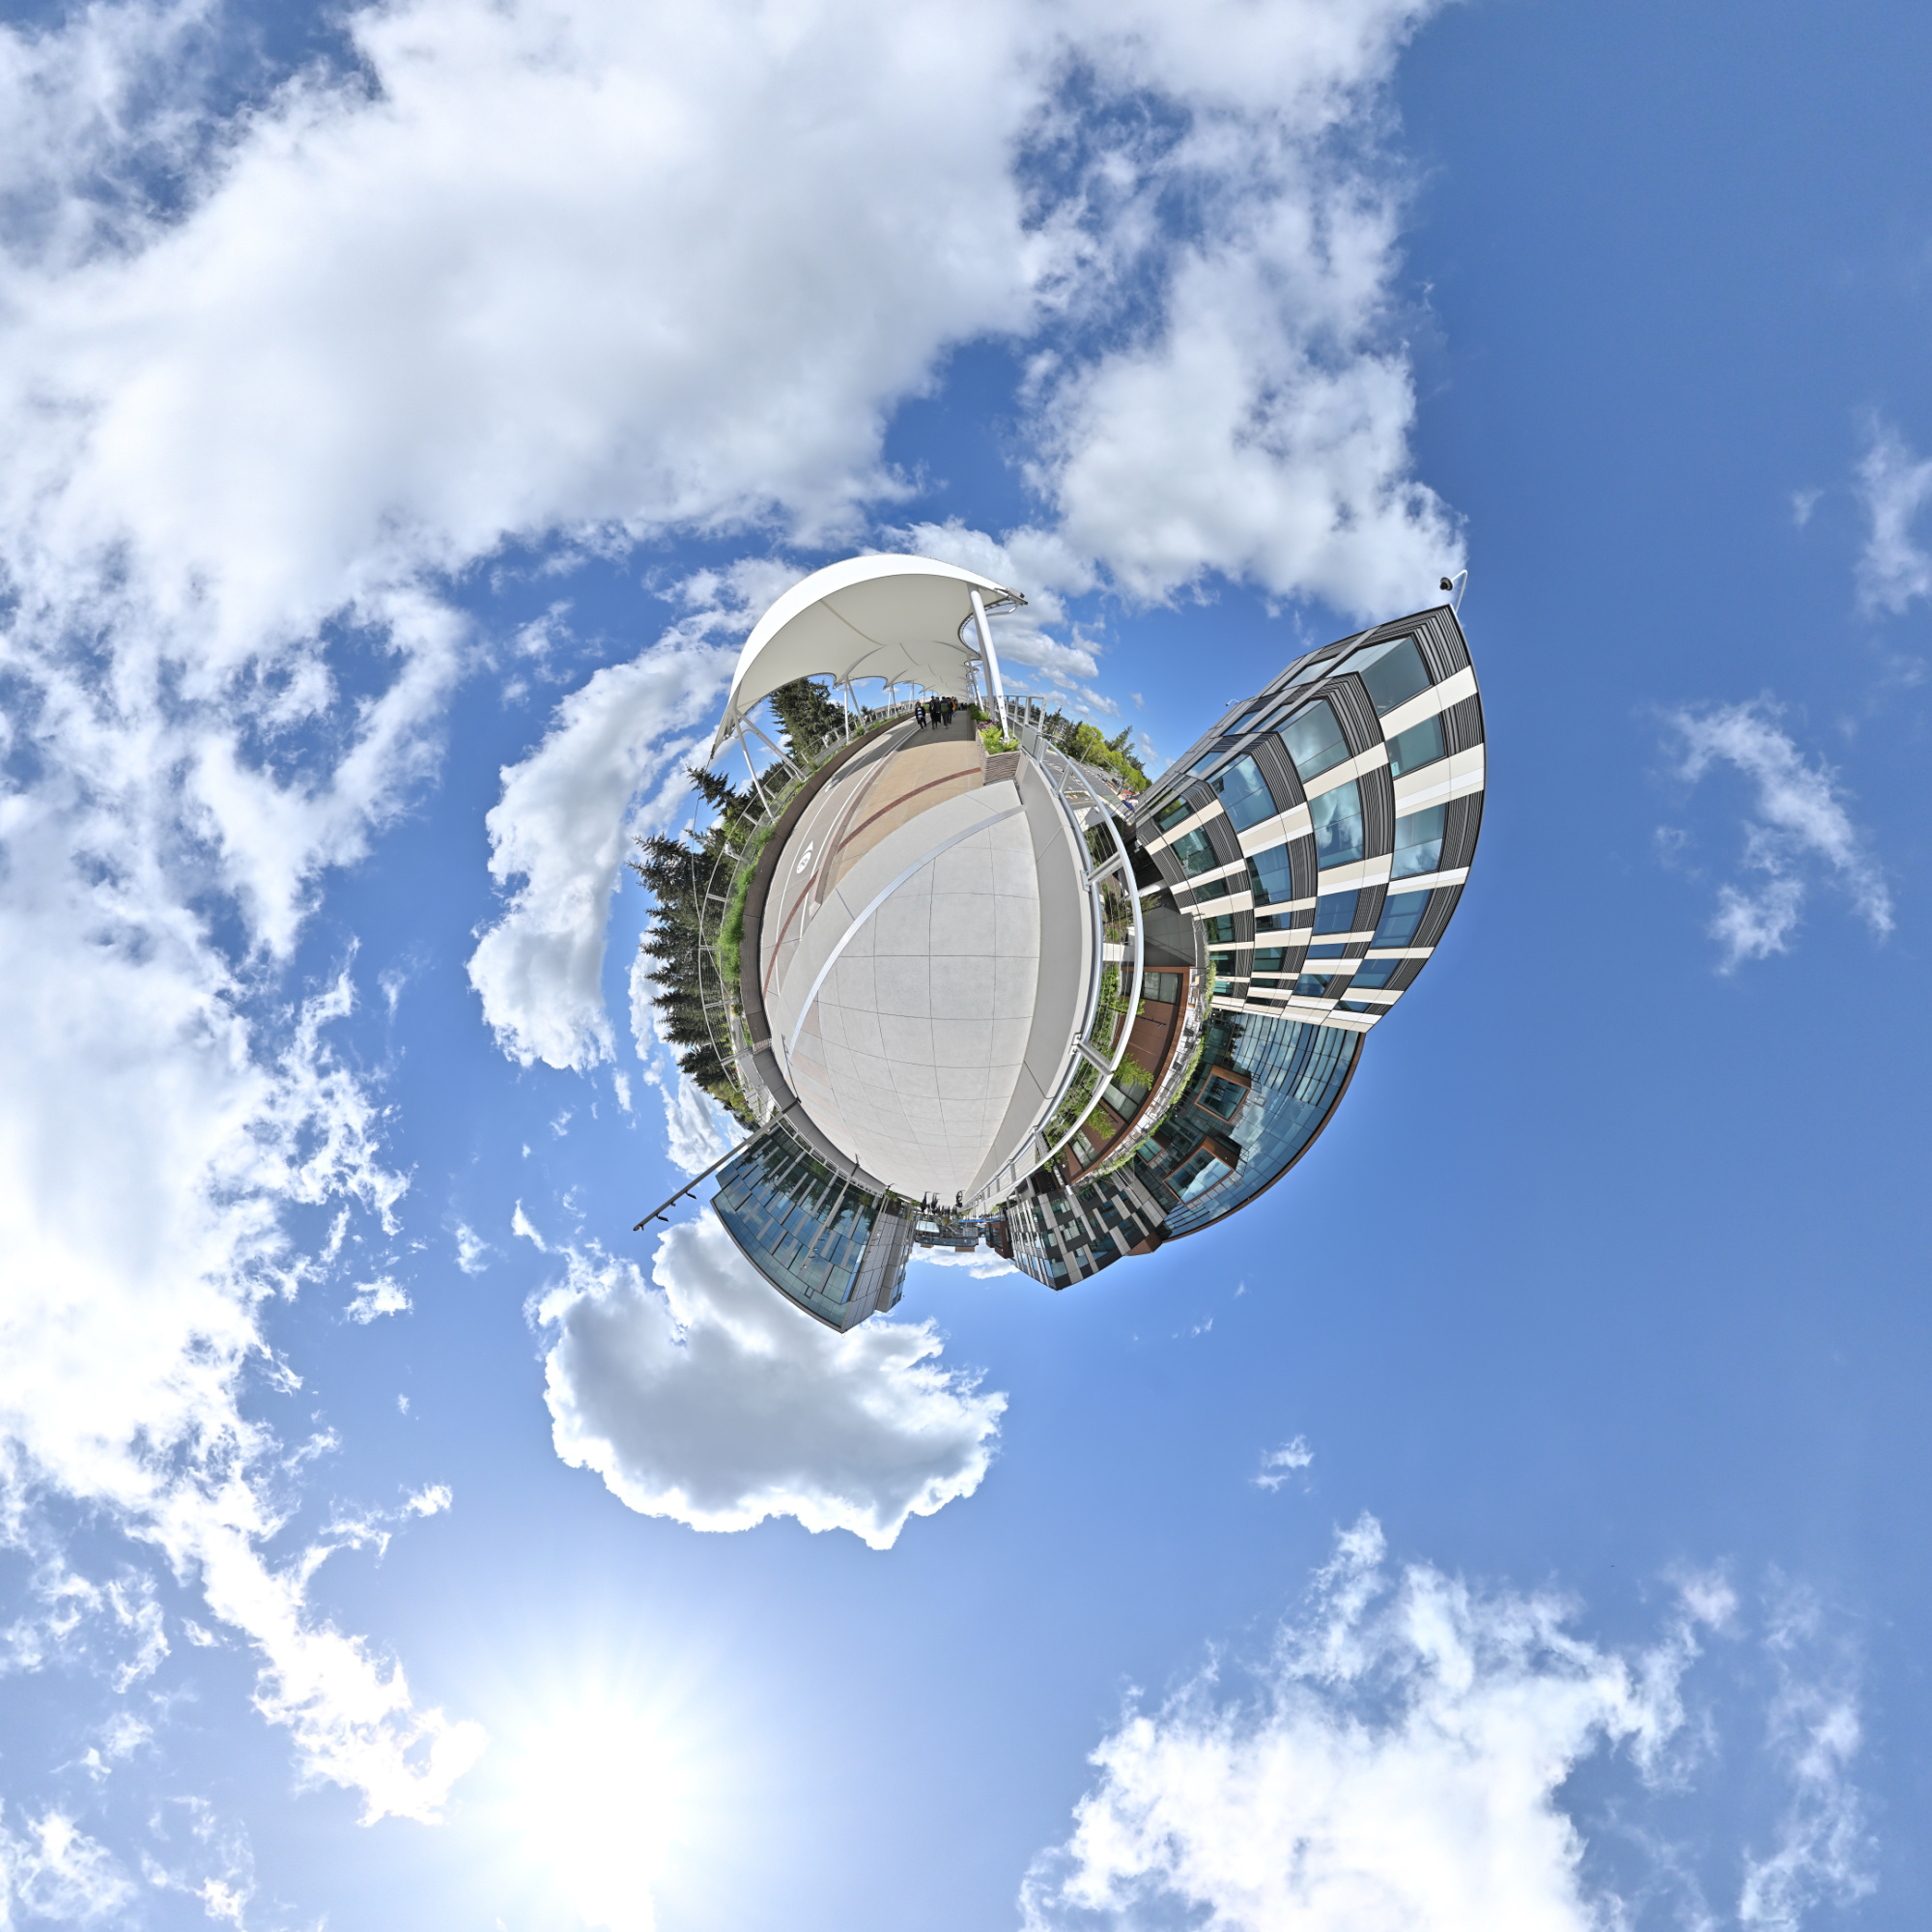
Interactive Panorama Microsoft East Campus Plaza


▒▒▒▒▒▒▒▒░░░░░░░░░░░░░░░░░░░░░░░░░░░░░░░░░░░l░▄▄@@▄▄▓▓▓▓▓▓@▄▄▄░░l▒░░░░░░░░░░░░░░░░░░░░░░░░░░░░░░░░░░░
░░░░░▒▒▒▒▒▒▒▒▒▒▒▒▒▒░░░░░░░░░░░░░░░░░░░░░▒▄▄╢▓▓▓▓▓▓▓▓▓▓▓▓╢▓╢▓▓▓▓▓▓▓▄░░░░░░░░░░░░░░░░░░░░░░░░░░░░░░░░░
░░░░░░░░░░░░░░░░░░░░░░░░░░░░░░░░░░░░▄▓▓▓▓▓▓▓▓╣╢▓▓▓▓╣╫╢╢╢╢╢╢╢╢╢╢╣╢▓▓╣▓@░░░░░░░░░░░░░░░░░░░░░░░░░░░░░░
░░░░░░░░░░░░░░░░░░░░░░░░░░░░░░░░░░░▐▓▓▓▓▓▓▓▓▓▓▓╫▓╢╢╢▓╣╢╢╢╣╢╢╢╢╢╢╢╫▓╢╢╣╢▓@░░░░░░░░░░░░░░░░░░░░░░░░░░░
░░░░░░░░░░░░░░░░░░░░░░░░░░░░░░░░░░░▓▓▓▓▓▓▓▓▓▓╣╣╢▓╢╢╢╢╢╣╢╣╢▓╢╢╢╫╢╫╢▓╢╢▓▓╢╫▌░░░░░░░░░░░░░░░░░░░░░░░░░░
░░░░░░░░░░░░░░░░░░░░░░▄▓▓▓▓▓▓▓▓▓▓╫▒╣╣▓▒▓▓▓▓▓▓▓╣╣╣╢╢╣╢╢╣▓▓▓╫╣╣▓▓╢▓╣▓▓▓▓╣╢╢▓░░░░░░░░░░░░░░░░░░░░░░░░░░
░░░░░░░░░░░░░░░░░░░░▓▓▓▓▓╢▓▓╢╢╢▓▓▓▓▓▓╣╣▓▓▓▓▓▓▓▓╣╢╢╢╫▓╣╣╣╣╢╣╢╢╢╣╢▓▓▓▓▓▓╢╣╢╢░░░░░░░░░░░░░░░░░░░░░░░░░░
░░░░░░░░░░░░░░░▒░░█▓▓▓█▓╢▓▓▓▓▓▓▓▓▓▓▒▒▓▓▓▓▓▓▓▓▓▓▓╣╣╢╢▓╢╣╢╣╣╢╢╢╢╣╣▓▓▓▓▓▓▓╣╢╣▒▒▒▒▒▒░░░░░░░░░░░░░░░░░░░░
░░░░░░░░░░░░░░░░░░▓▓▓▓▓▓▓╣╢▓▓▓▓▓▓▒╣╣▒╢╢╢▓▓▓▓▓▓▓▓▓▓▓╫▓▓╣╢╣╢╢╣╢╢╢╢▓▓╫▓▓▓▓▓▓▓@░░░░▒▒▒▒▒▒▒░░░▒░░░░░░░░░░
░░░░░░░░░░░░%mÄW@▓▓▓▓▓███▓██╫▓▓▓▓▓╬╜╨╨▓████████████████▓▓▓▓▓╢▓▓╣▓▓▓█▓▓▓▓▓▓▌░░░░░░░░░░░░░░░░░░░░░░░░░
░░░░░░░░░░░░░░░░░░░░⌠▀▀▀▀▀▀▀▀▀▀╙░░░░░▐▓█████████▓▓▓▓▒▓▓▓█▓▓▓▓▓▓▓▓▓▓▓▓▓██░▀░░░░░░░░░░░░░░░░░░░░░░░░░░
░░░░░░░░░░░░░░░░░░░░░░░░░░░░░░░░░░░░░▓▓▓▓███▓▓▓▓▓▓▓▓▓▓▓▓▓█▓▓▓▓▓▓▓╣▓▓▓▓▓▓░░░░░░░░░░░░░░░░░░░░░░░░░░░░
░░░░░░░░░░░░░░░░░░░░░░░░░░░░░░░░░░░░▓▓╢▓▓▓▀▀▀▀▓▓▓▓▓▓▓▓▓▓▓██▓██▓▓▓▓▓▓▓╢▓▓░░░░░░░░░░░░░░░░░░░░░░░░░░░░
░░░░░░░░░░░░░░░░░░░░░░░░░░░░░░░░░░░░▓╣╢╢▓╡░░░░▐▓▓▓▓▓⌠░░░░█▓███░░░░⌠▓▓▓▓▓░░░░░░░░░░░░░░░░░░░░░░░░░░░░
░░░░░░░░░░░░░░░░░░░░░░░░░░░░░░░░░░░▓▓▓▓╢▌░░░░░▐▓▓▓▓▓░░░░░▓▓▓▓▌░░░░░▓▓▓▓▓░░░░░░░░░░░░░░░░░░░░░░░░░░░░
░░░░░░░░░░░░░░░░░░░░░░░░░░░░░░░░░░▐▓▓▓▓▌░░░░░░▓▓▓▓▓░░░░░░▓▓▓▓W░░░░░j▓▓▓▓░░░░░░░░░░░░░░░░░░░░░░░░░░░░
░░░░░░░░░░░░░░░░░░░░░░░░░░░░░░░░░░▓╣╢▓▓░░░░░░░▓▓▓▓▓░░░░░░▓▓▓▓░░░░░░░▓▓▓▓░░░░░░░░░░░░░░░░░░░░░░░░░░░░
░░░░░░░░░░░░░░░░░░░░░░░░░░░░░░░░▒▓▓▓▓▓░░░░░░░░▓▓▓▓▌░░░░░▐▓╣▓▌░░░░░░░▐▓▓▓@░░░░░░░░░░░░░░░░░░░░░░░░░░░
░░░░░░░░░░░▒▒░░░░▒▒▒▒▒▒▒▒▒▒▒▒▒▒▒▓▓▓▓▓▌▒░░░░░░j▓▓▓▓░░░░░░▓▓▓▓▒░░░░░░░▒▓▓▓▌░░░░░░░░░░░░░░░░░░░░░░░░░░░
░░░░░░░░▒▒░▒▒▒▒▒▒▒▒▒▒▒▒▒▒▒▒▒▒▒▒▒░▓▓▓▓▓▒▒▒▒▒▒▒▓▓▓╫▓░▒░░░░▓▓▓▓░░░░░░░░j▓▓╢▓░░░░░░░░░░░░░░░░░░░░░░░░░░░
░░▒▒▒▒▒▒▒▒▒▒▒▒▒▒▒▒▒▒▒▒▒▒▒▒▒▒▒▒▒▒▒░▓▓▓▓▓▒▒▒▒▒▒▓▓▓╢▓▒▒▒▒▒░▓▓▓▓░░░░░░░░░▓▓▓╢░░░░░░░░░░░░░░░░░░░░░░░░░░░
▒▒▒▒▒▒▒▒▒▒▒▒▒▒▒▒▒▒▒▒▒▒▒▒▒▒▒▒▒▒▒▒▒▒▒▓▓▓▓▓▓▒▒▒▒▓▓▓▓▒▒▒▒▒▒▐▓▓▓▒▒░░░░░░░░▐▓╢▓▒░░░░░░░░░░░░░░░░░░░░░░░░░░
▒▒▒▒▒▒▒▒▒▒▒▒▒▒▒▒▒▒▒▒▒▒▒▒▒▒▒▒▒▒▒▒▒▒▒█▓▓▓▓▓▓▒▒▒▓╢╢╣▒▒▒▒▒▒▓▓▓▓▒▒▒▒▒▒░░░░░▓╢▓▓░░░░░░░░░░░░░░░░░░░░░░░░░░
▒▒▒▒▒▒▒▒▒▒▒▒▒▒▒▒▒▒▒▒▒▒▒▒▒▒▒▒▒▒▒▒▒▒▒▀█▓▓▓▓█▓▓▓▓▓▓╣▒▒▒▒▒▓▓▓▓▓▓▒▒▒▒▒░░░▐▓▓▓▓▓▓░░░░░░░░░░░░░░░░░░░░░░░░░
▒▒▒▒▒▒▒▒▒▒▒▒▒▒▒▒▒▒▒▒▒▒▒▒▒▒▒▒▒▒▒▒▒▒▒▒▓▓▓▓▓▓█▓▓▓╢▓▓▌▒▒▒▒▓▓▓▓▓▓▒▒▒▒▒▒░░▐▓█▓▓▓▓░░░░░░░░░░░░░░░░░░░░░░░░░
▒▒▒▒▒▒▒▒▒▒▒▒▒▒▒▒▒▒▒▒▒▒▒▒▒▒▒▒▒▒▒▒▒▒▒▒▓▓▓▓▓▓▓██╢▓▓▓▒▒▒▒▓▓▓▓▓█▓▌▒▒▒▒▒▒░▓▓▓▓▓▓█▓░░░░░░░░░░░░░░░░░░░░░░░░
▒▒▒▒▒▒▒▒▒▒▒▒▒▒▒▒▒▒▒▒▒▒▒▒▒▒▒▒▒▒▒▒▒▒▒▐▓▓▓▓▓▓▓▓█▓▓█▓▒▒▒▒▓▓▓╣╫▓▓▓▒▒▒▒▒▒▒█▓▓▓▓▓▓▓▒░░░░░░░░░░░░░░░░░░░░░░░
▒▒▒▒▒▒▒▒▒▒▒▒▒▒▒▒▒▒▒▒▒▒▒▒▒▒▒▒▒▒▒▒▒▒▒▒▓█▓▓▓▓▓▓▓▓▓▓▓▒▒▓▓▓▓╢╢╢╢▓▓▌░▒▒▒▒▓▓▓▓╢╢╢╢▓▓▌░░░░░░░░░░░░░░░░░░░░░░
░░░░░░░░░░░░░░░░░░░░░░░░░░▒▒▒▒▒▒▒▒╣▒▓▓▒▒▓▓▓▓▓▓▓▓▓▓▓▓█▓▓▓▓▓▓▓▓▓▒▒▒▒▒▓▓▓▓▓▓▓▓▓▓▌░░░░░░░░░░░░░░░░░░░░░░
░░░░░░░░░░░░░░░░░░░░░░░░░░░░░░░░░░▒╜╢▒▒▓▓▓▓▓╣╣╣╢▓▓▓░▒░░░░░░░░░░░░░░░░░░░░░░░░░░░░░░░░░░░░░░░░░░░░░░░
░░░░░░░░░░░░░░░░░░░░░░░░░░░░░░░░░░░░░░░▀▀▀▀▀▀▀▀▀▀▀▀▀░░░░░░░░░░░░░░░░░░░░░░░░░░░░░░░░░░░░░░░░░░░░░░░░
░░░░░░░░░░░░░░░░░░░░░░░░░░░░░░░░░░░░░░░░░░░░░░░░░░░░░░░░░░░░░░░░░░░░░░░░░░░░░░░░░░░░░░░░░░░░░░░░░░░░
https://asciiart.club
NIKON Z30, 18-140mm f/3,5-6,3 VR
Gesamtbild: 1/500s f/8,0 ISO 100/21° f=18mm/27mm
Einzelbilder, 480x320 crop: 1/800s f/7,1 ISO 100/21° f=140mm/210mm
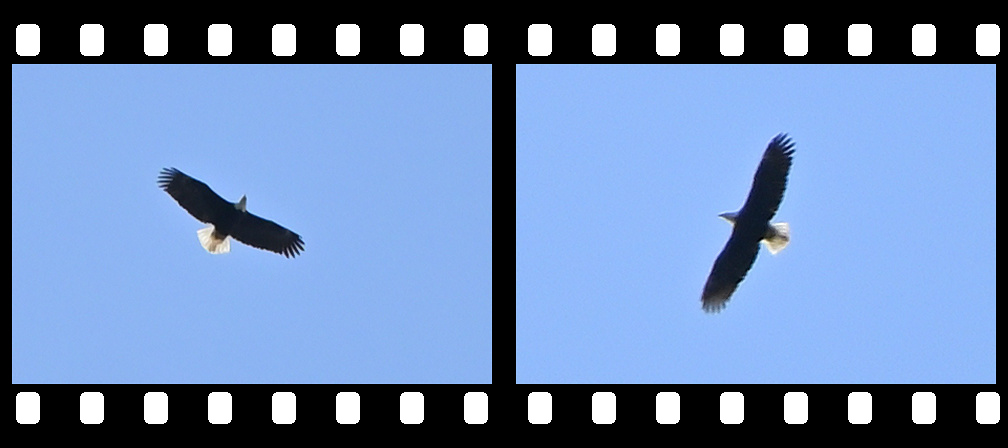
140mm Brennweite entspricht einem Vergrößerungsfaktor von 4,9. Die Ausschnittsvergrößerung von 5568x3712 auf 480x320 entspricht einem Faktor von 11,6.
Die Gesamtvergrößerung ist 4,9 * 11,6 = 56,84 , was einer Vollformatbrennweite von 2460mm oder 1640mm APS-C-Brennweite entspricht.
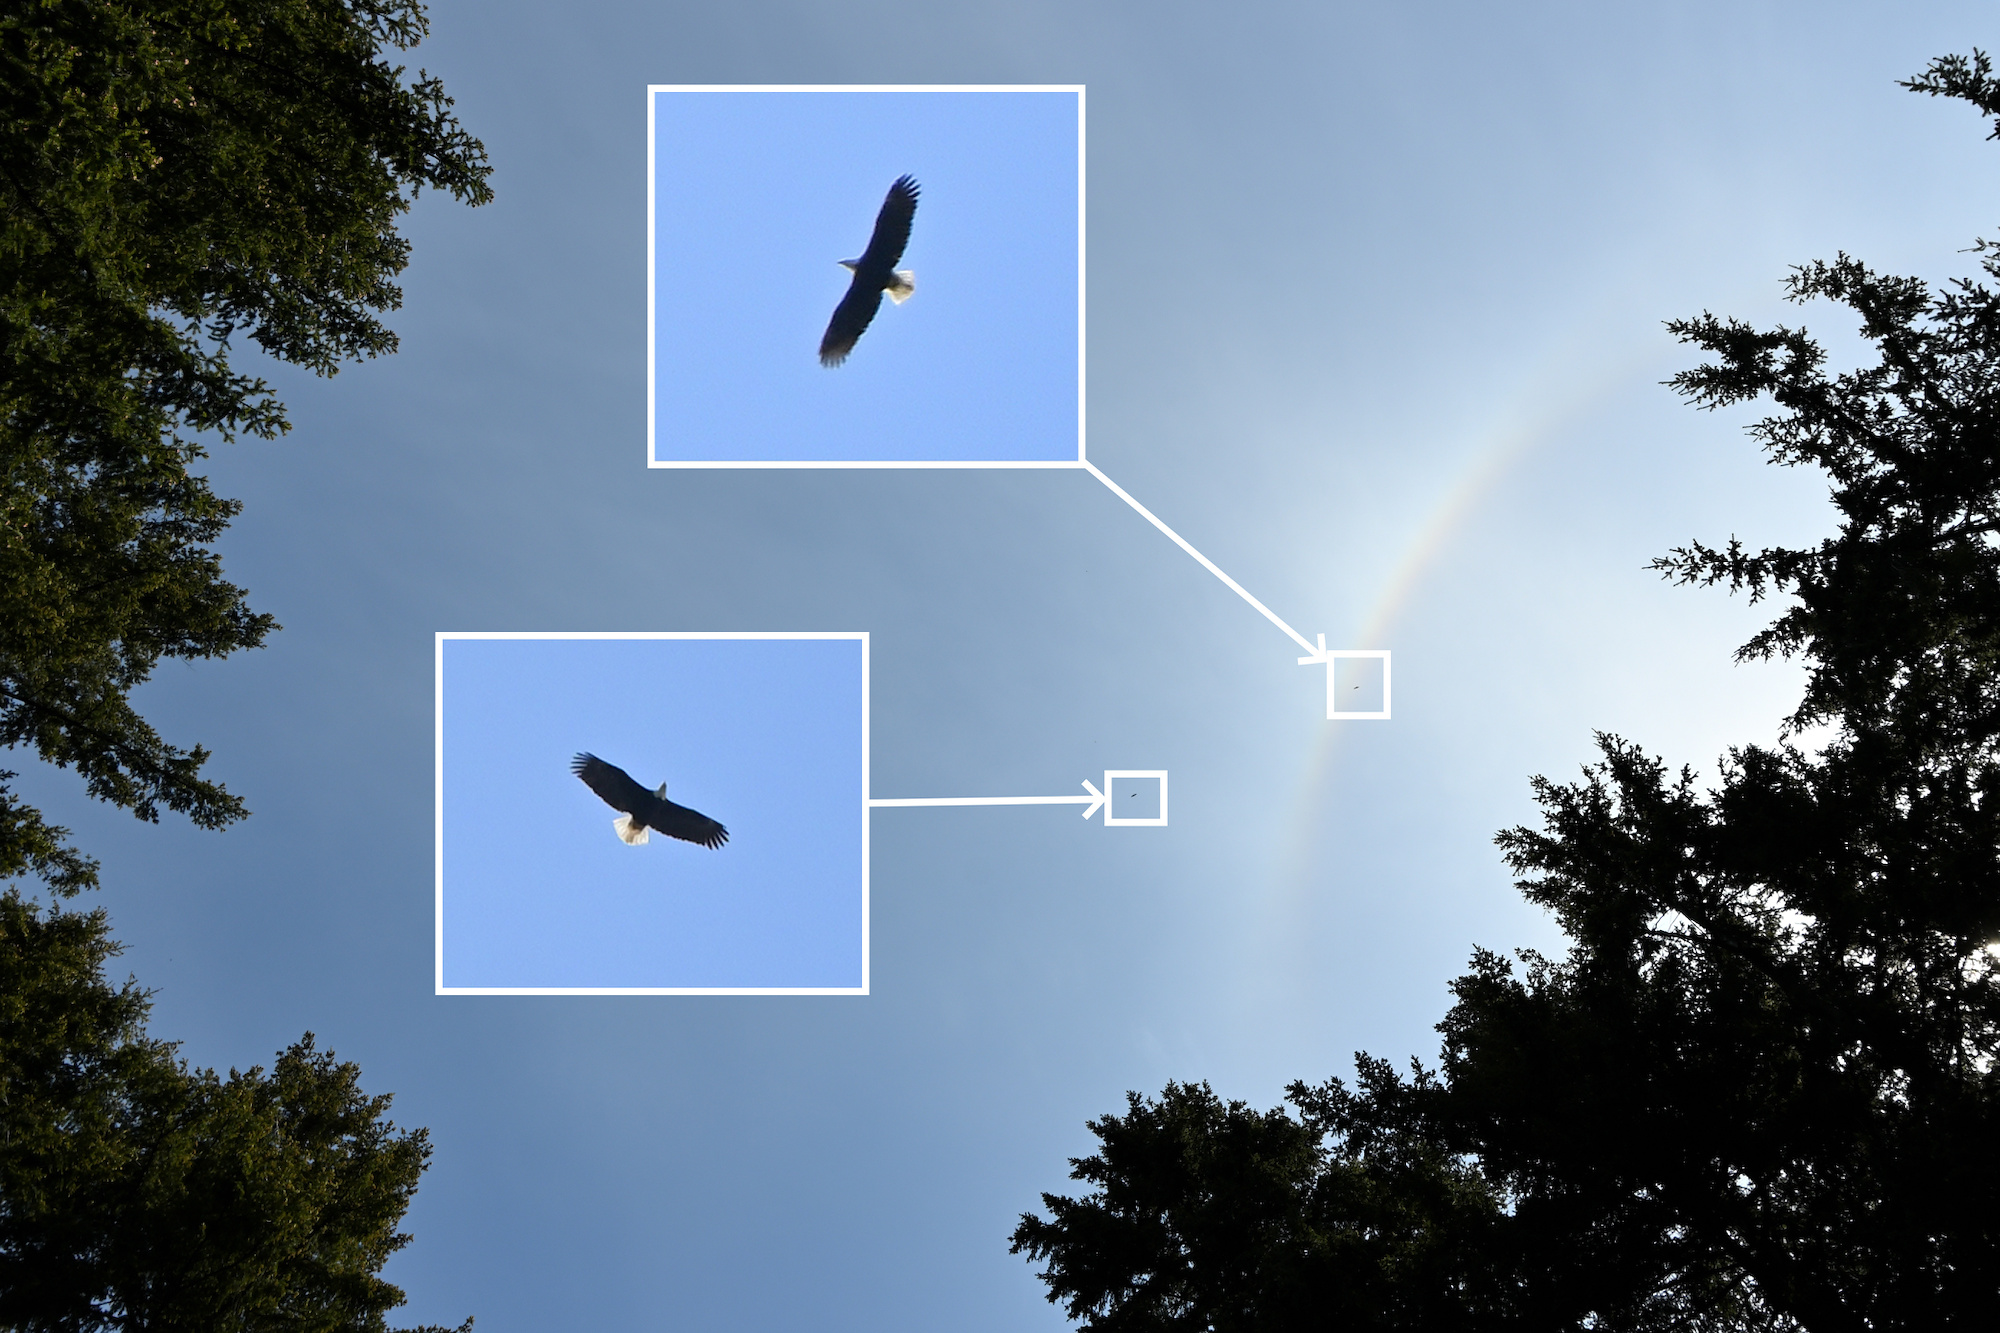
Die Adler im 18mm-Gesamtbild sind 5 pixel groß.
Ohne Zoom in der gleichen Größe wärs dann was für MineCraft:
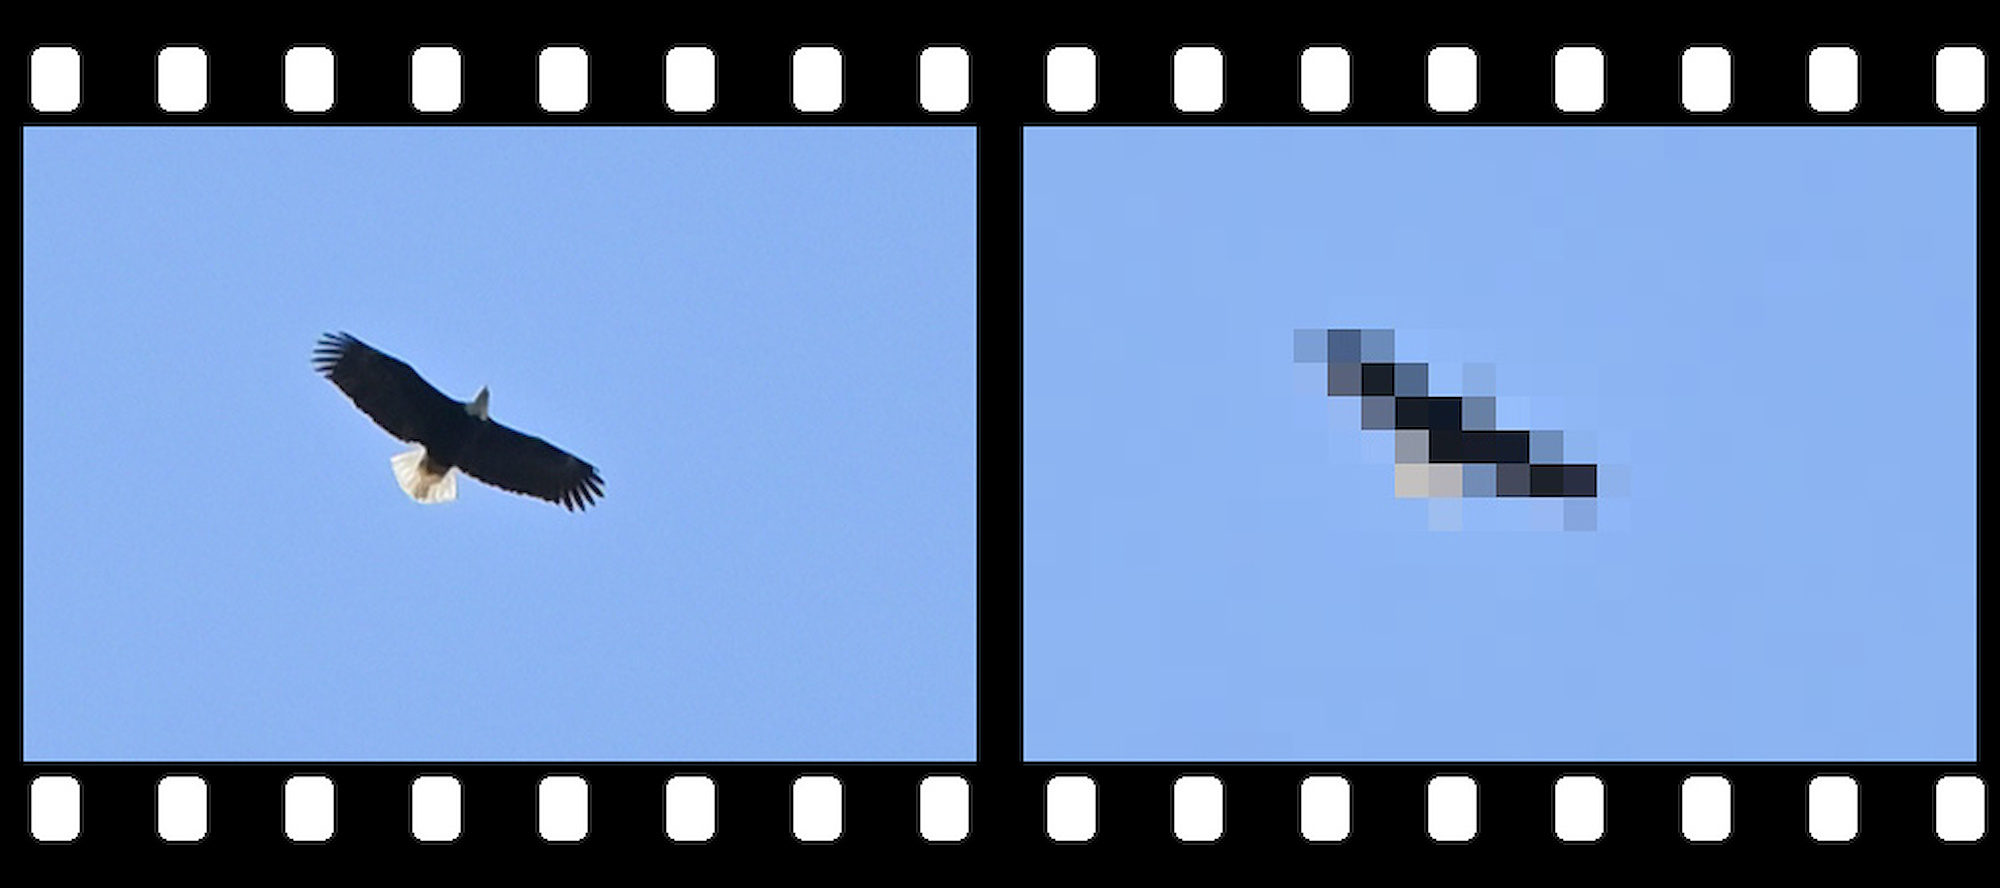
1/500s f/6,3 ISO 360 f=140mm/210mm
1/250s f/6.3 ISO 100/21° 50-250mm f/4.5-6.3 VR f=250mm/375mm
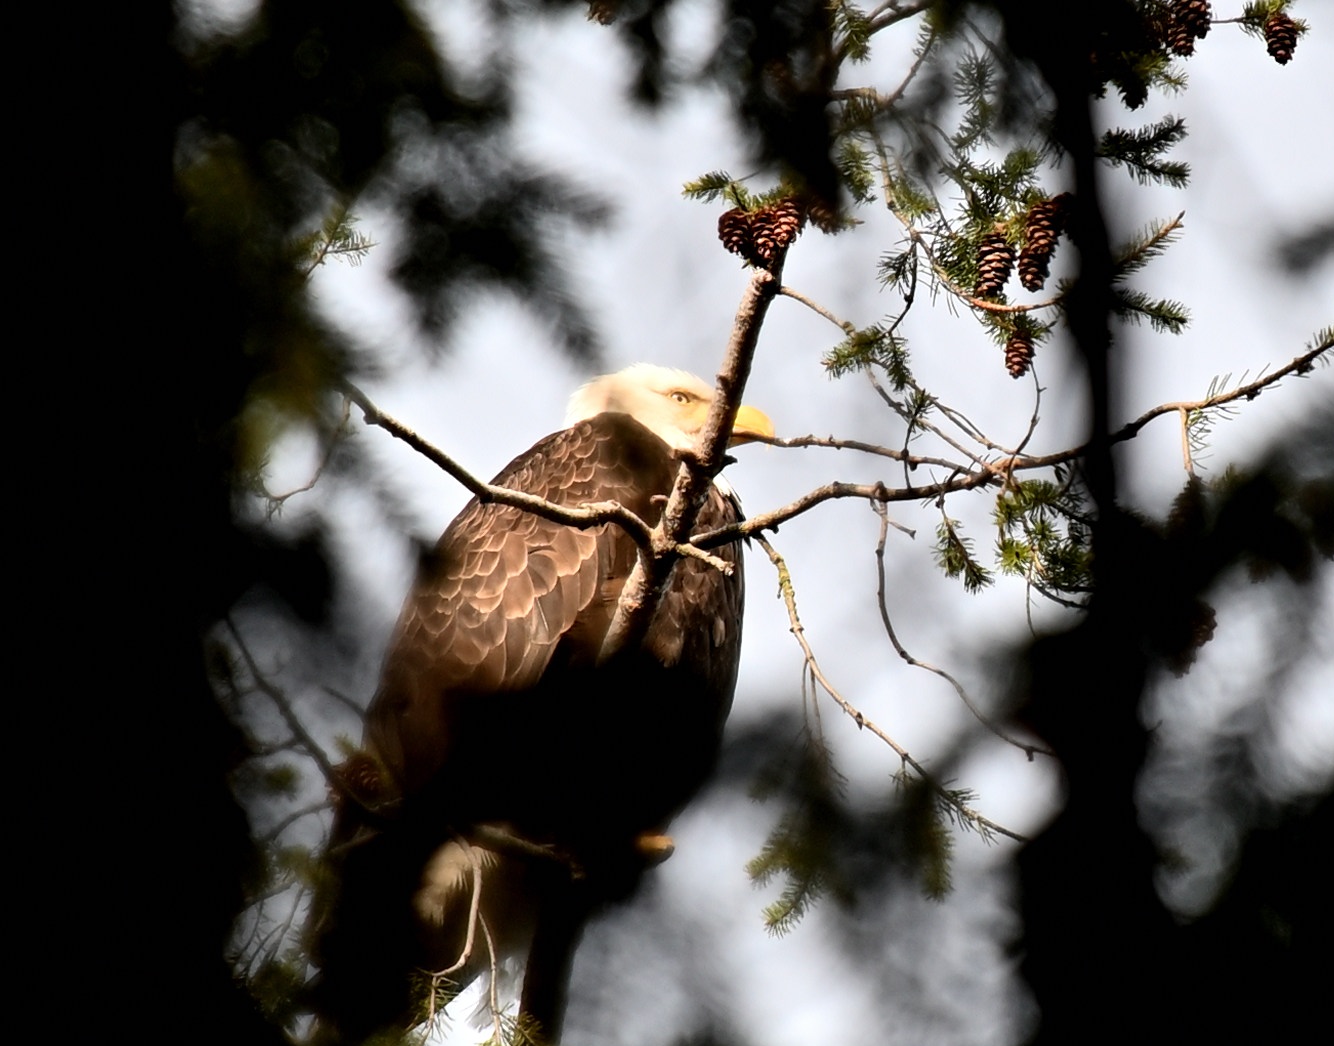
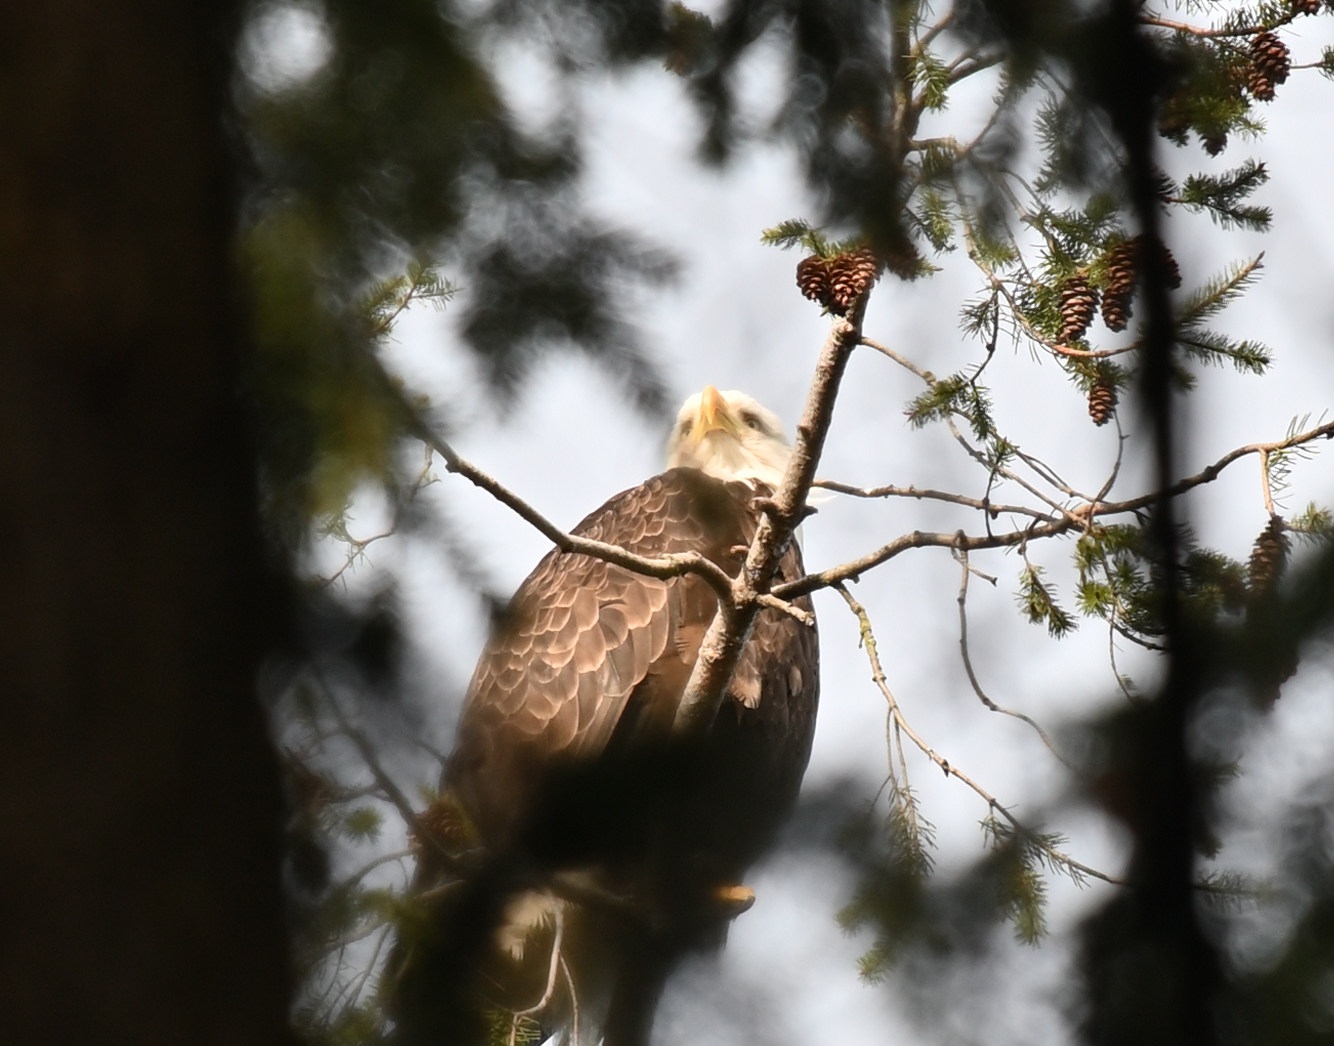
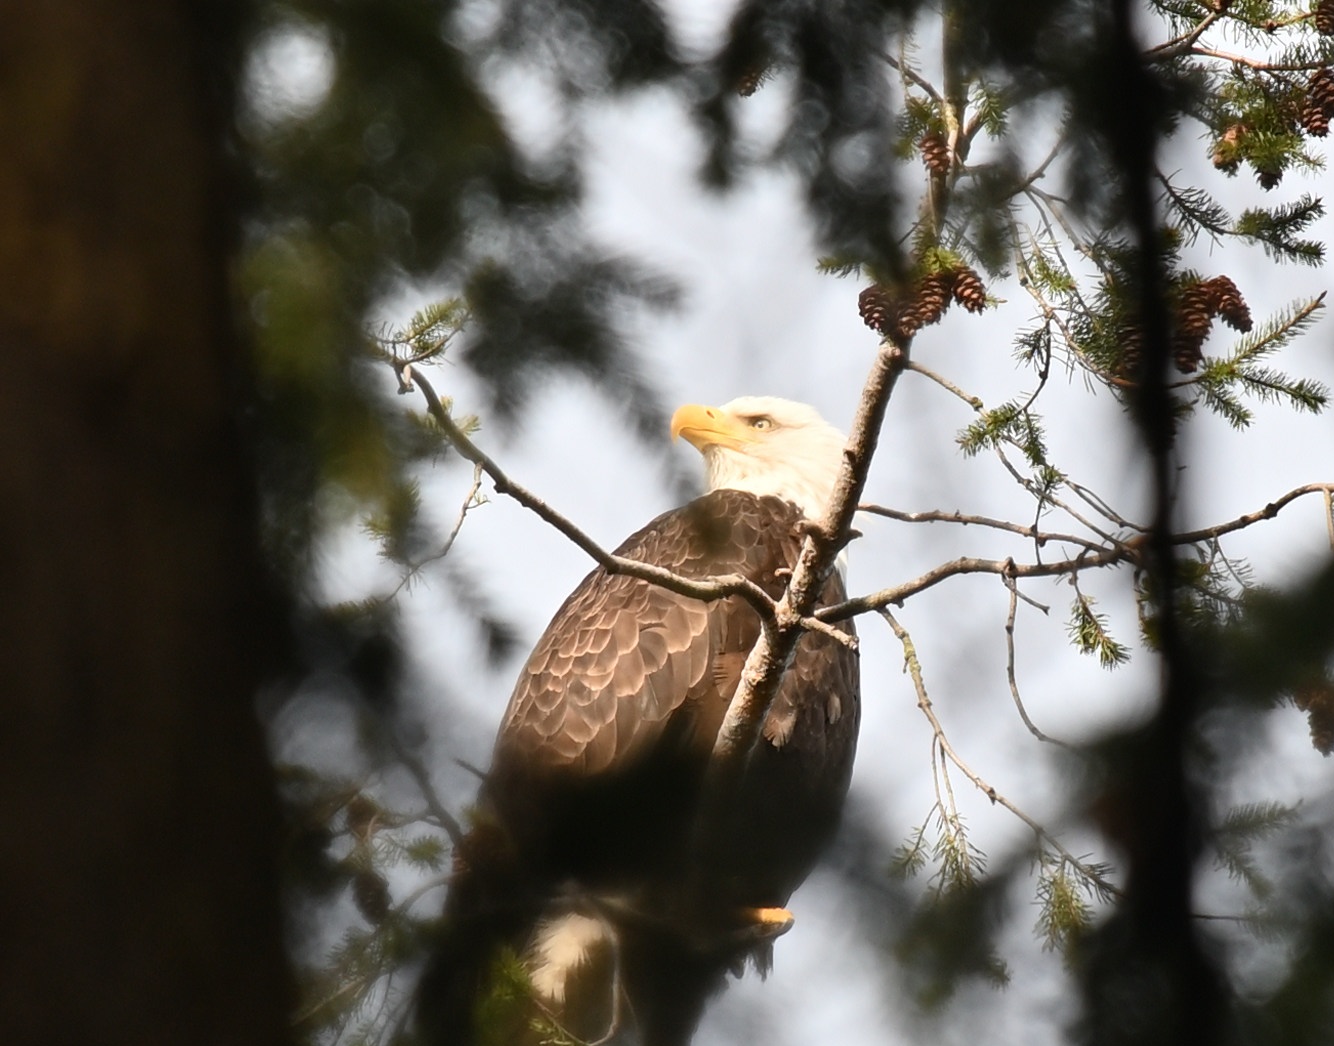
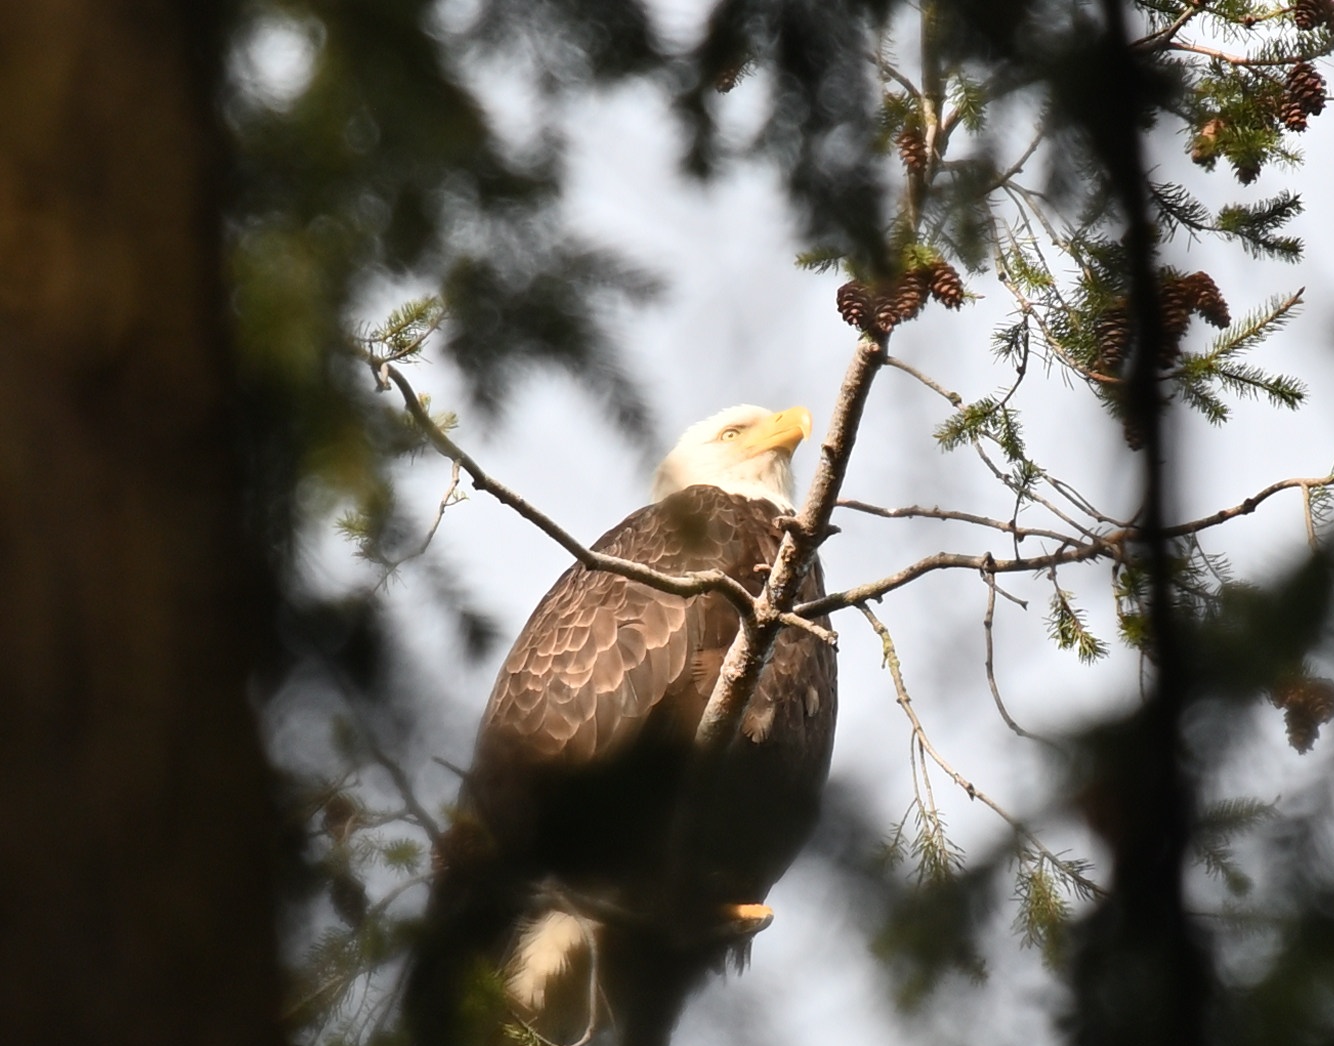
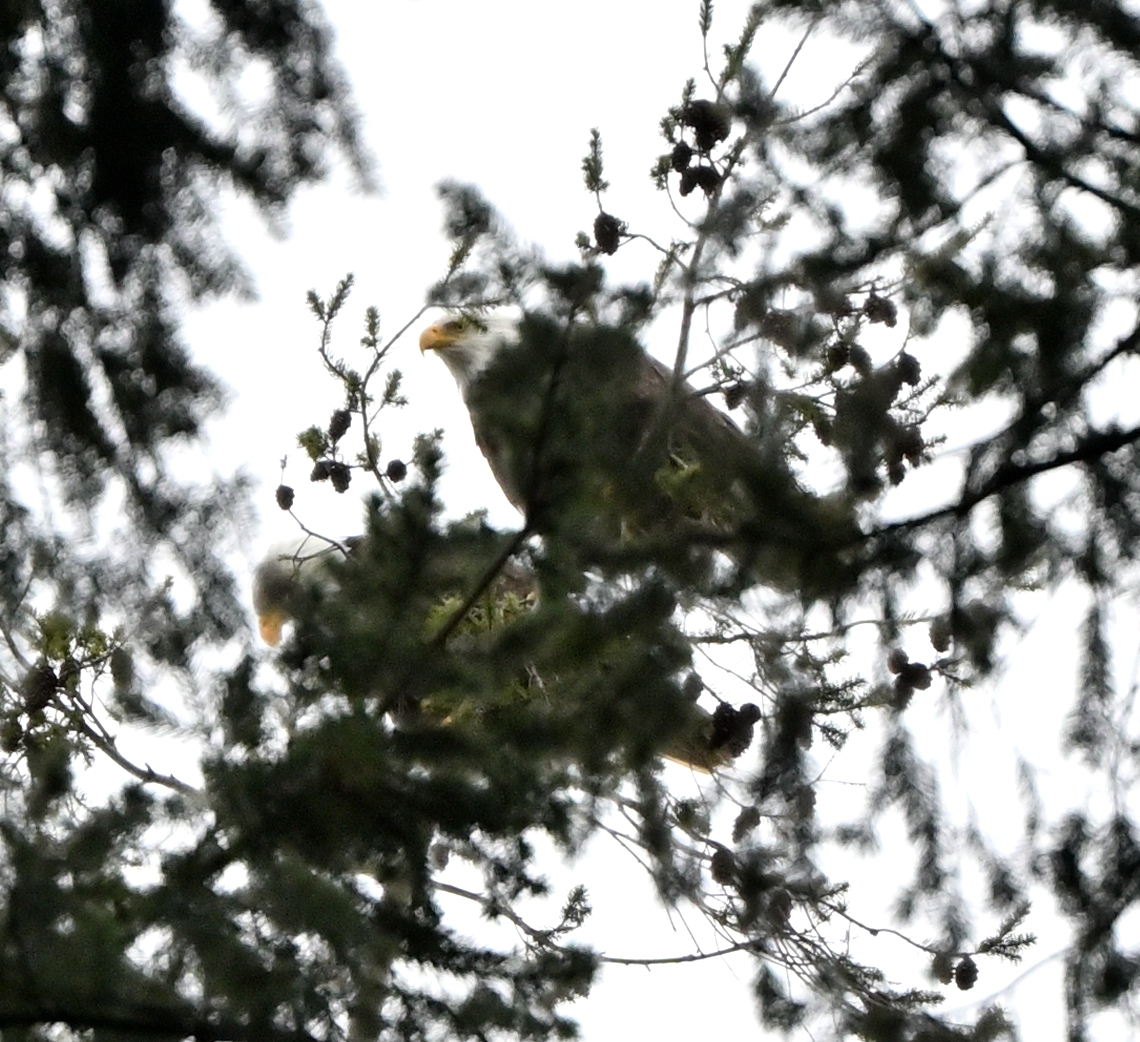
Die beiden Weißkopfseeadler wohnen seit ein paar Jahren bei uns im Garten ganz oben im Baum.
Fast!
_________________ ____ __________
. . / | / \ . | \
. / ______ _____| . / \ | ___ | . .
\ \ | | / /\ \ | |___> |
. \ \ | | / /__\ \ . | _/ .
. ________> | | | . / \ | |\ \_______ .
| / | | / ______ \ | | \ |
|___________/ |___| /____/ \____\ |___| \__________| .
. _____ __ . _____ ____ . __________ . _________
\ \ / \ / / / \ | \ / | .
\ \/ \/ / / \ | ___ | / ______| .
\ / / /\ \ . | |___> | \ \
. \ / / /__\ \ | _/. \ \ +
\ /\ / / \ | |\ \______> | .
\ / \ / / ______ \ | | \ / .
. . \/ \/ /____/ \____\ |___| \____________/
. .
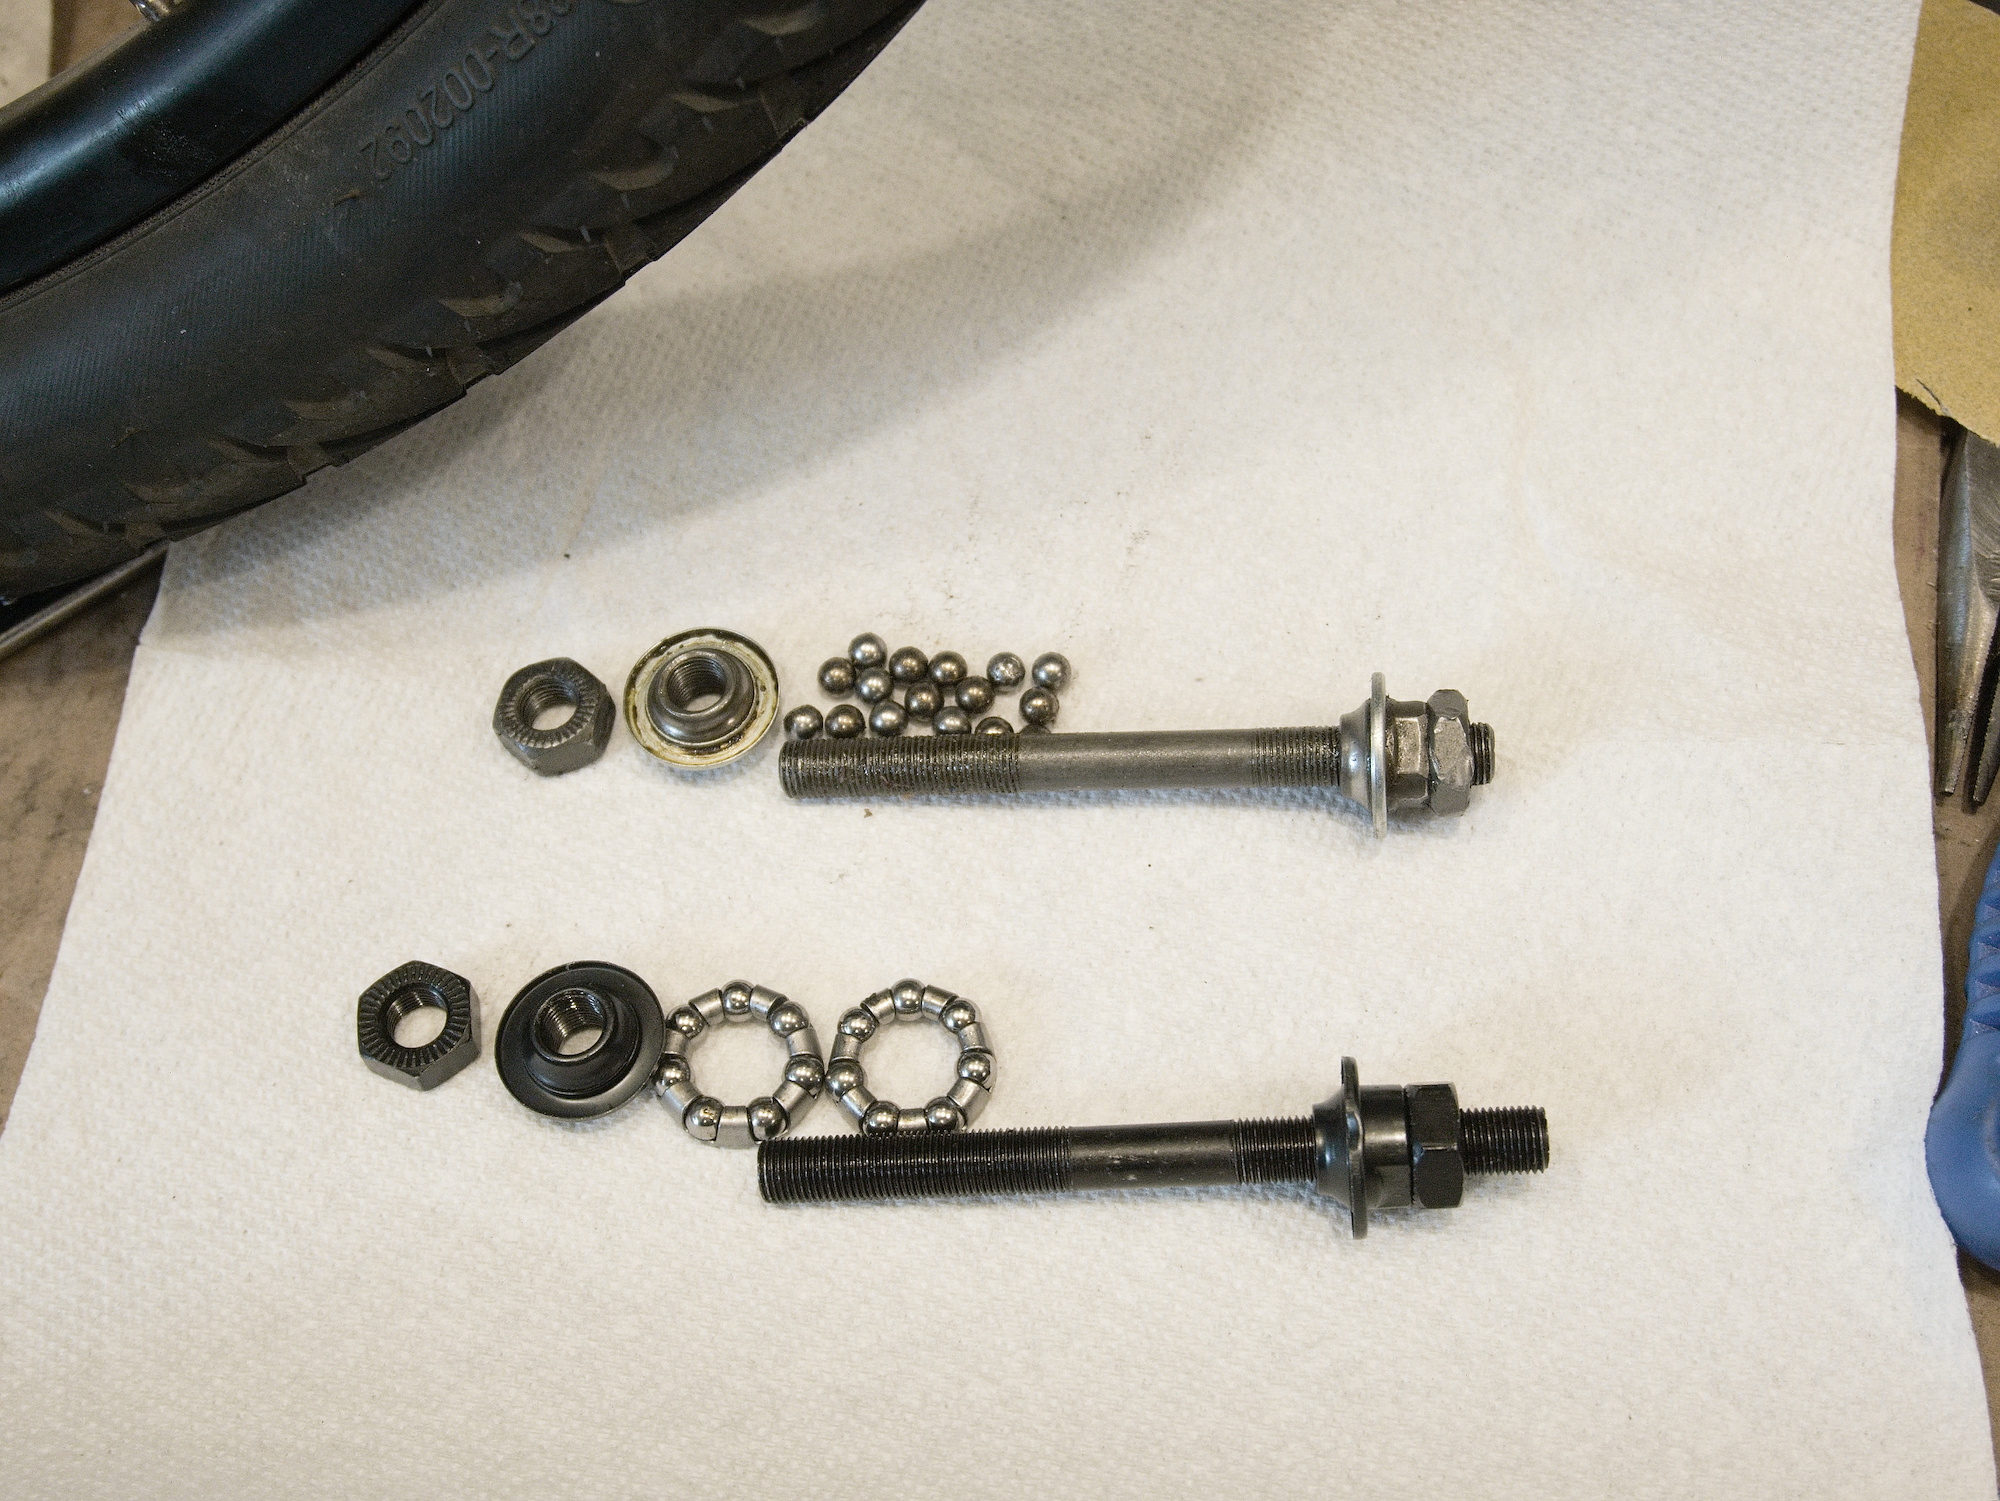
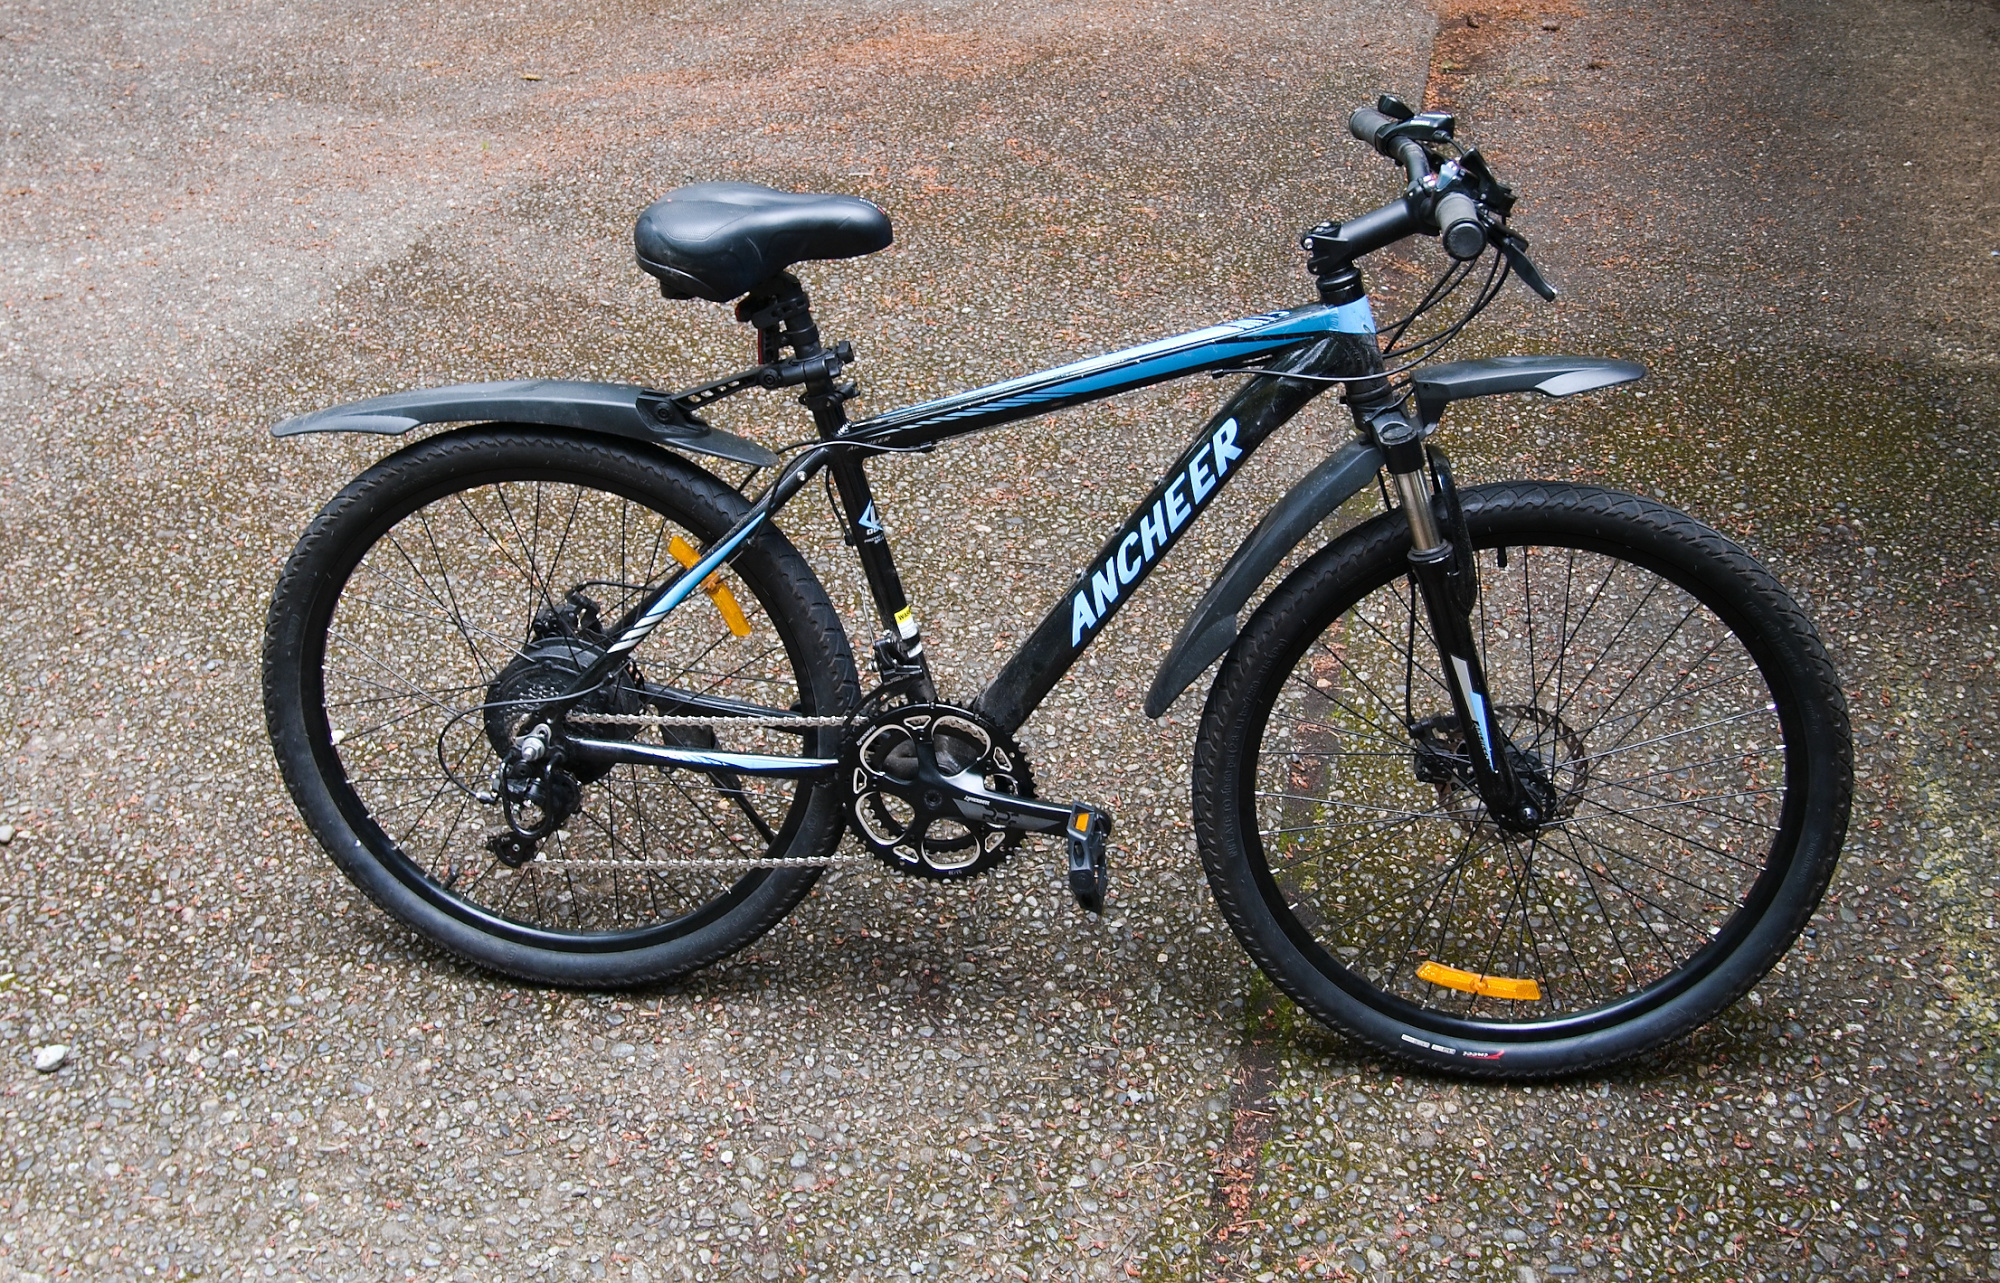
Die Kontaktflächen eines Kugellagers bestehen aus gehärtetem Stahl oder Keramik. Mit einer Ausnahme, wenn sie aus China kommen.
Gesehen an meinem Fahrrad, das auch aus China kommt. Während der Fahrt hat das Vorderrad Geräusche gemacht und hier ist warum:
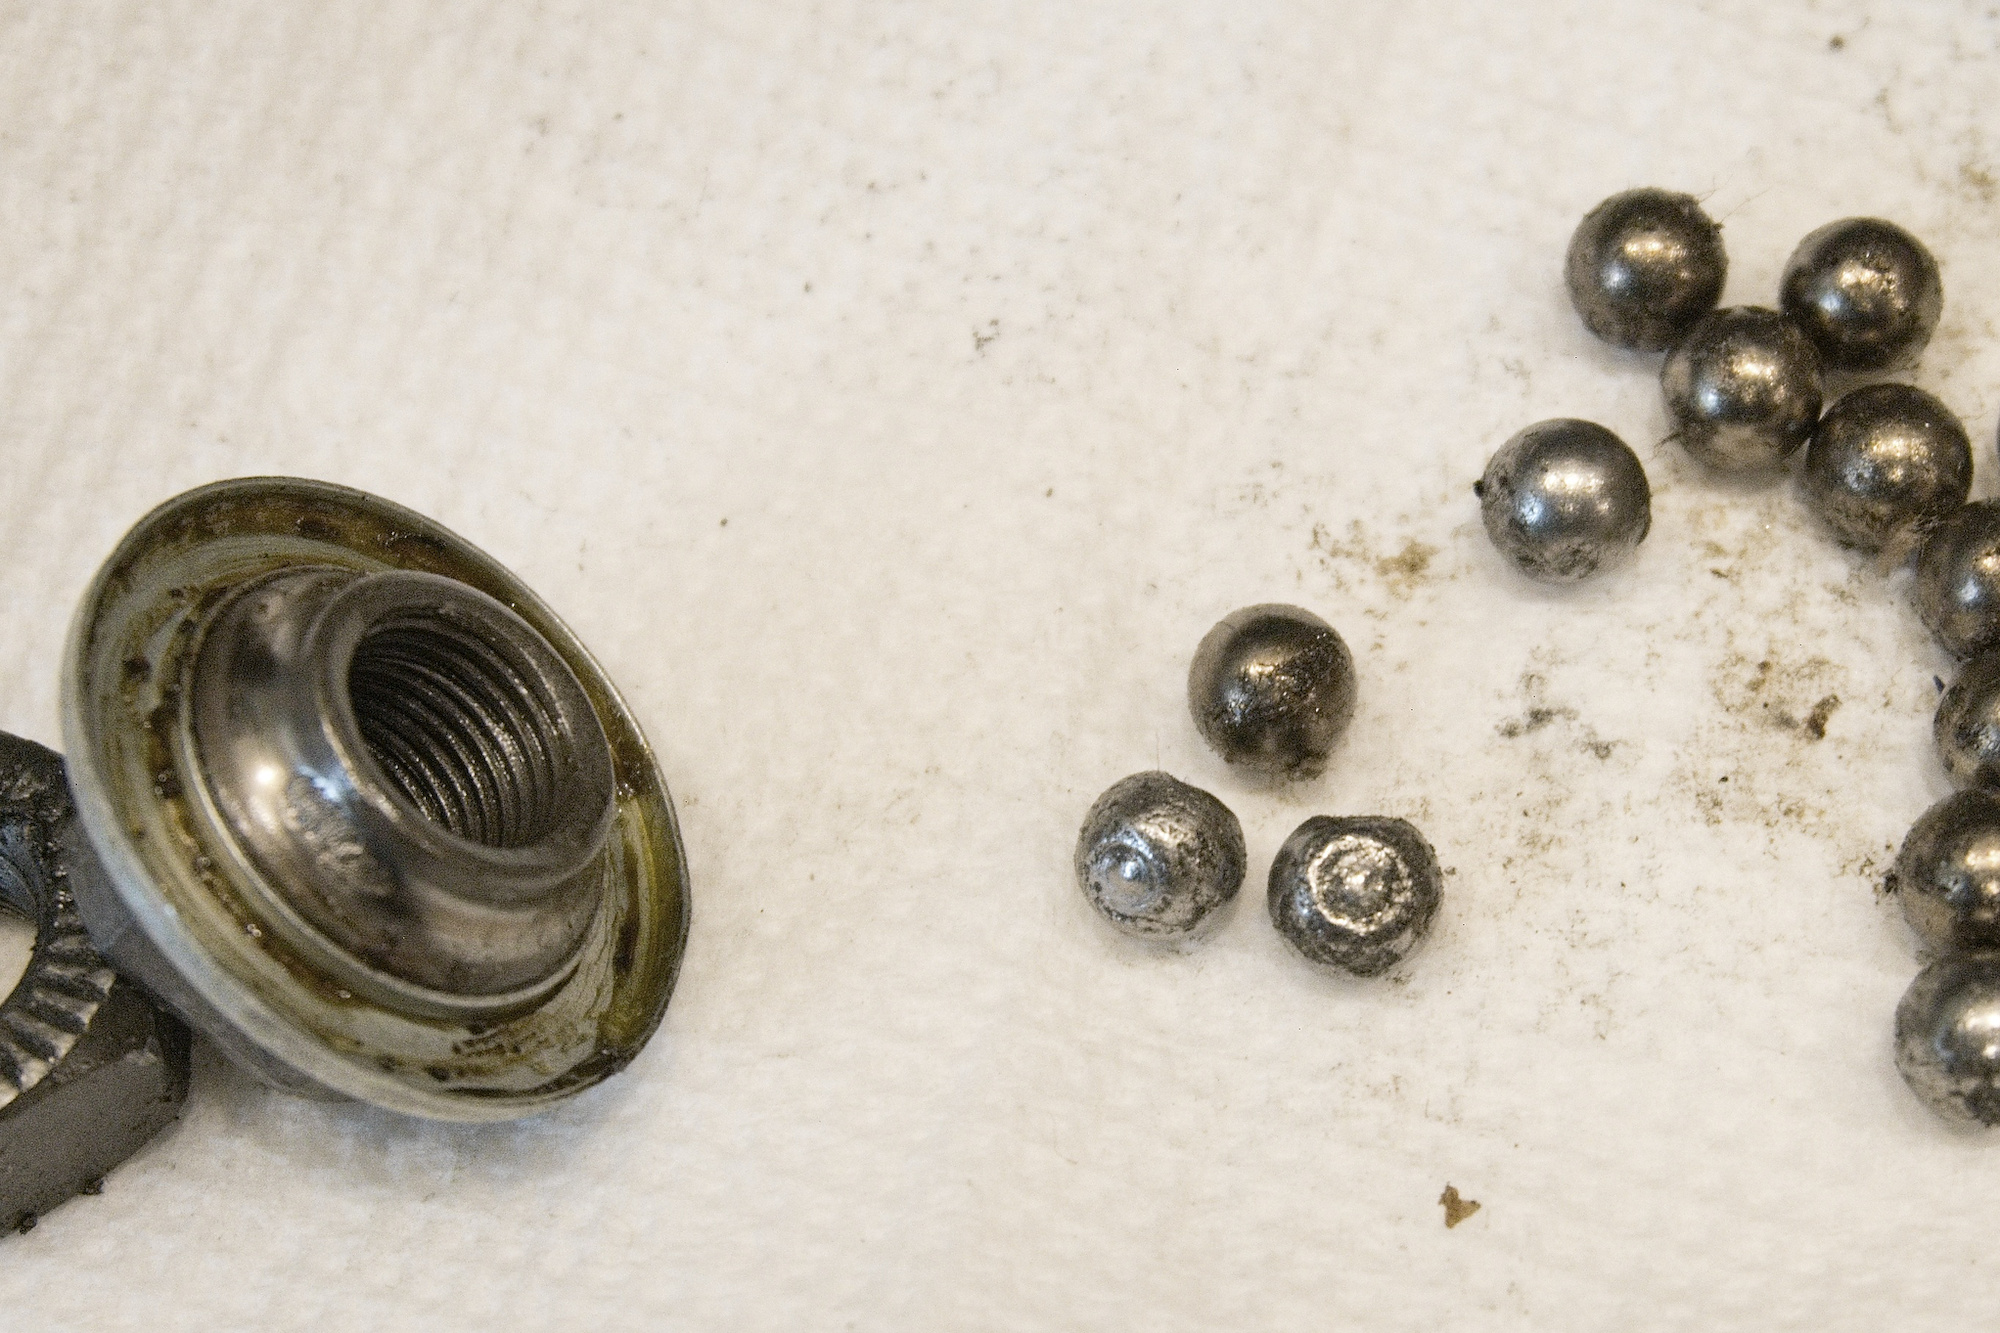
Bei Fahrrädern ist es üblich, dass die Lagerschalen und Käfig (der die Kugeln hält) getrennt sind. Also ein einfaches Konuslager. In diesem Fall noch nicht mal mit Käfig, sondern einzelne Kugeln, die nicht mit dem Käfig auf Abstand gehalten werden:
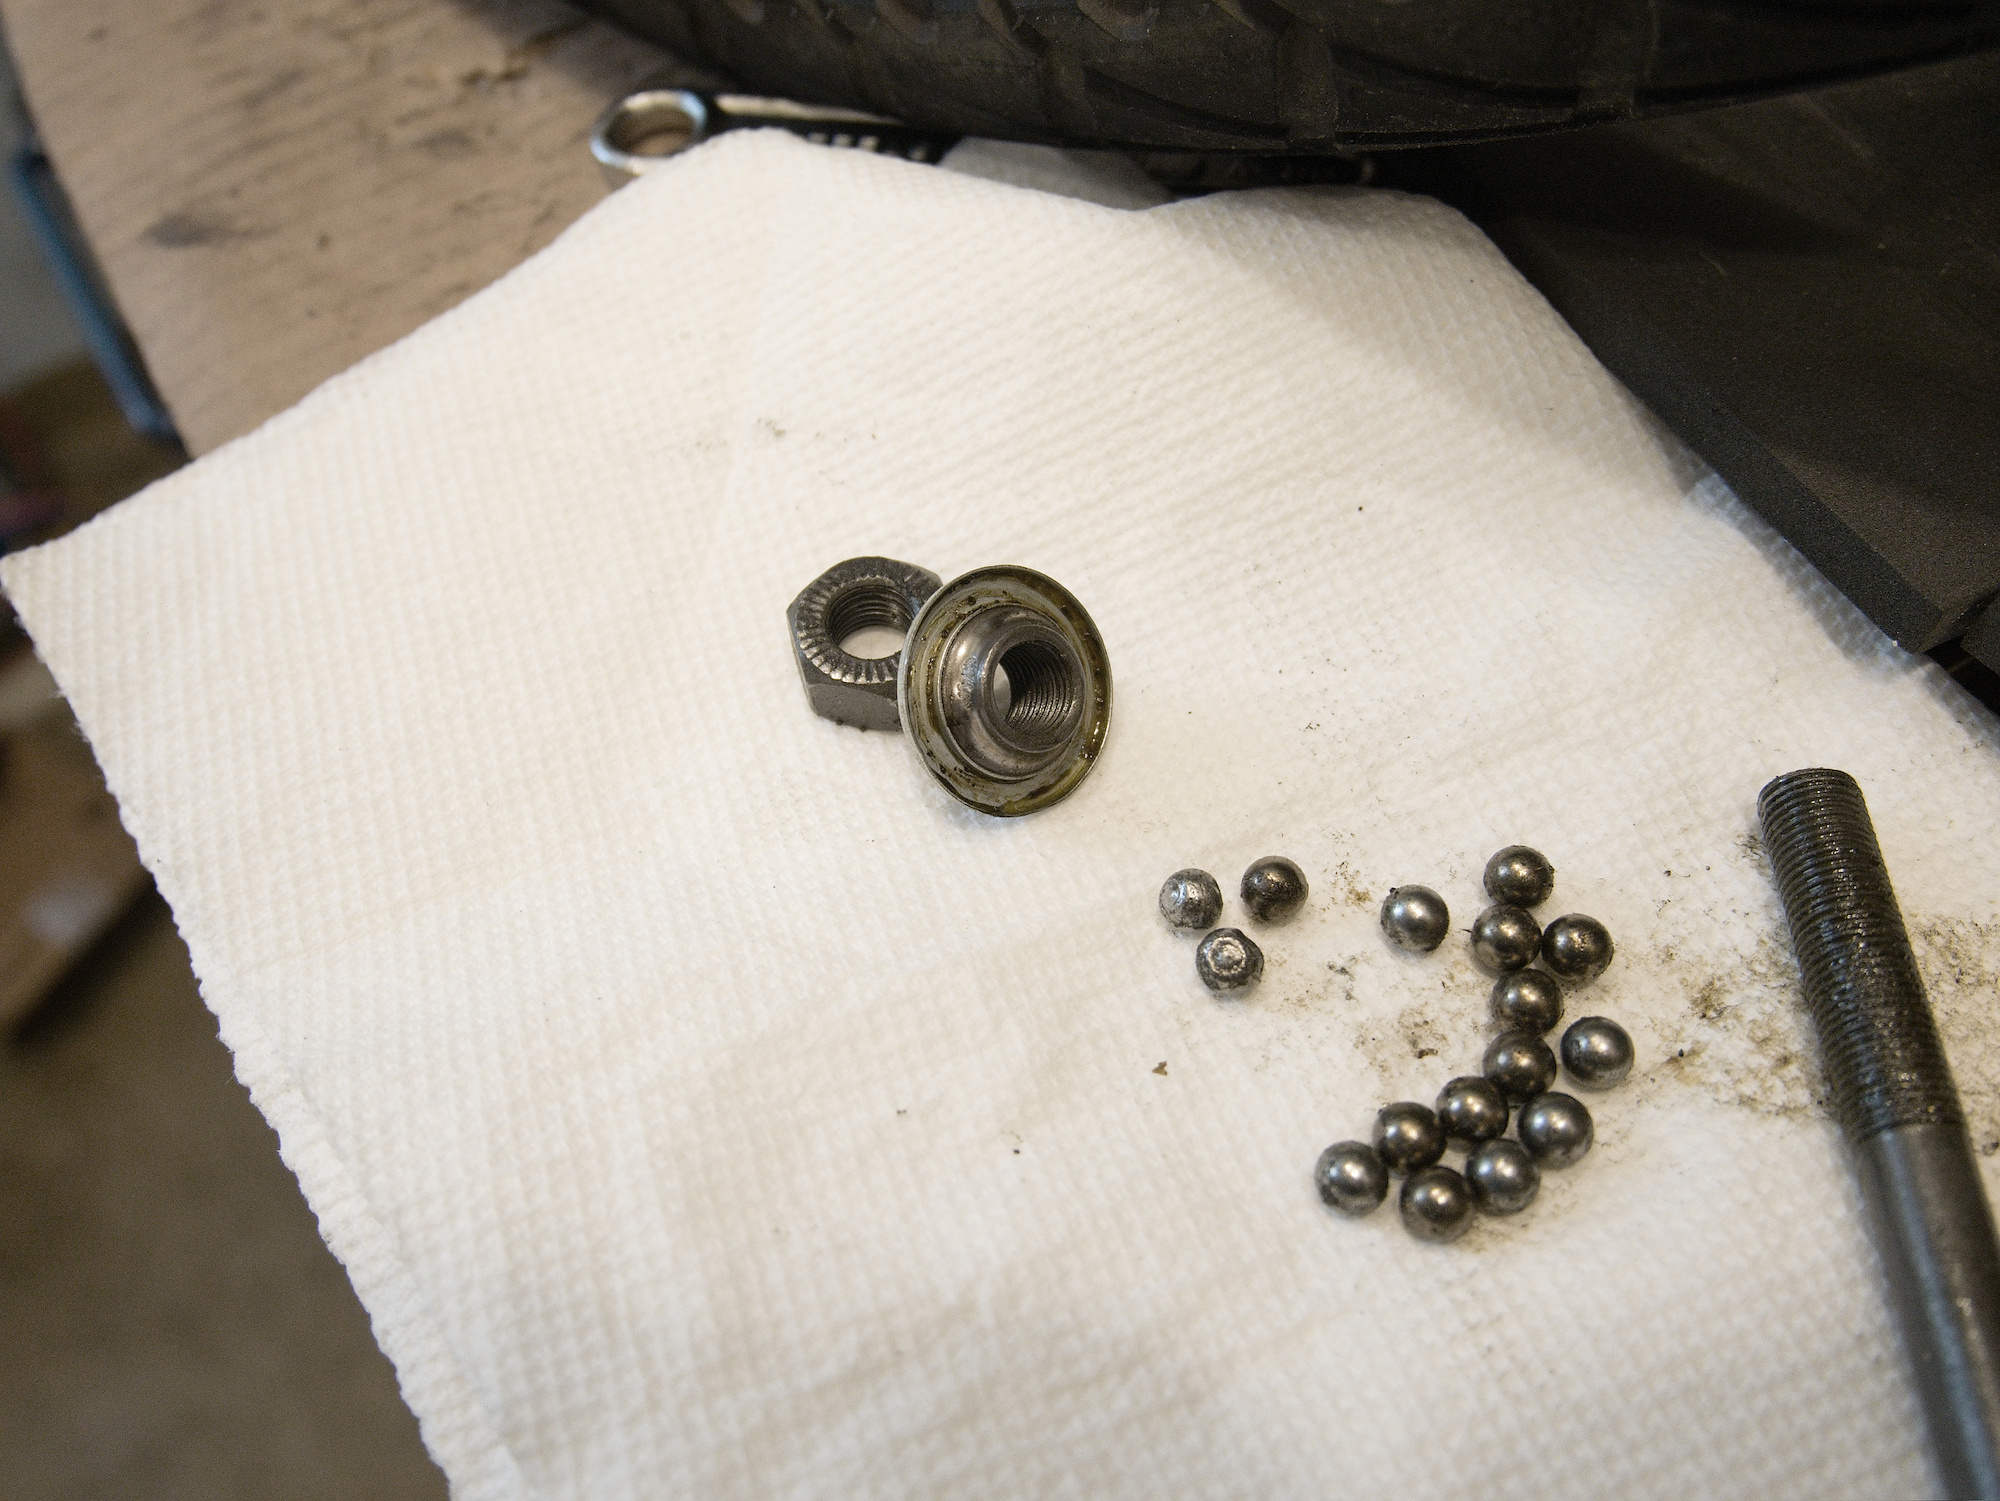
Die Kugeln waren verformt (!) und die Ursache der Fahrgeräusche. Die Lagerschale in der Mutter war teilweise beschädigt. Das ist alles, aber kein gehärteter Stahl.
Ein einfacher Reparatursatz mit Kugelkäfig:
Die Nabenseite, die den Außenring des Lagers hält, war nicht beschädigt. Ansonsten hätte das Rad auch noch ersetzt werden müssen.
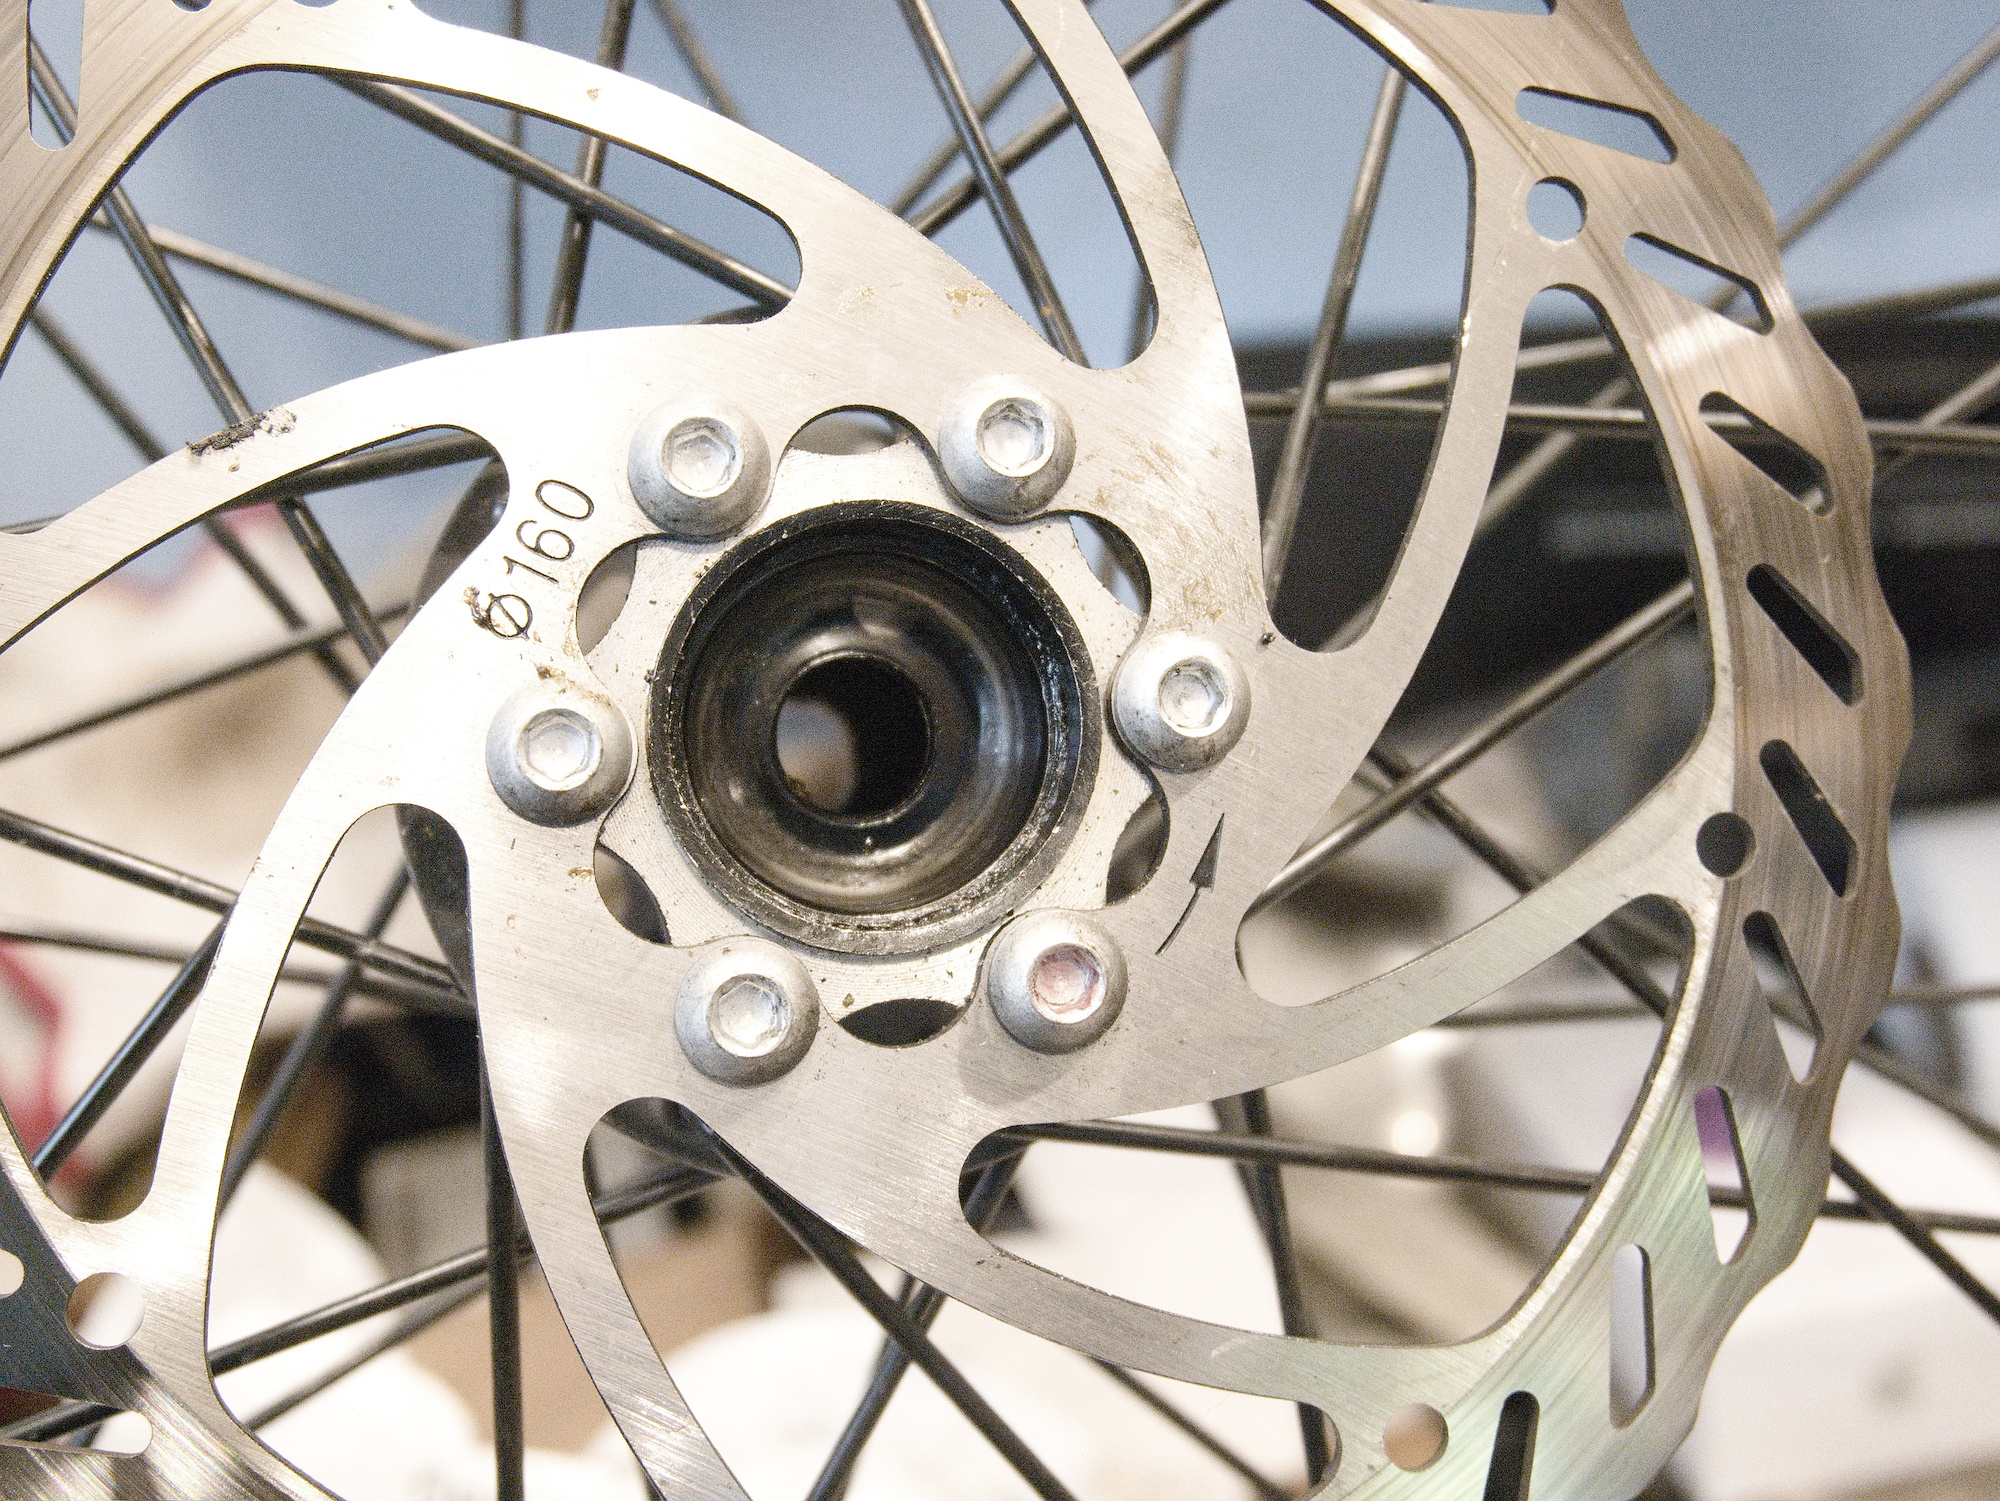
Dann wären der Rahmen, der Motor und der Lenker das einzige, was noch nicht ersetzt wurde.
Aber billig war das Fahrrad nicht. Und ein Haufen 5-Sterne-Beurteilungen hat es auch gehabt.
Update Juni 2024 质量
Es ist soweit. Der Motor ist jetzt endlich auch kaputt. Hat sich innen mitgedreht und sich dabei selber die Kabel abgerissen:
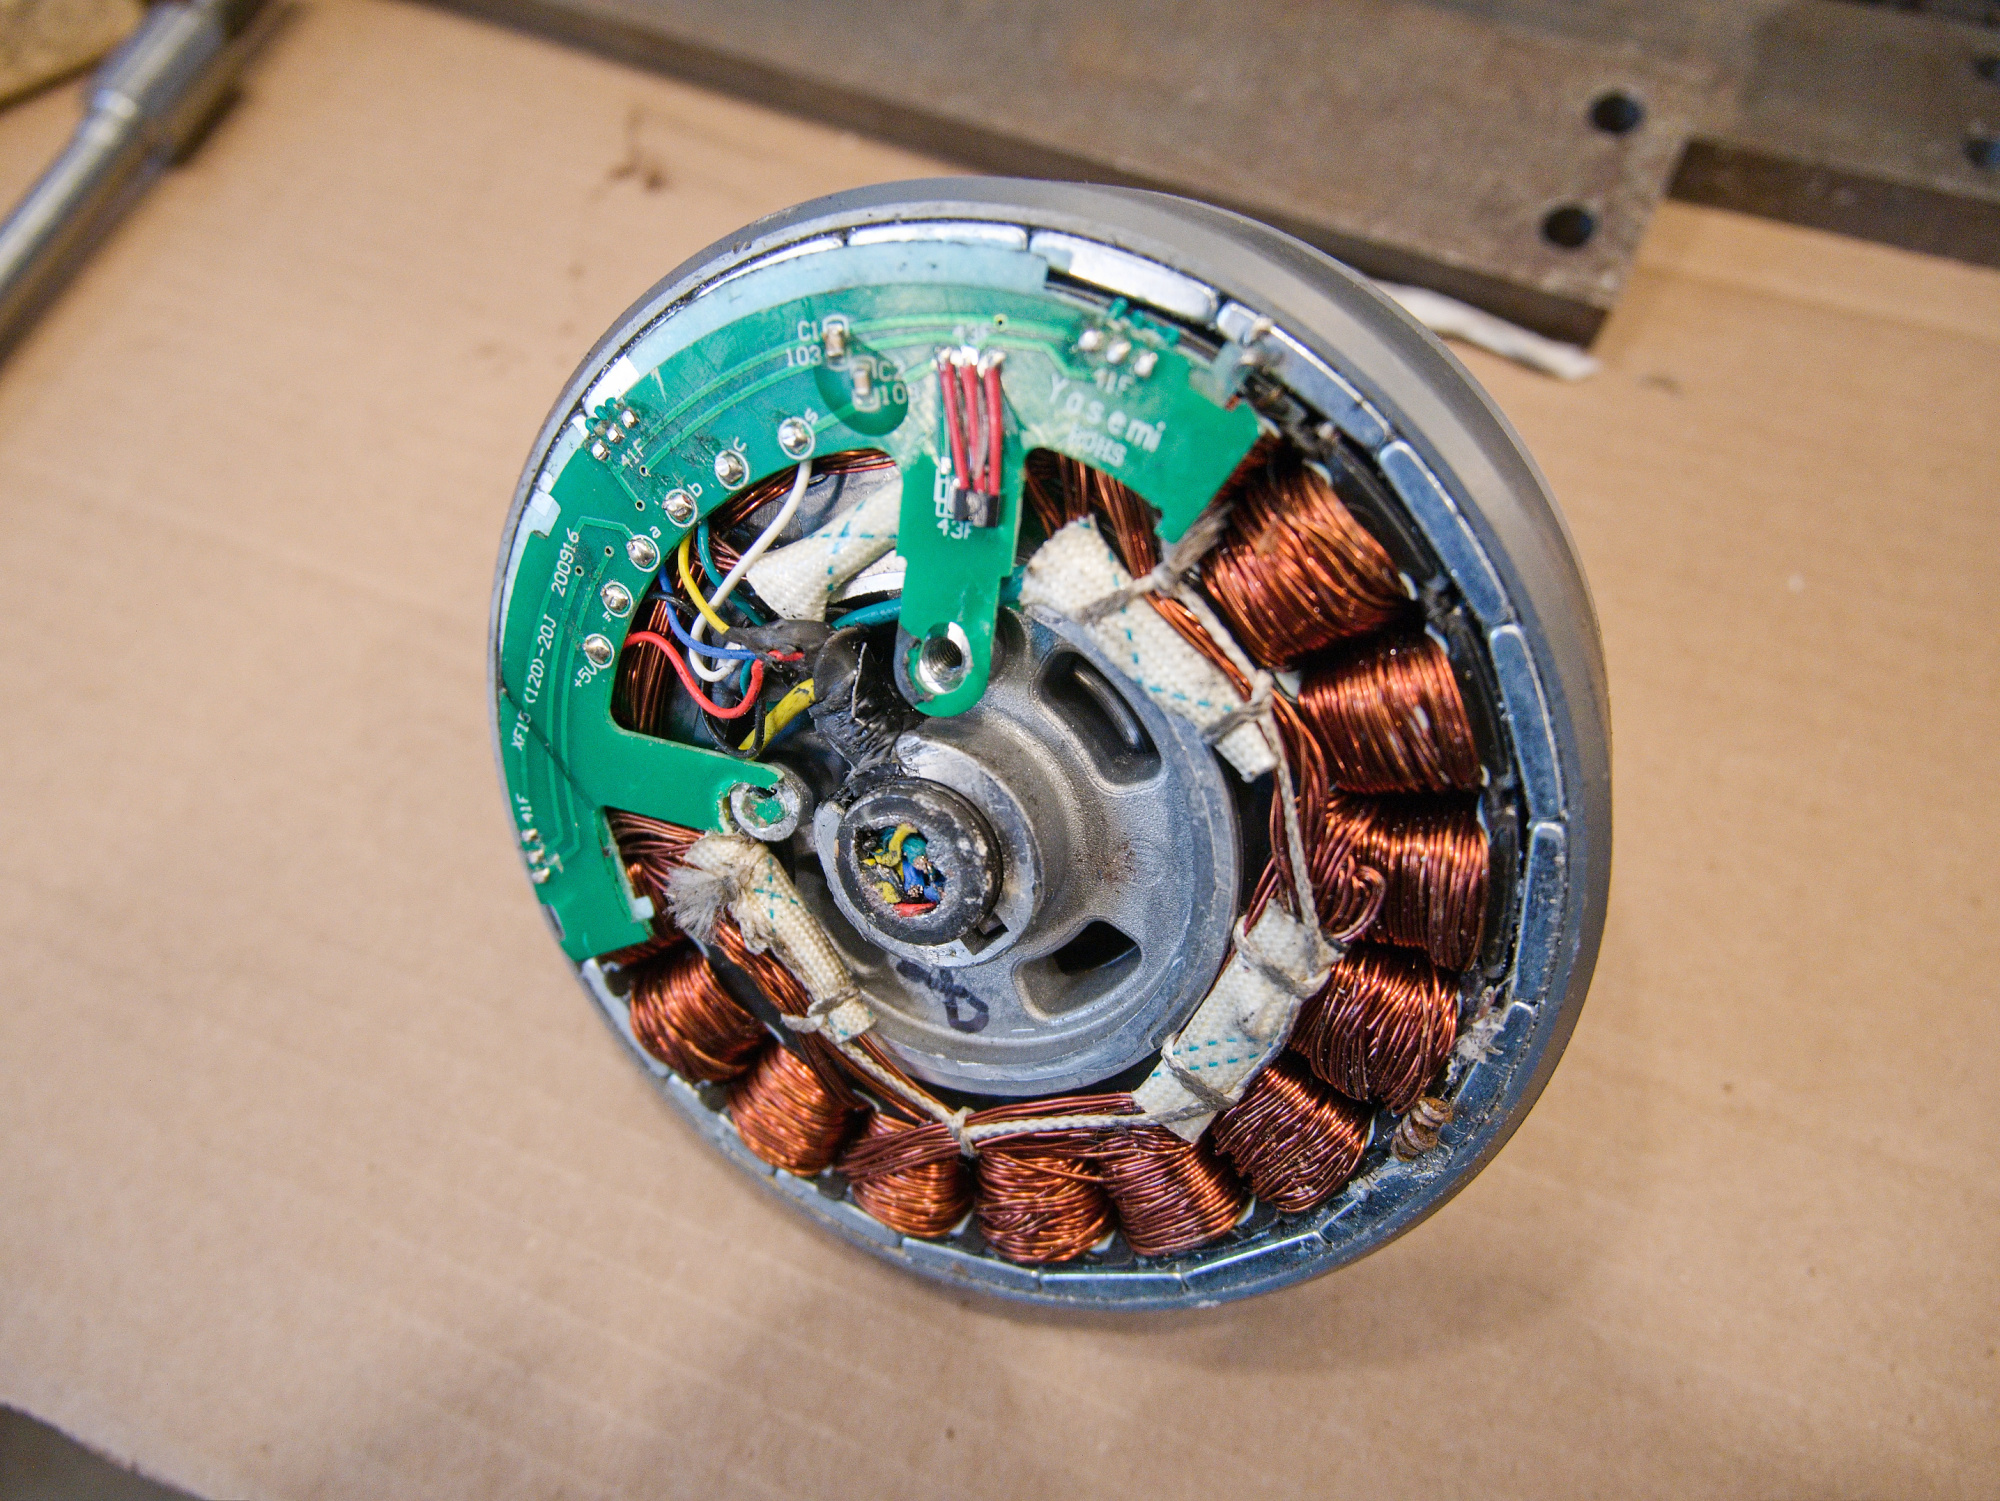
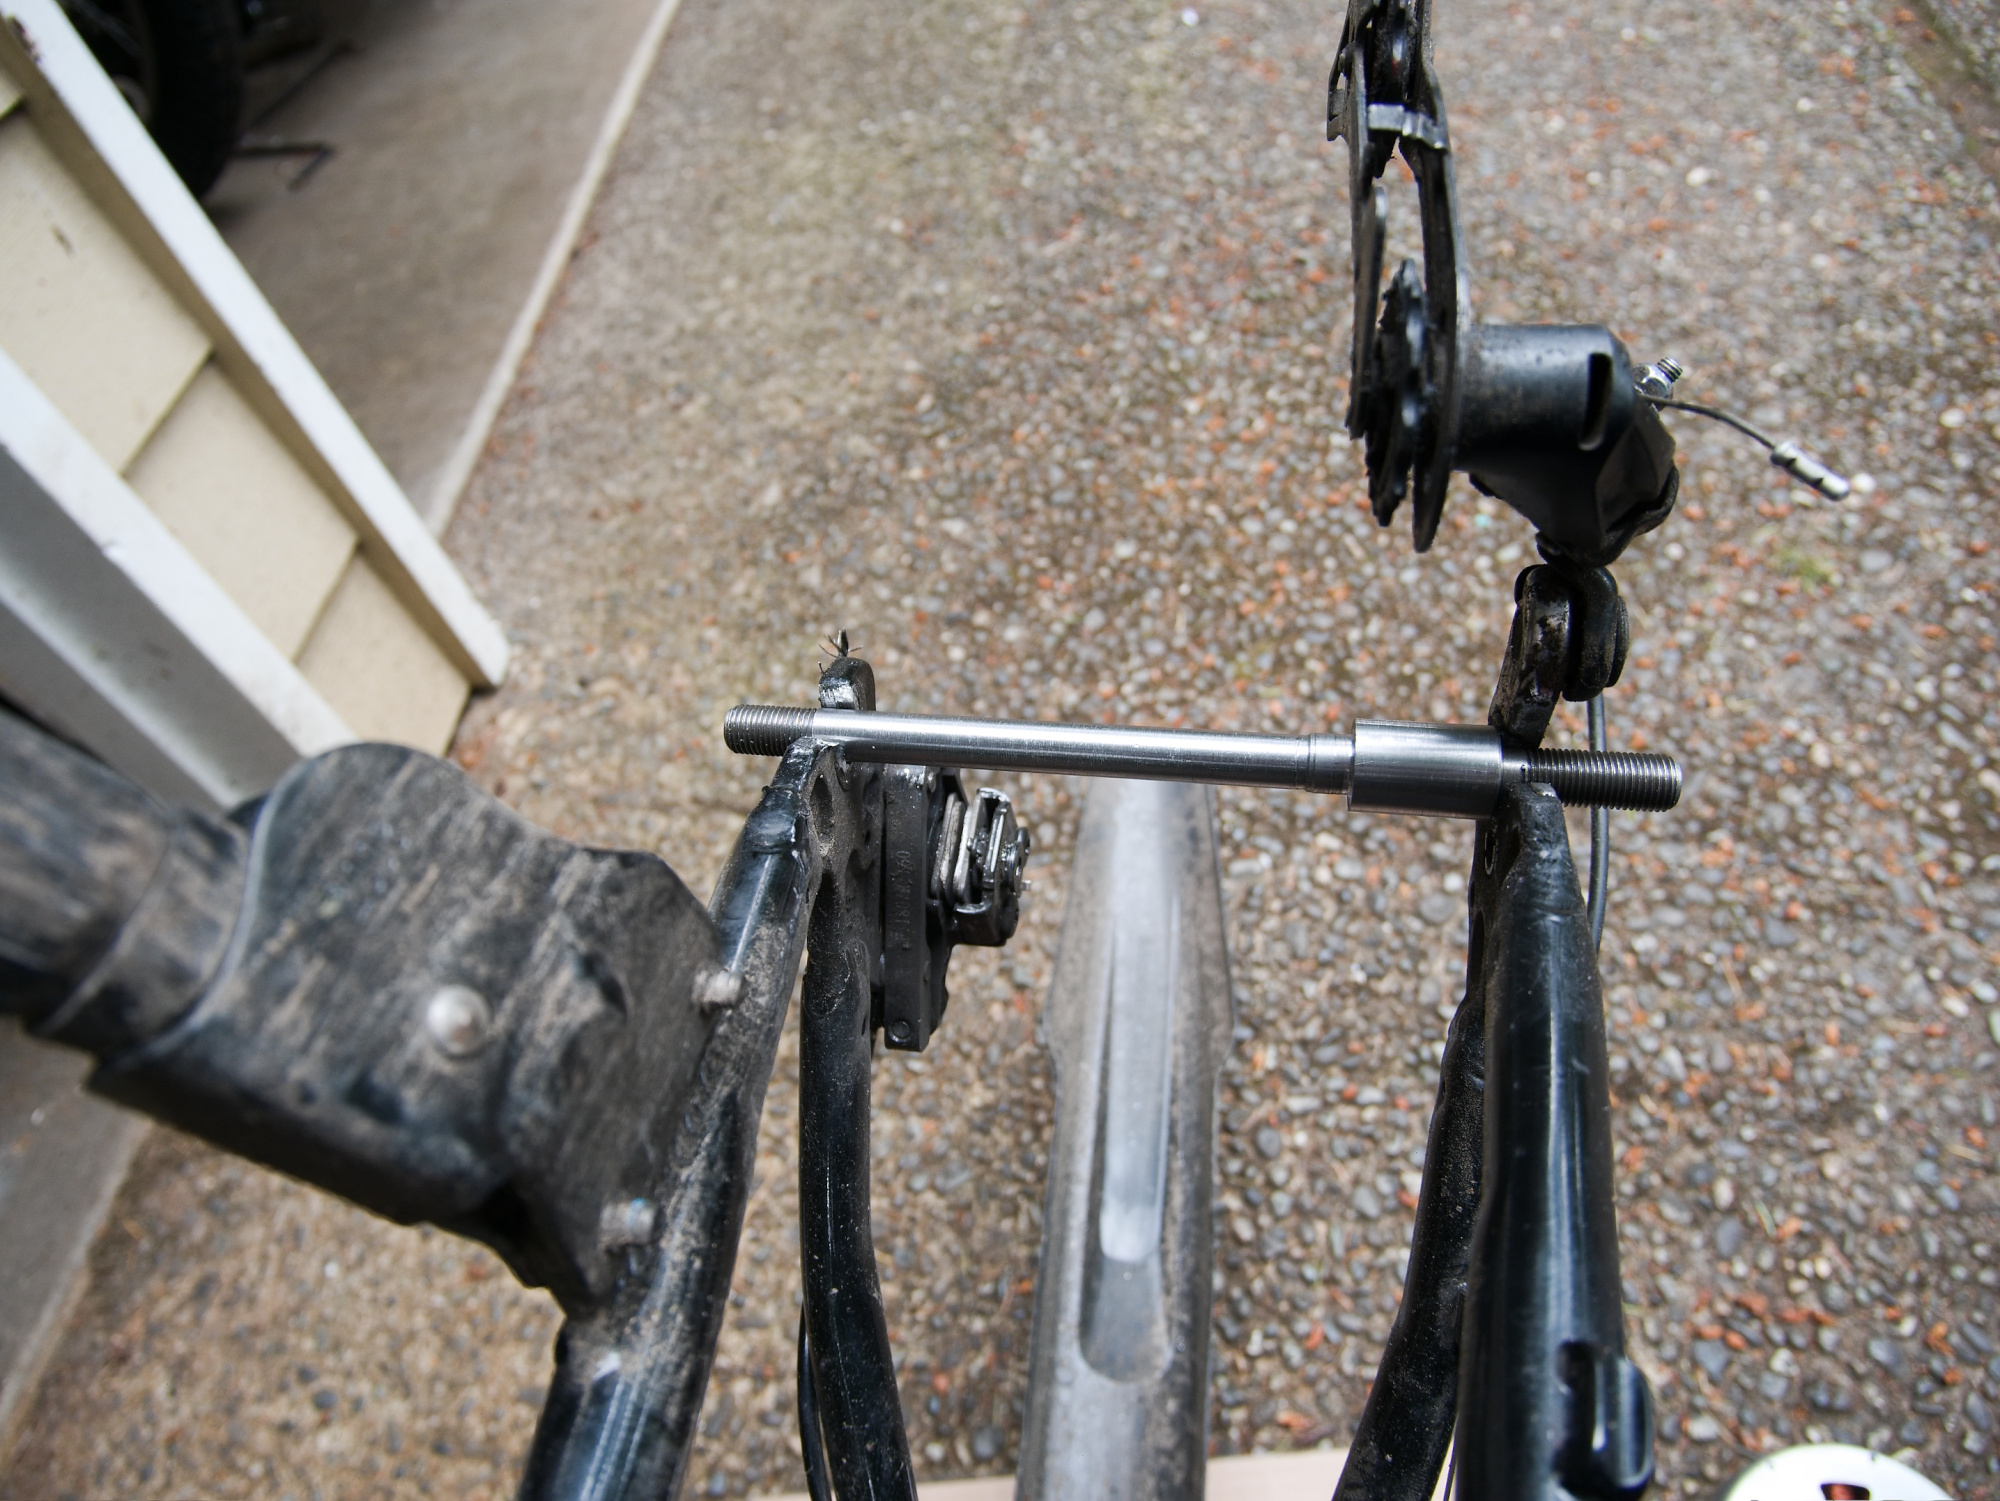
Die Entscheidung steht: Jetzt ist schon soviel repariert, und aus dem 'E-Bike' wird jetzt ein solides 'Bike'. Also Motor raus und mit einer Achse ersetzt.
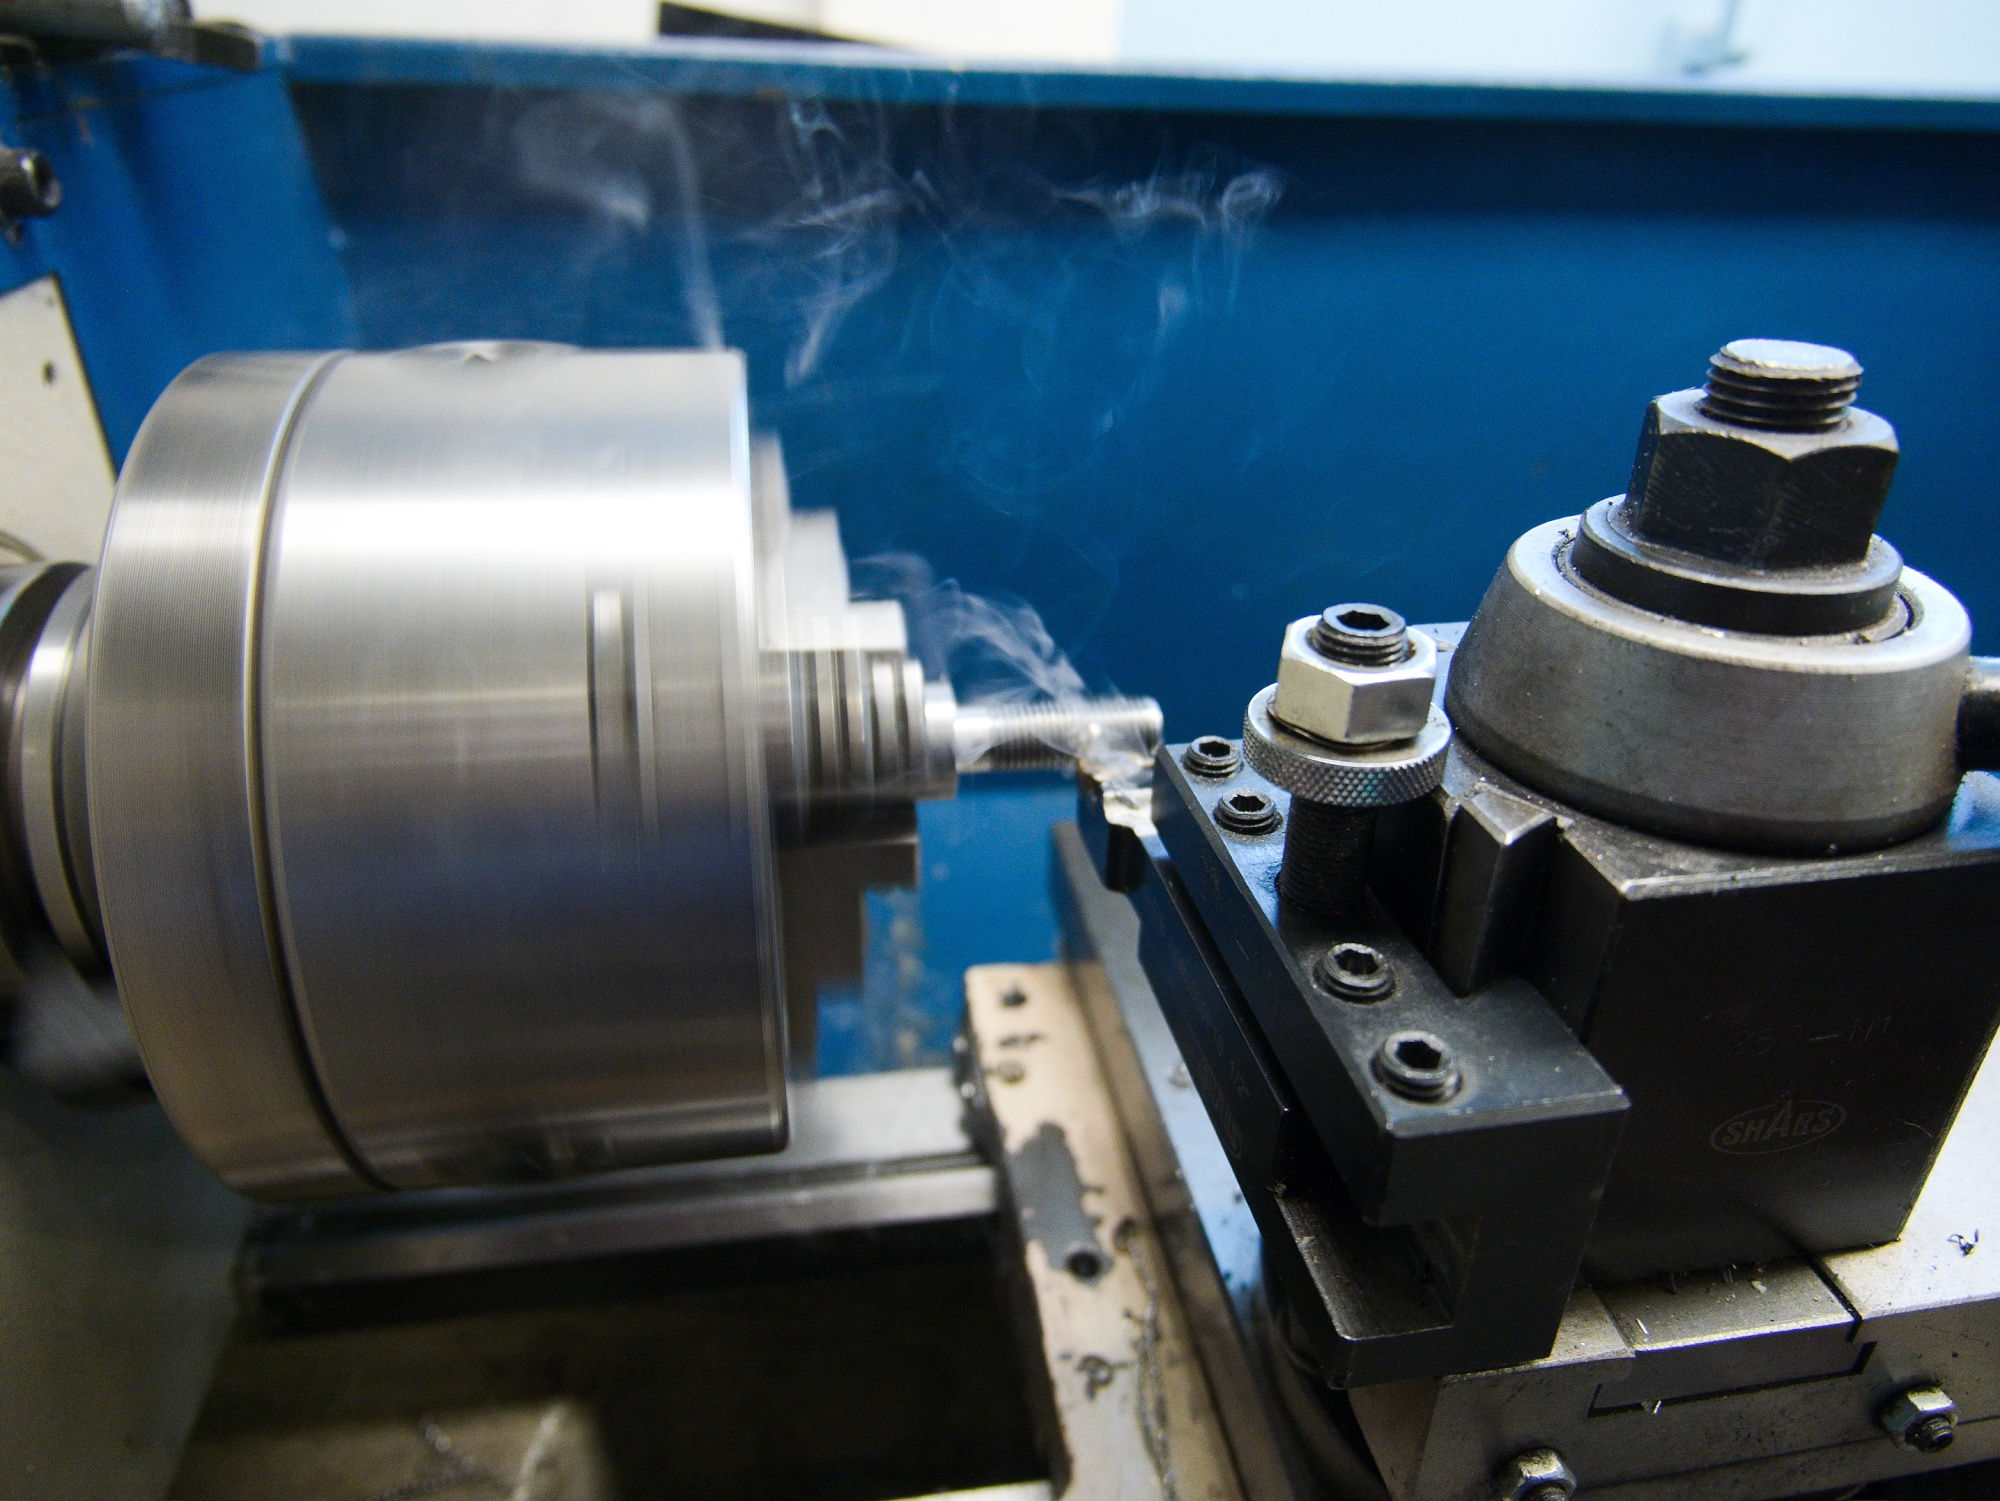
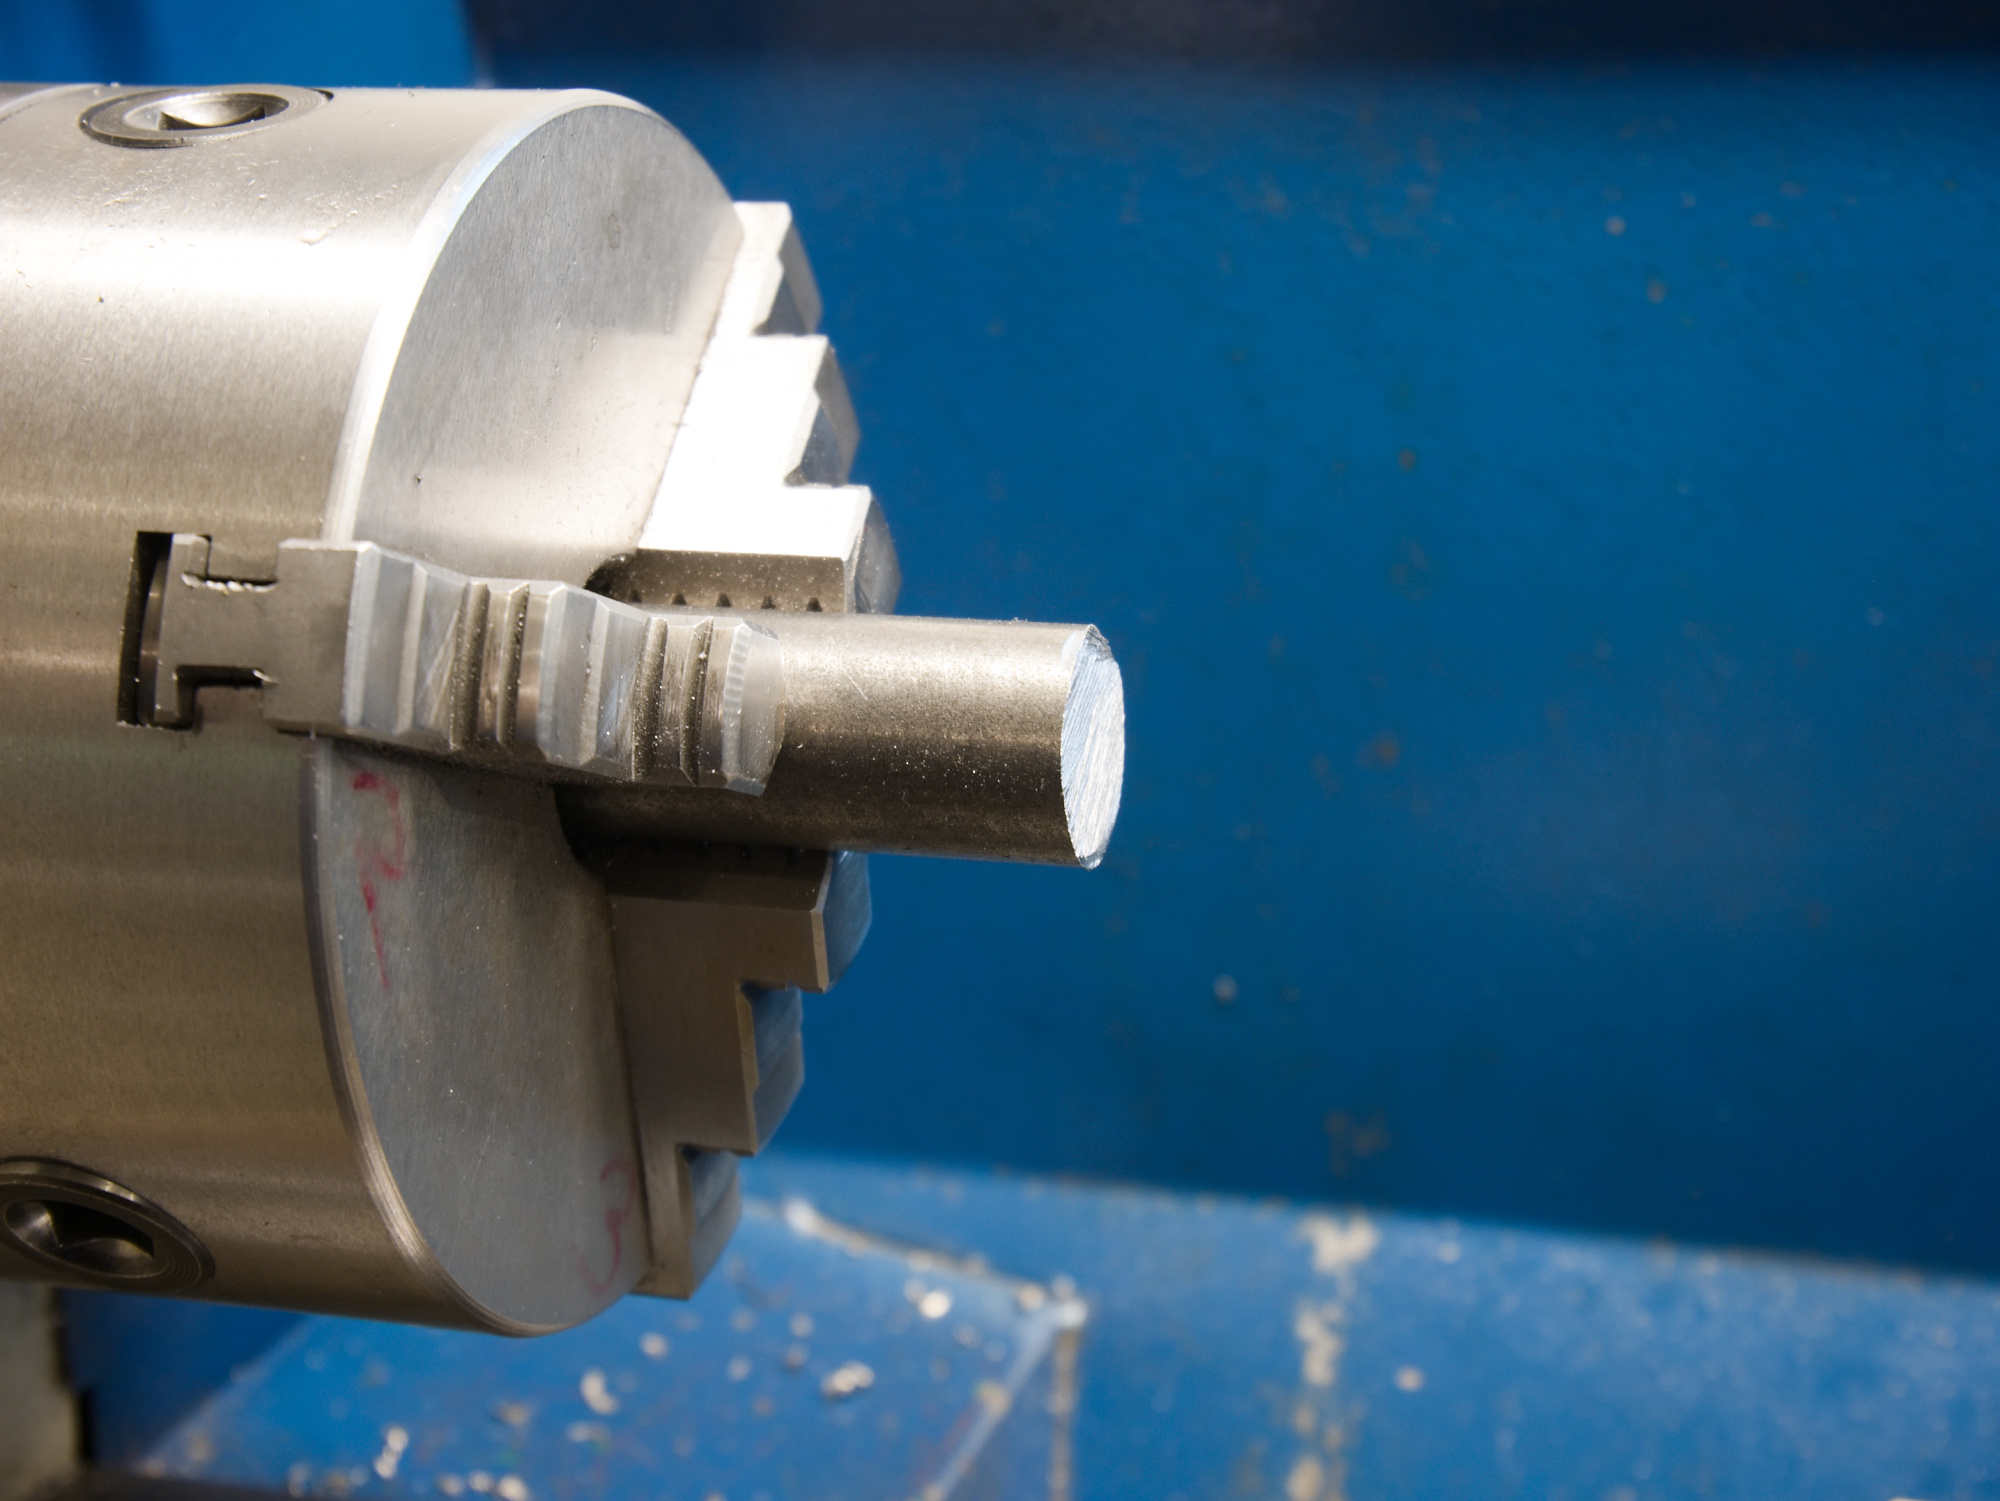
Material ist 4130, ein hochwertiger Stahl.
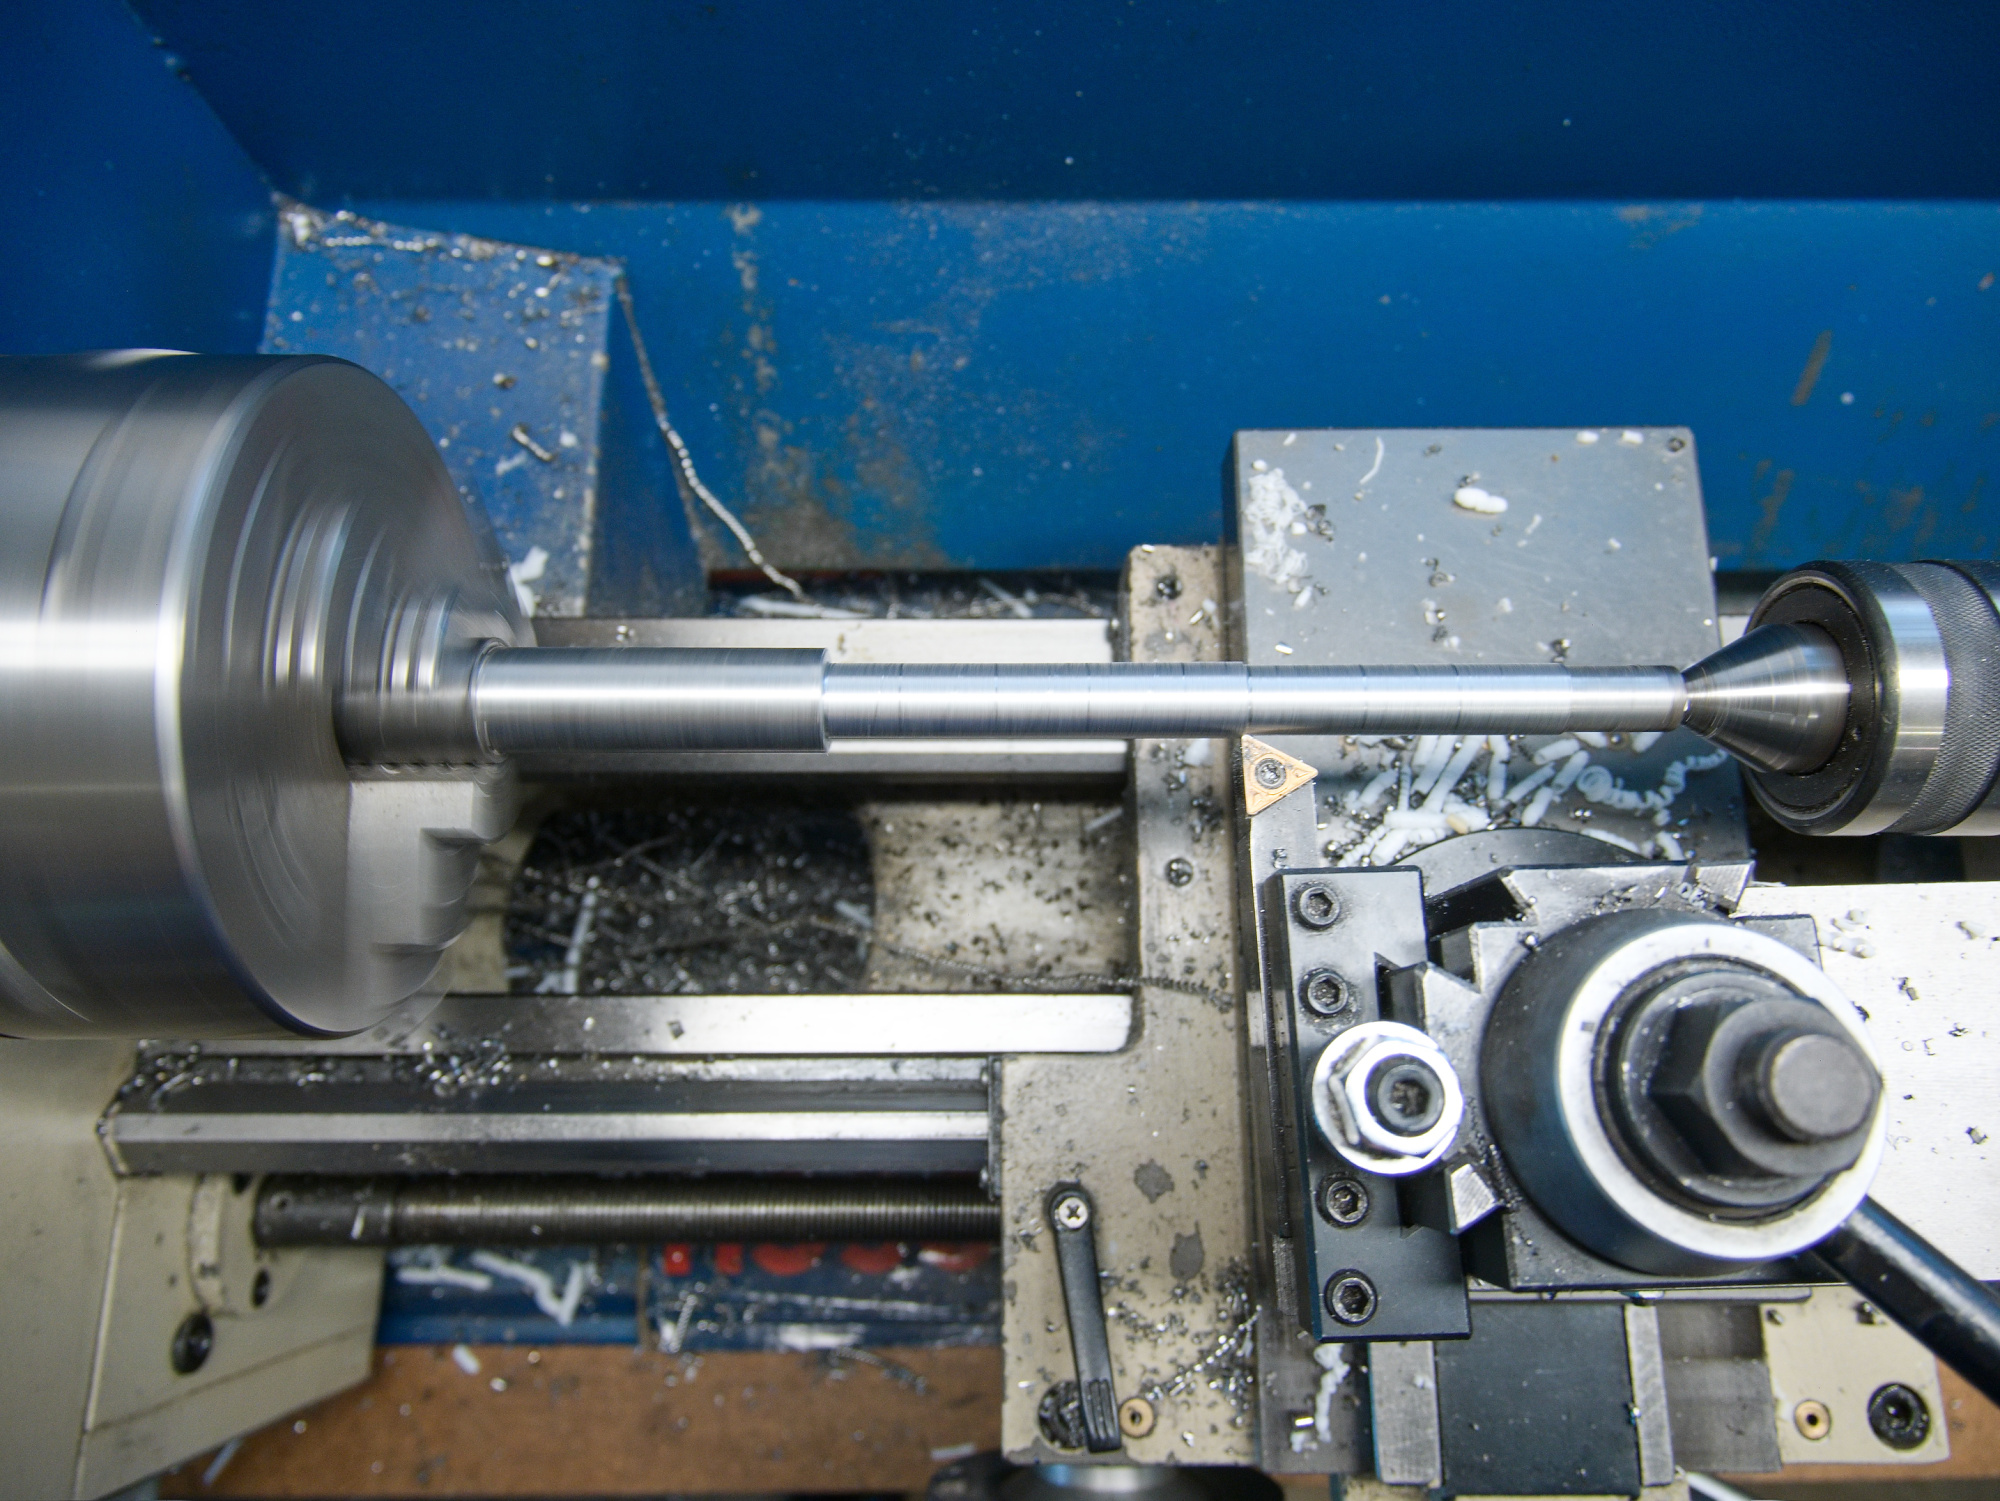
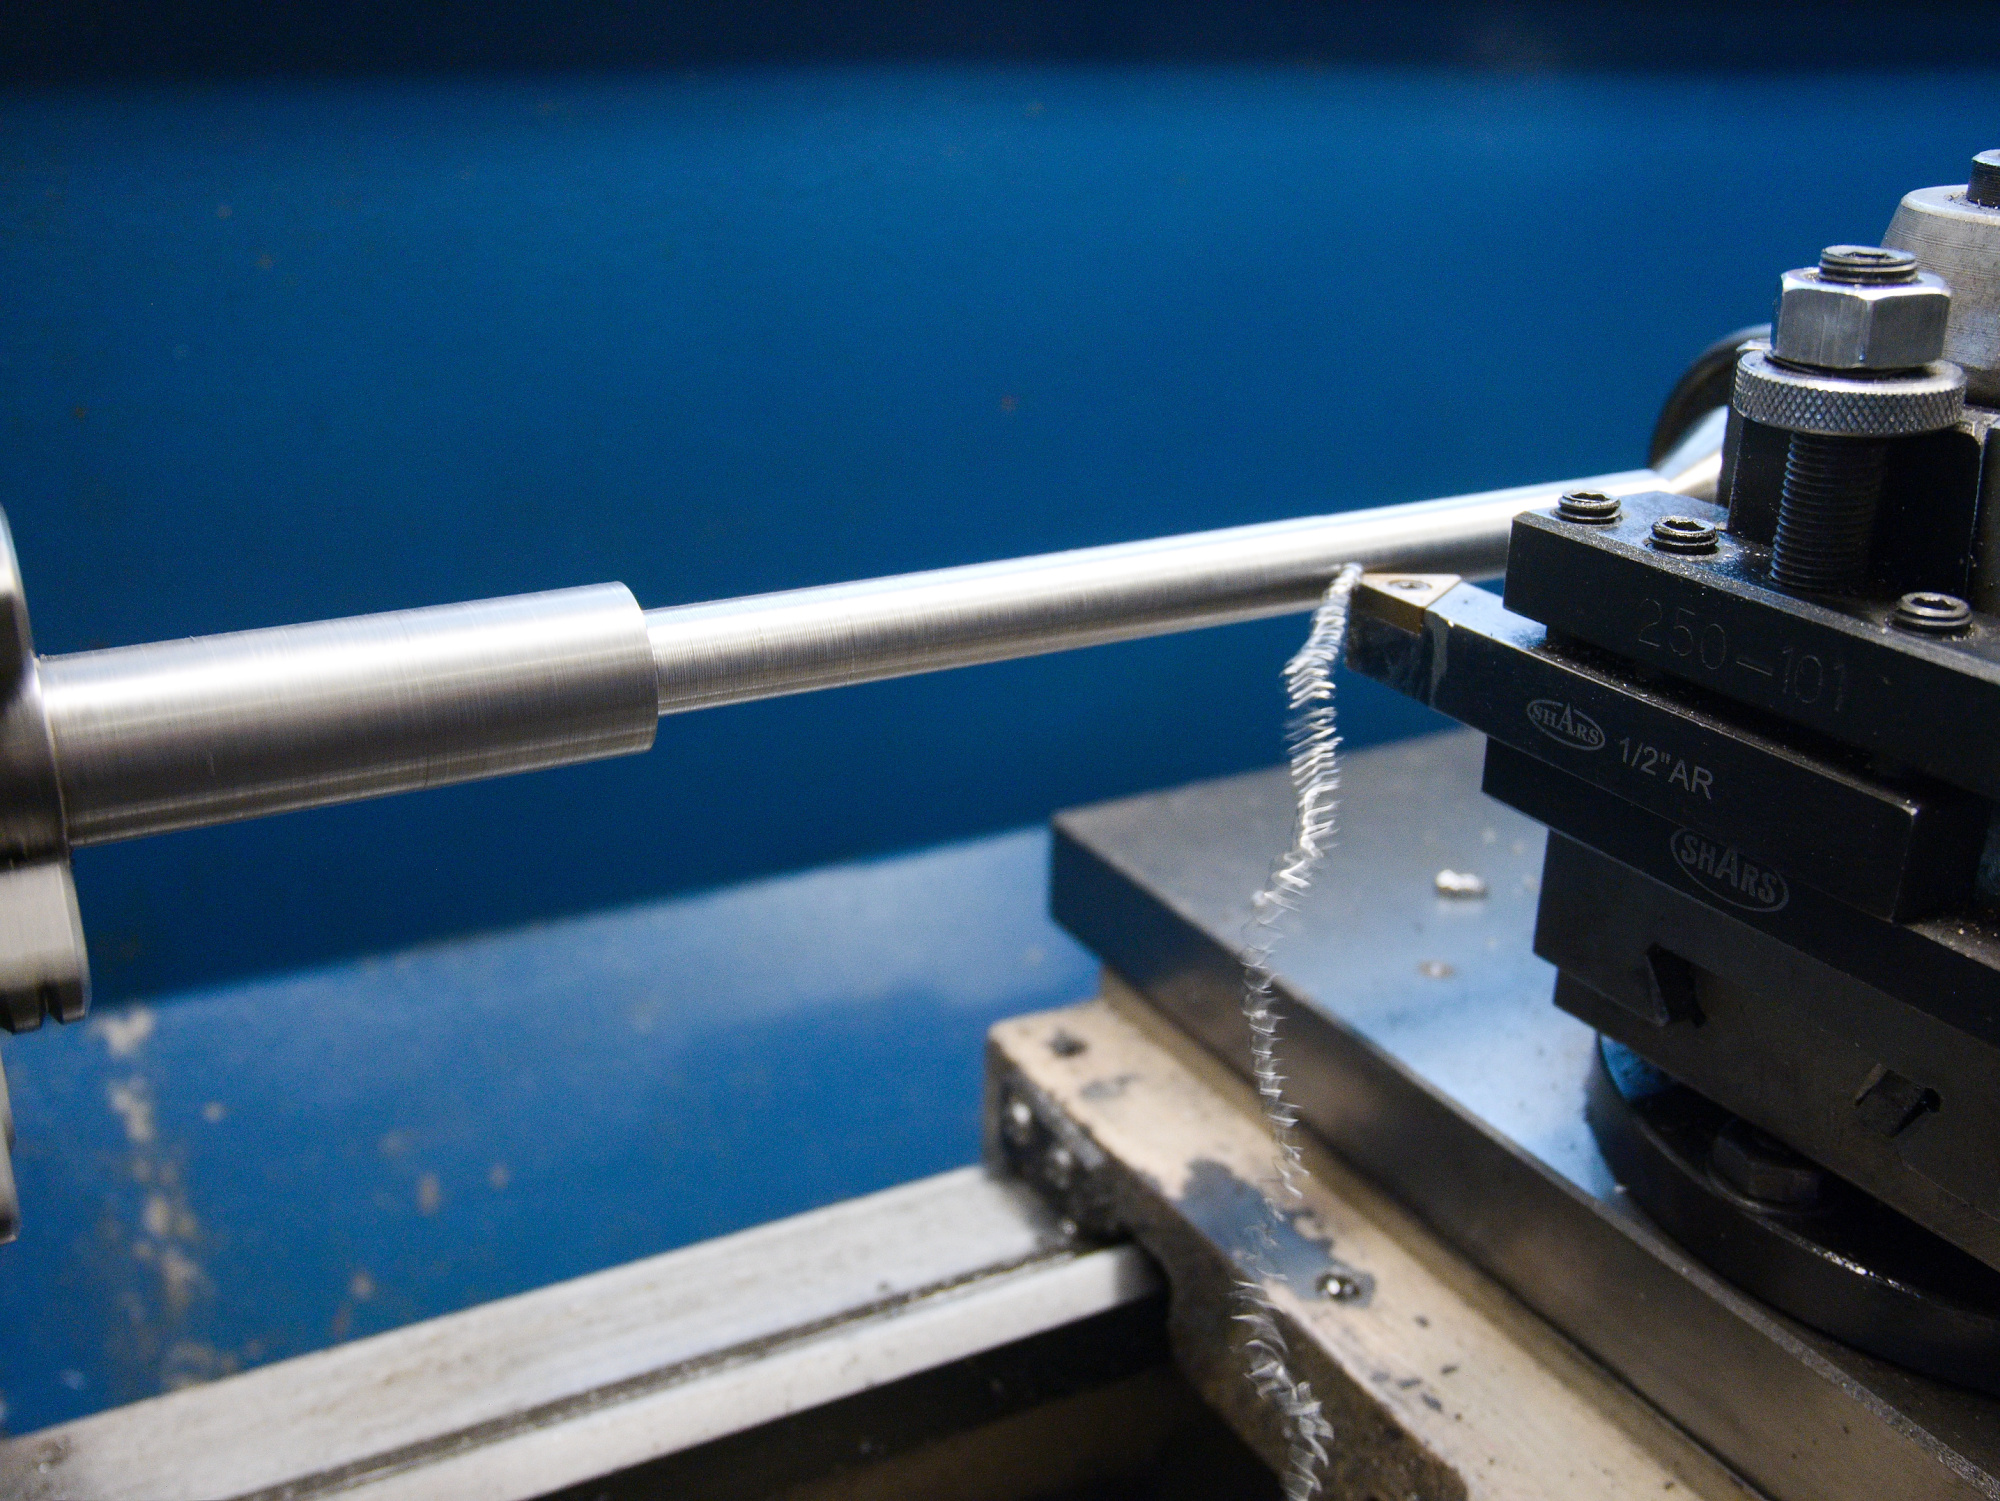
M12 1.25 Fahrrad-Außengewinde wird mit der Maschine geschnitten:
Aber die Qualitätsfalle lässt nicht lange auf sich warten. Der zum Schneiden des Innengewinde M12 1.25 verwendete Gewindeschneider ist nicht richtig hergestellt. Die Spezialmutter zum Gegenhalten der Achse muss deswegen neu gemacht werden.
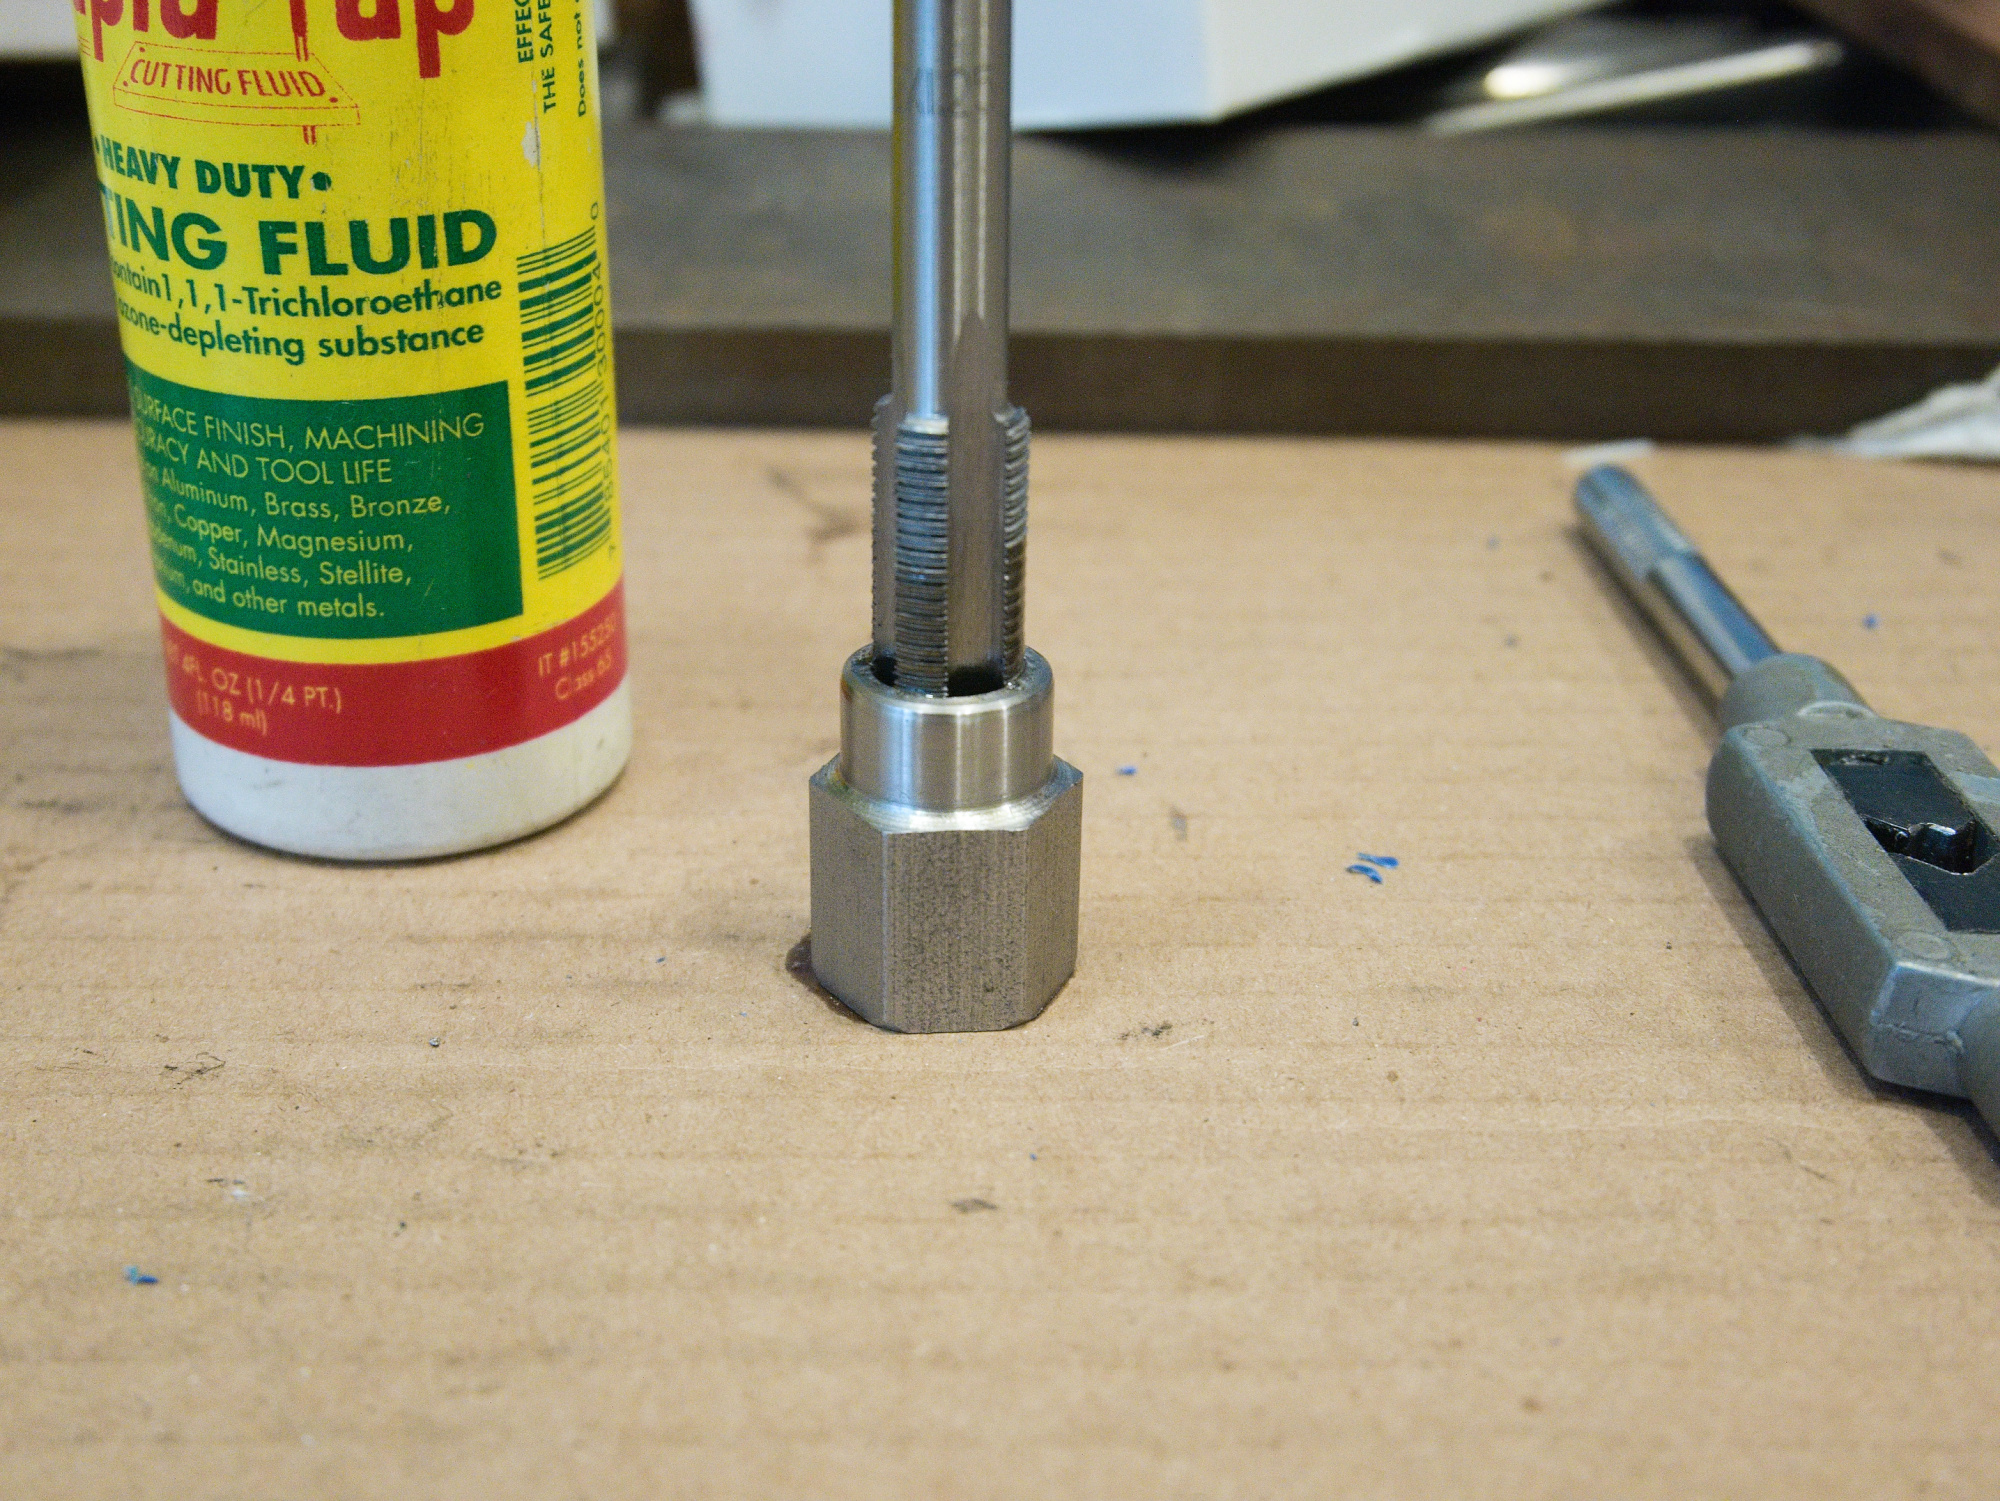
Ganz normaler Werkzeugpreis, aber nur Schrott:
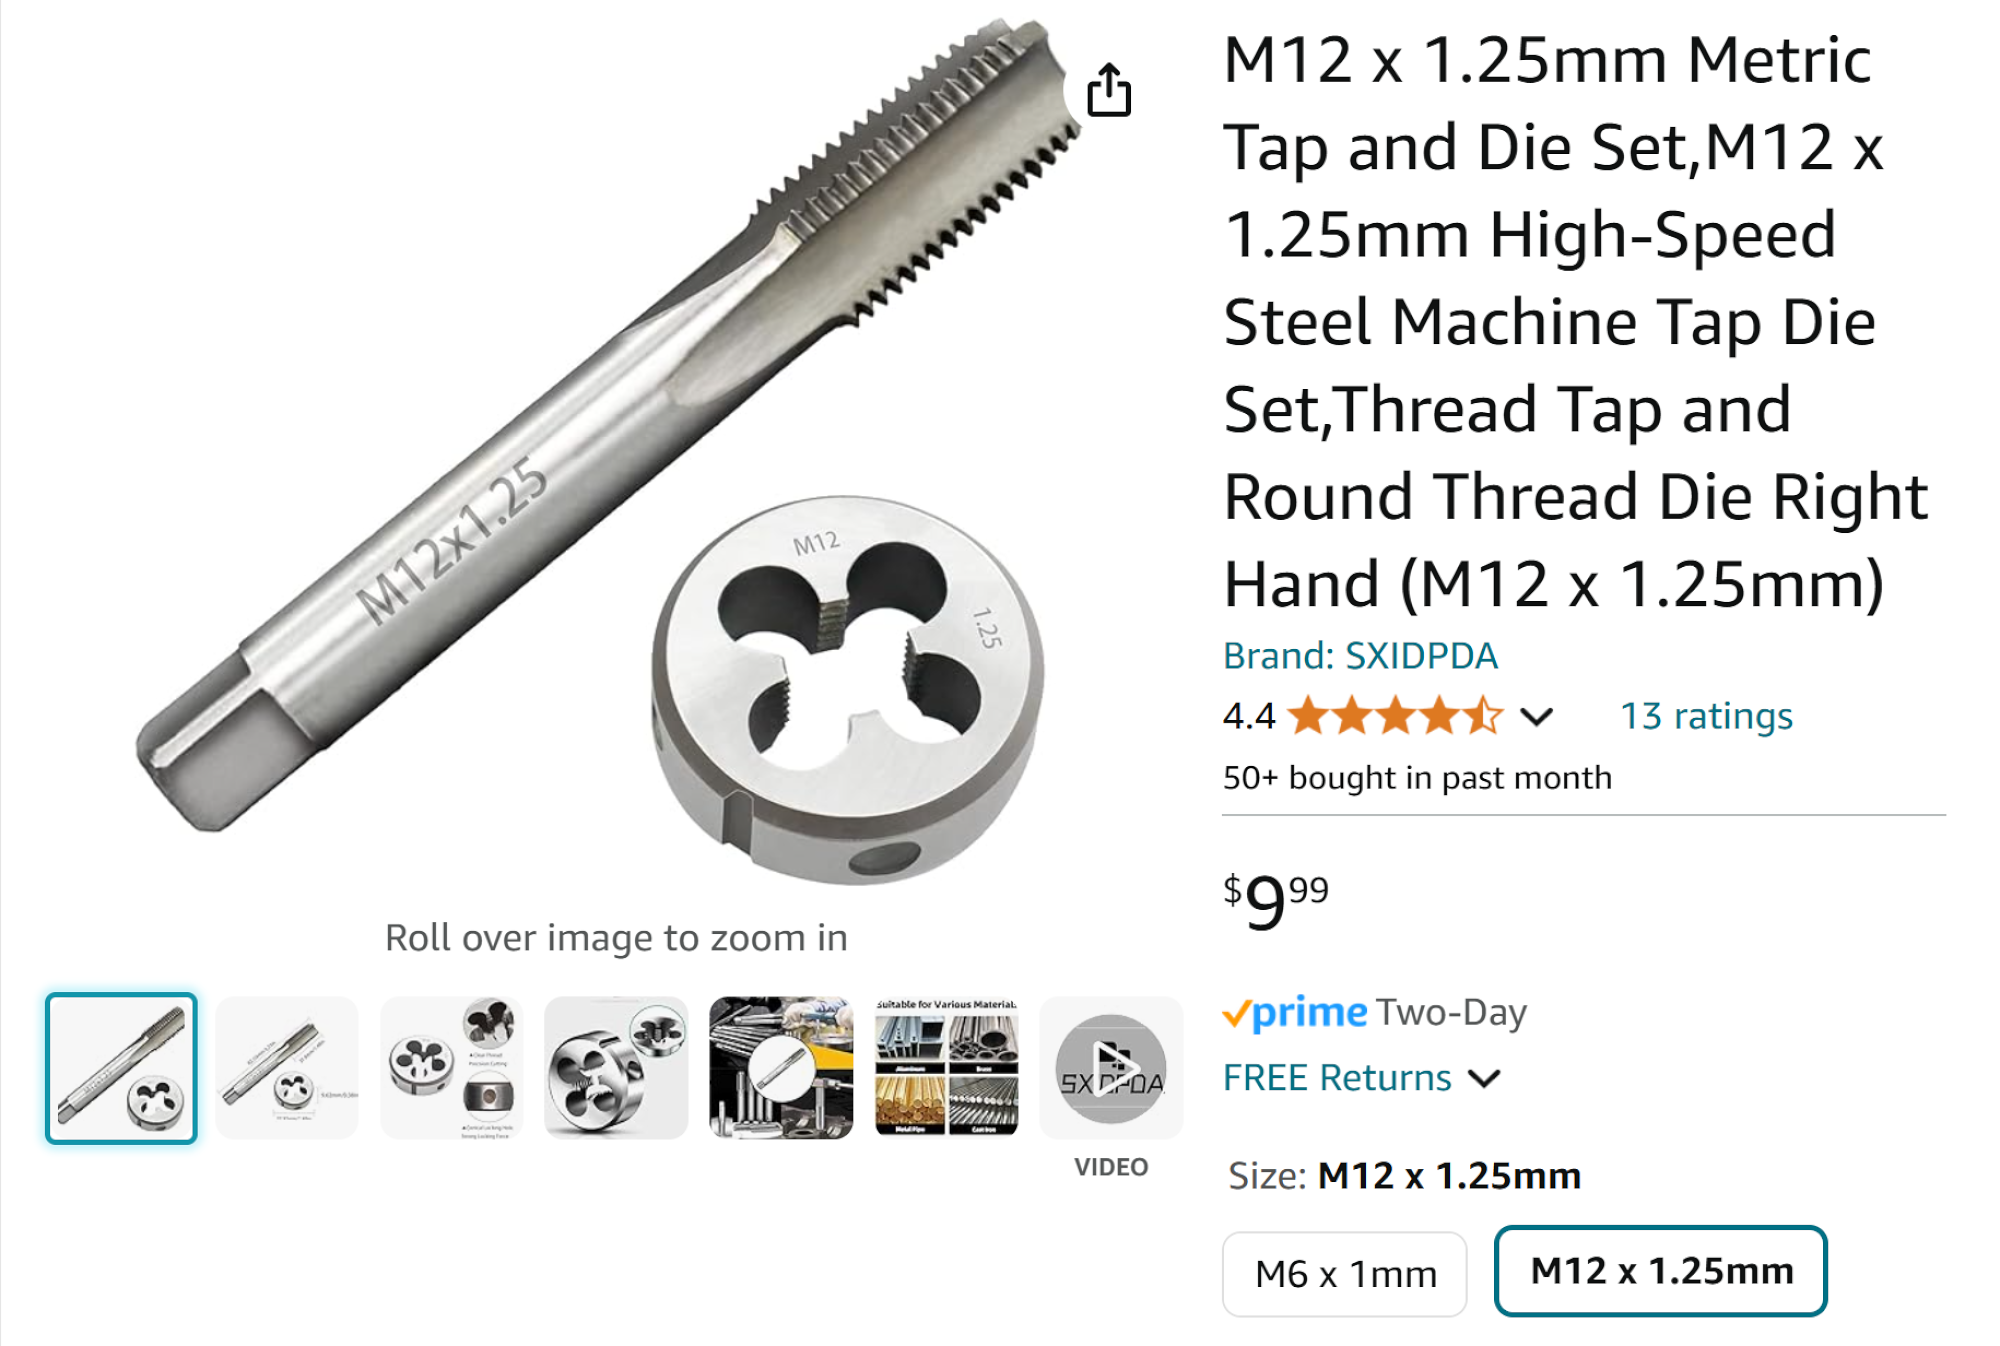
Der Gewindeschneider hat überlappende Gewindegänge:
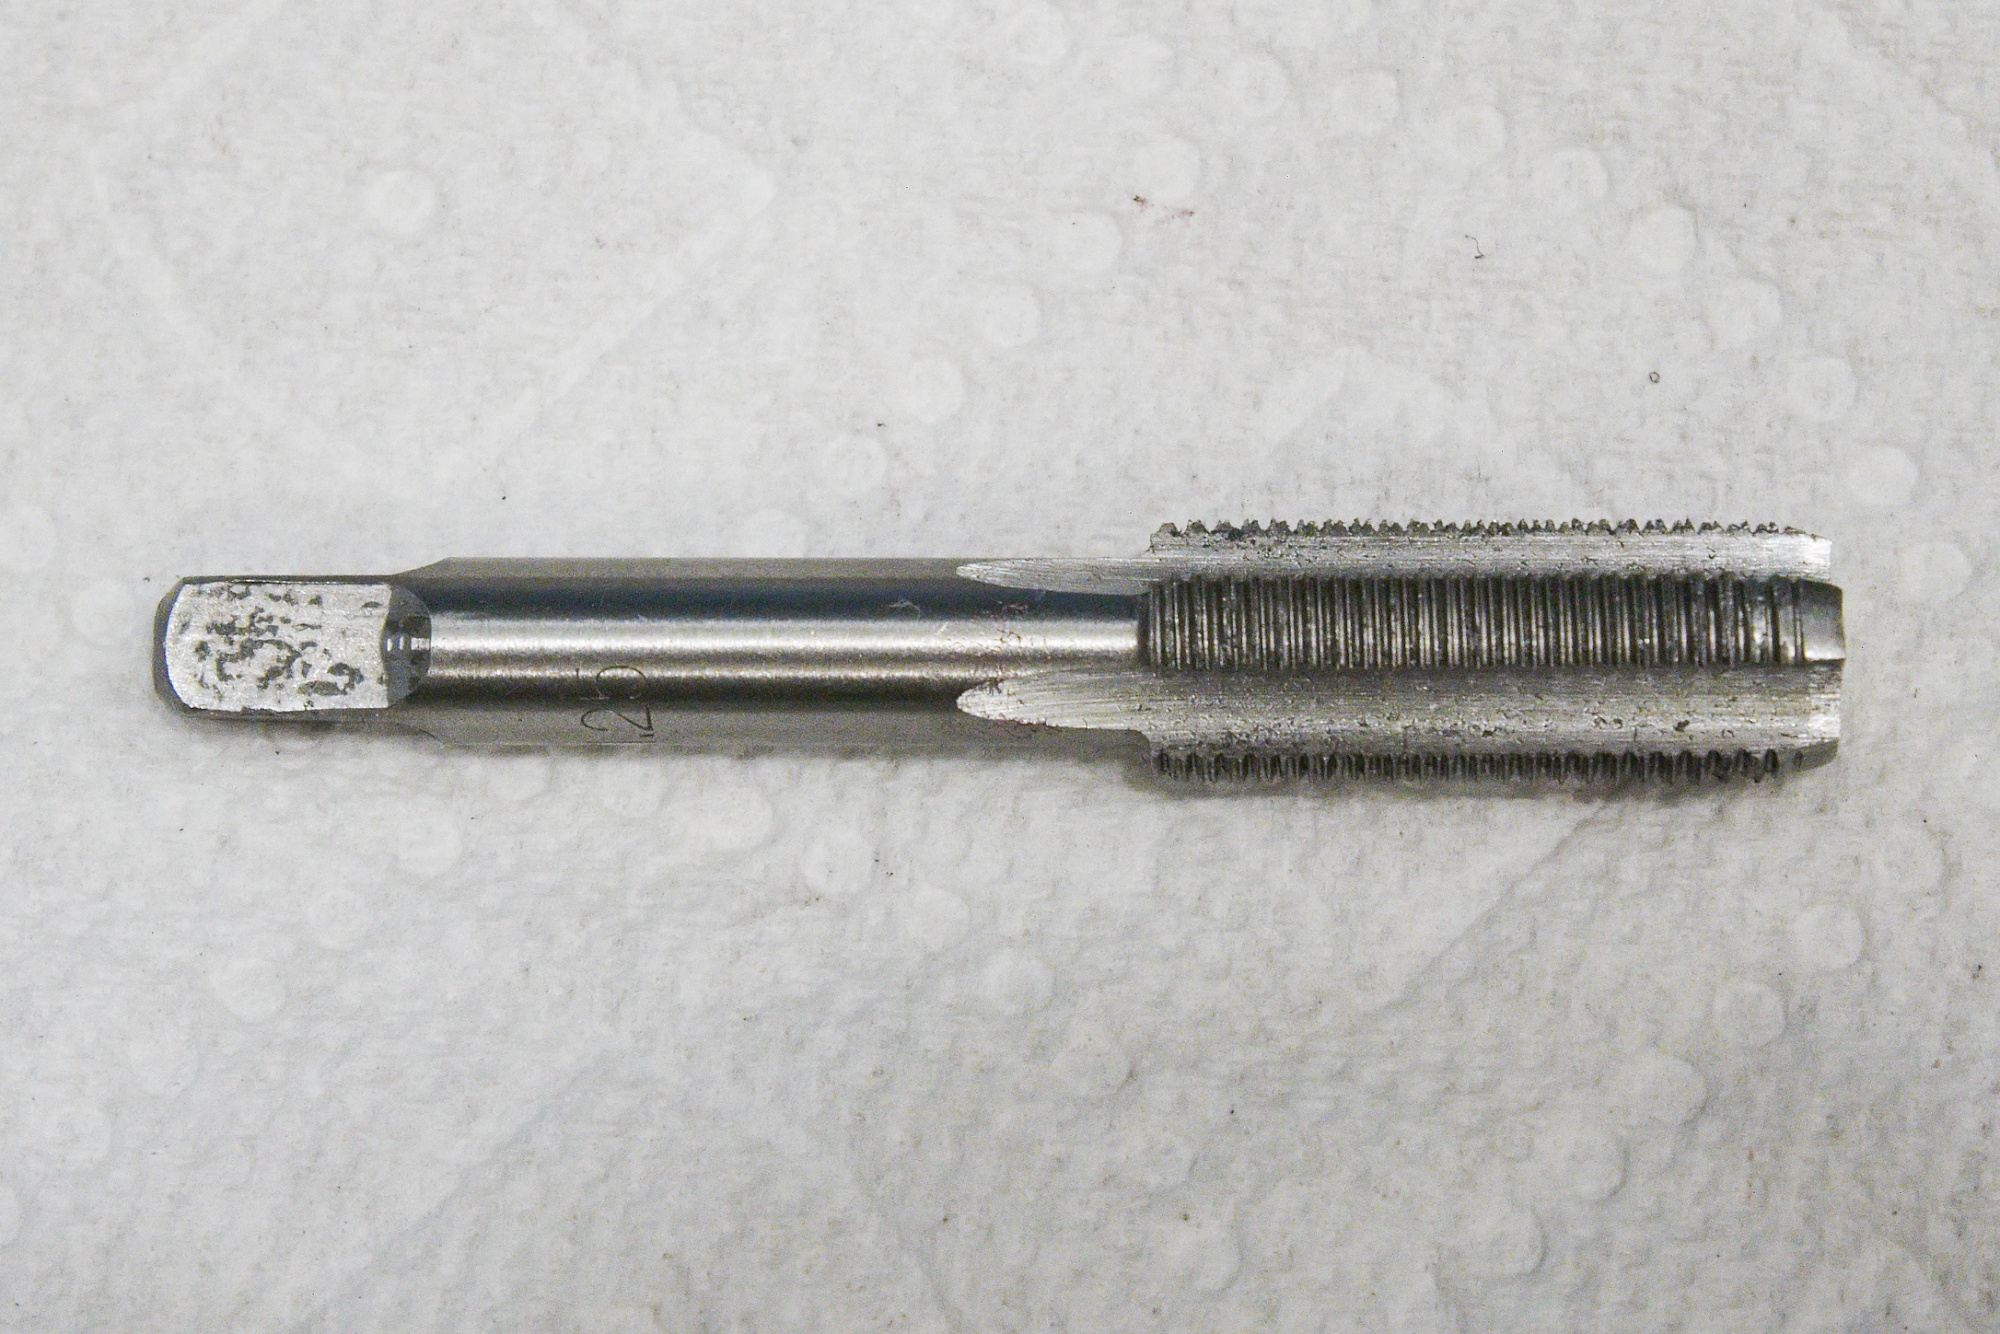
Also nochmal neu:
Die Kontermutter wird nur ganz leicht angezogen damit etwas Lagerspiel bleibt.
Die leichte Verdickung an der rechten Bildseite ist für die Dichtungspassung. Die linksseitige Dichtungspassung ist mit 16,8mm ein Stück größer.
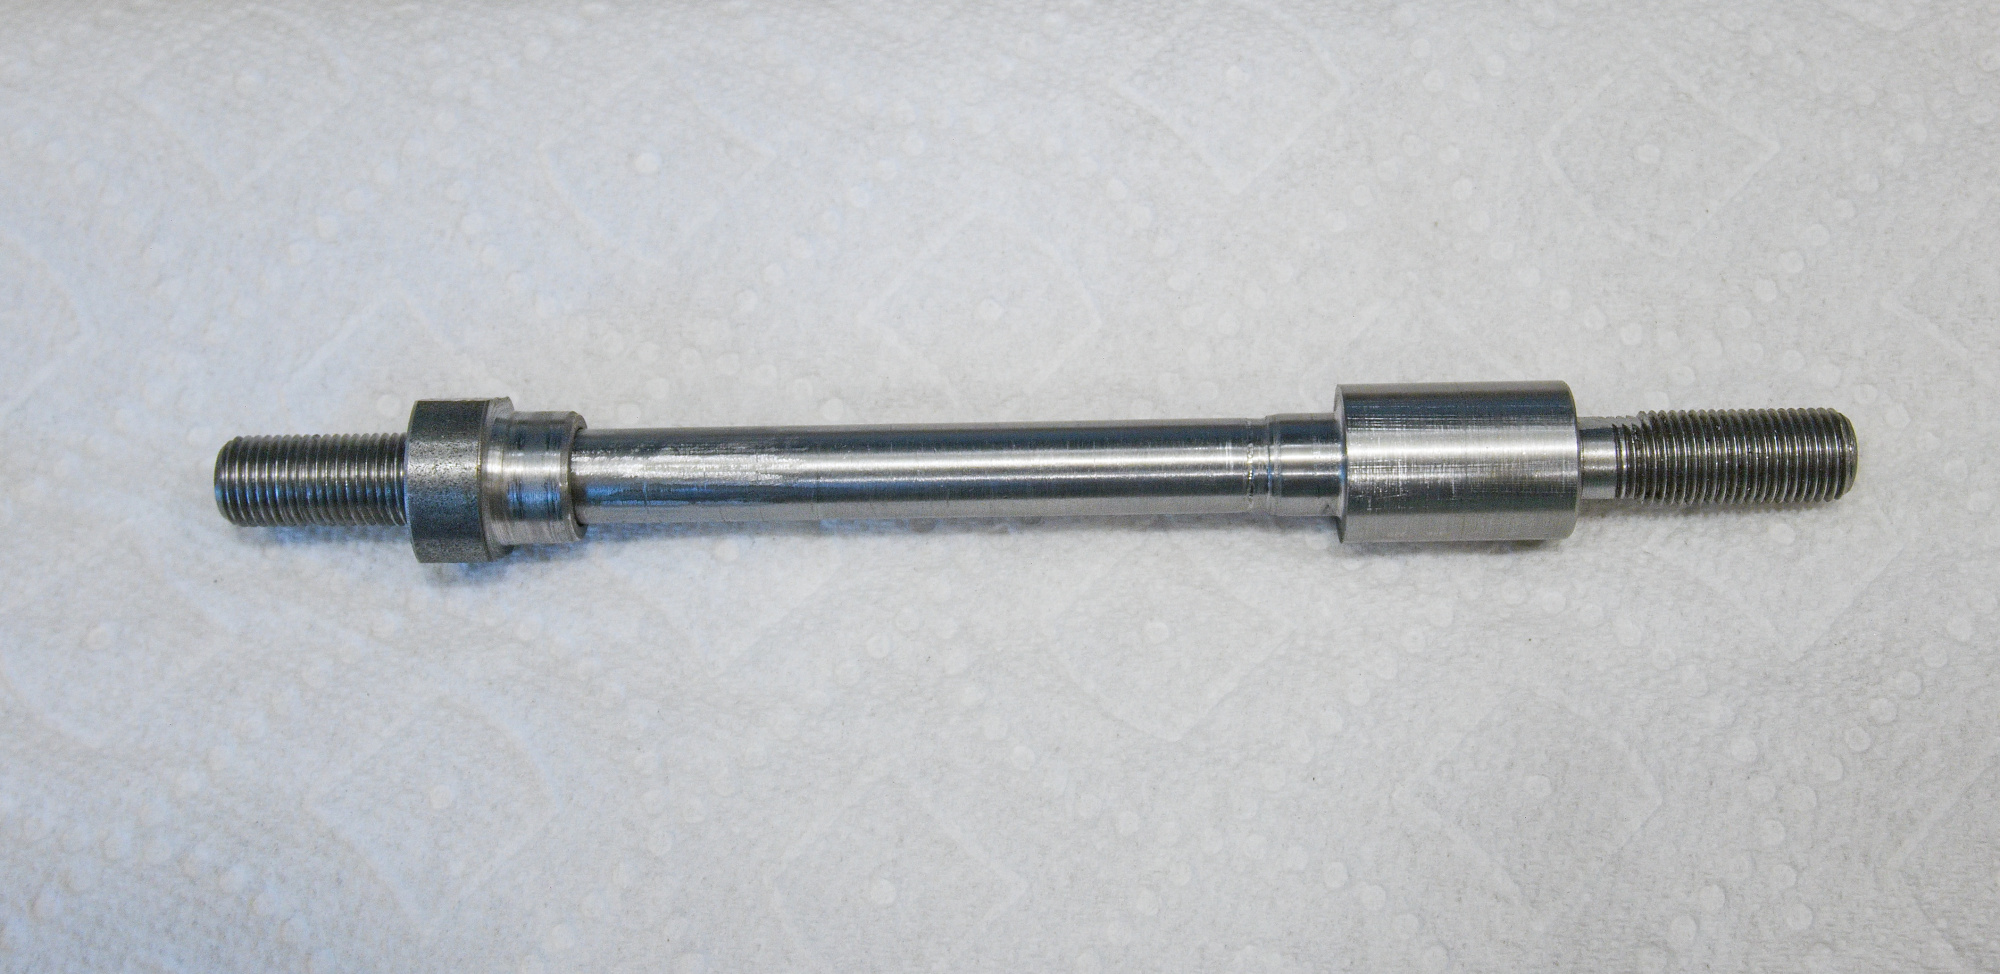
Perfekter Achssitz:

Bei der Gelegenheit habe ich auch noch das vordere Antriebszahnrad mit einer größeren Version mit 53/39 Zähnen ersetzt (130BCD 53/39T). Neue Kette ist 1/2 x 3/32". Standardkettenlänge mit 116 Gliedern muss auf 112 gekürzt werden.
Eigentlich kann jetzt nichts mehr kaputt gehen.
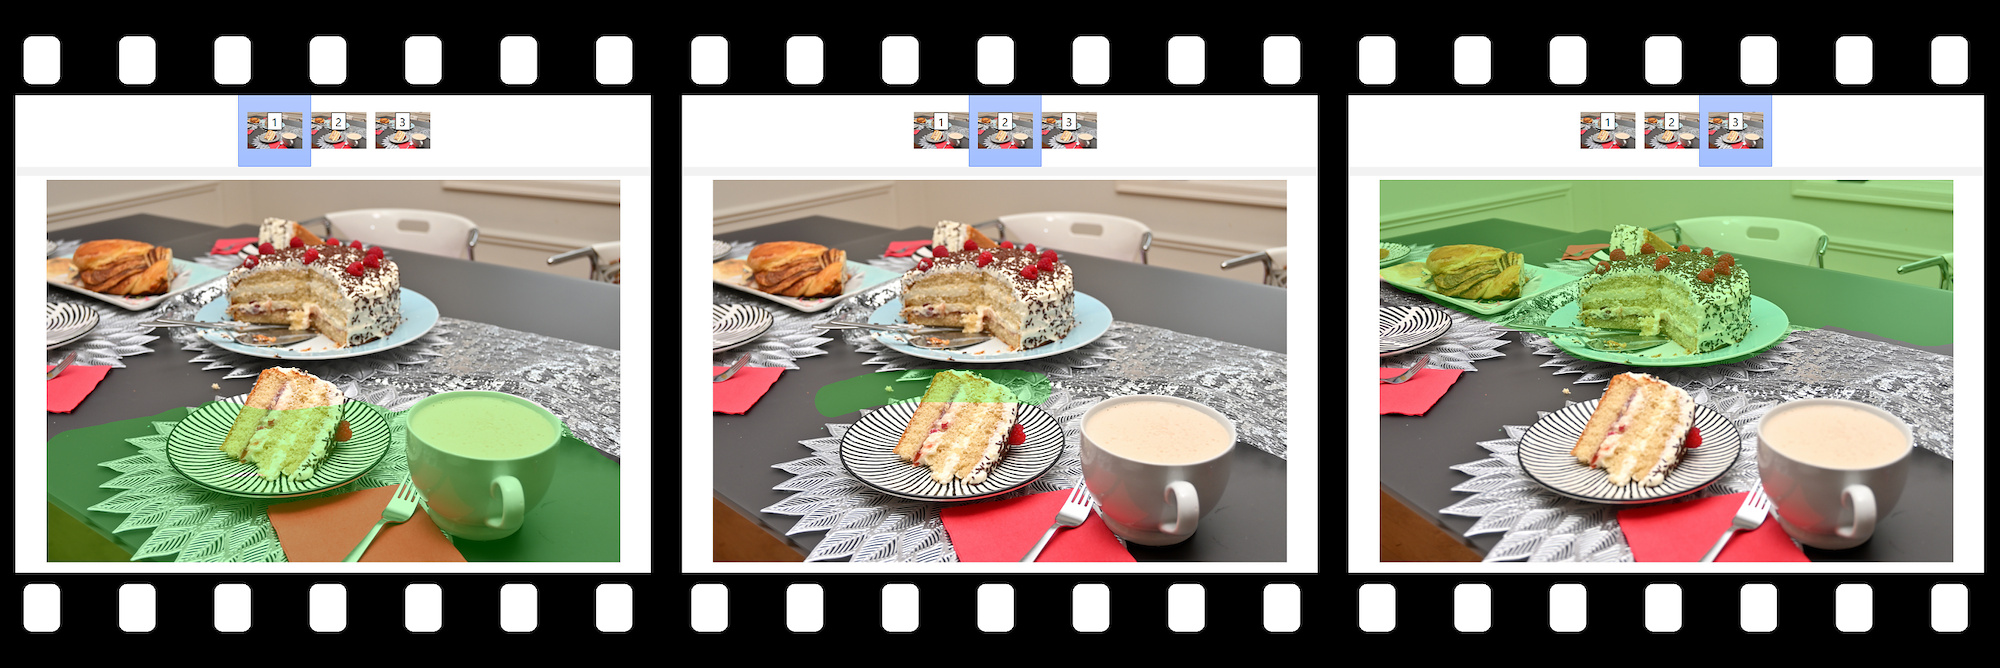
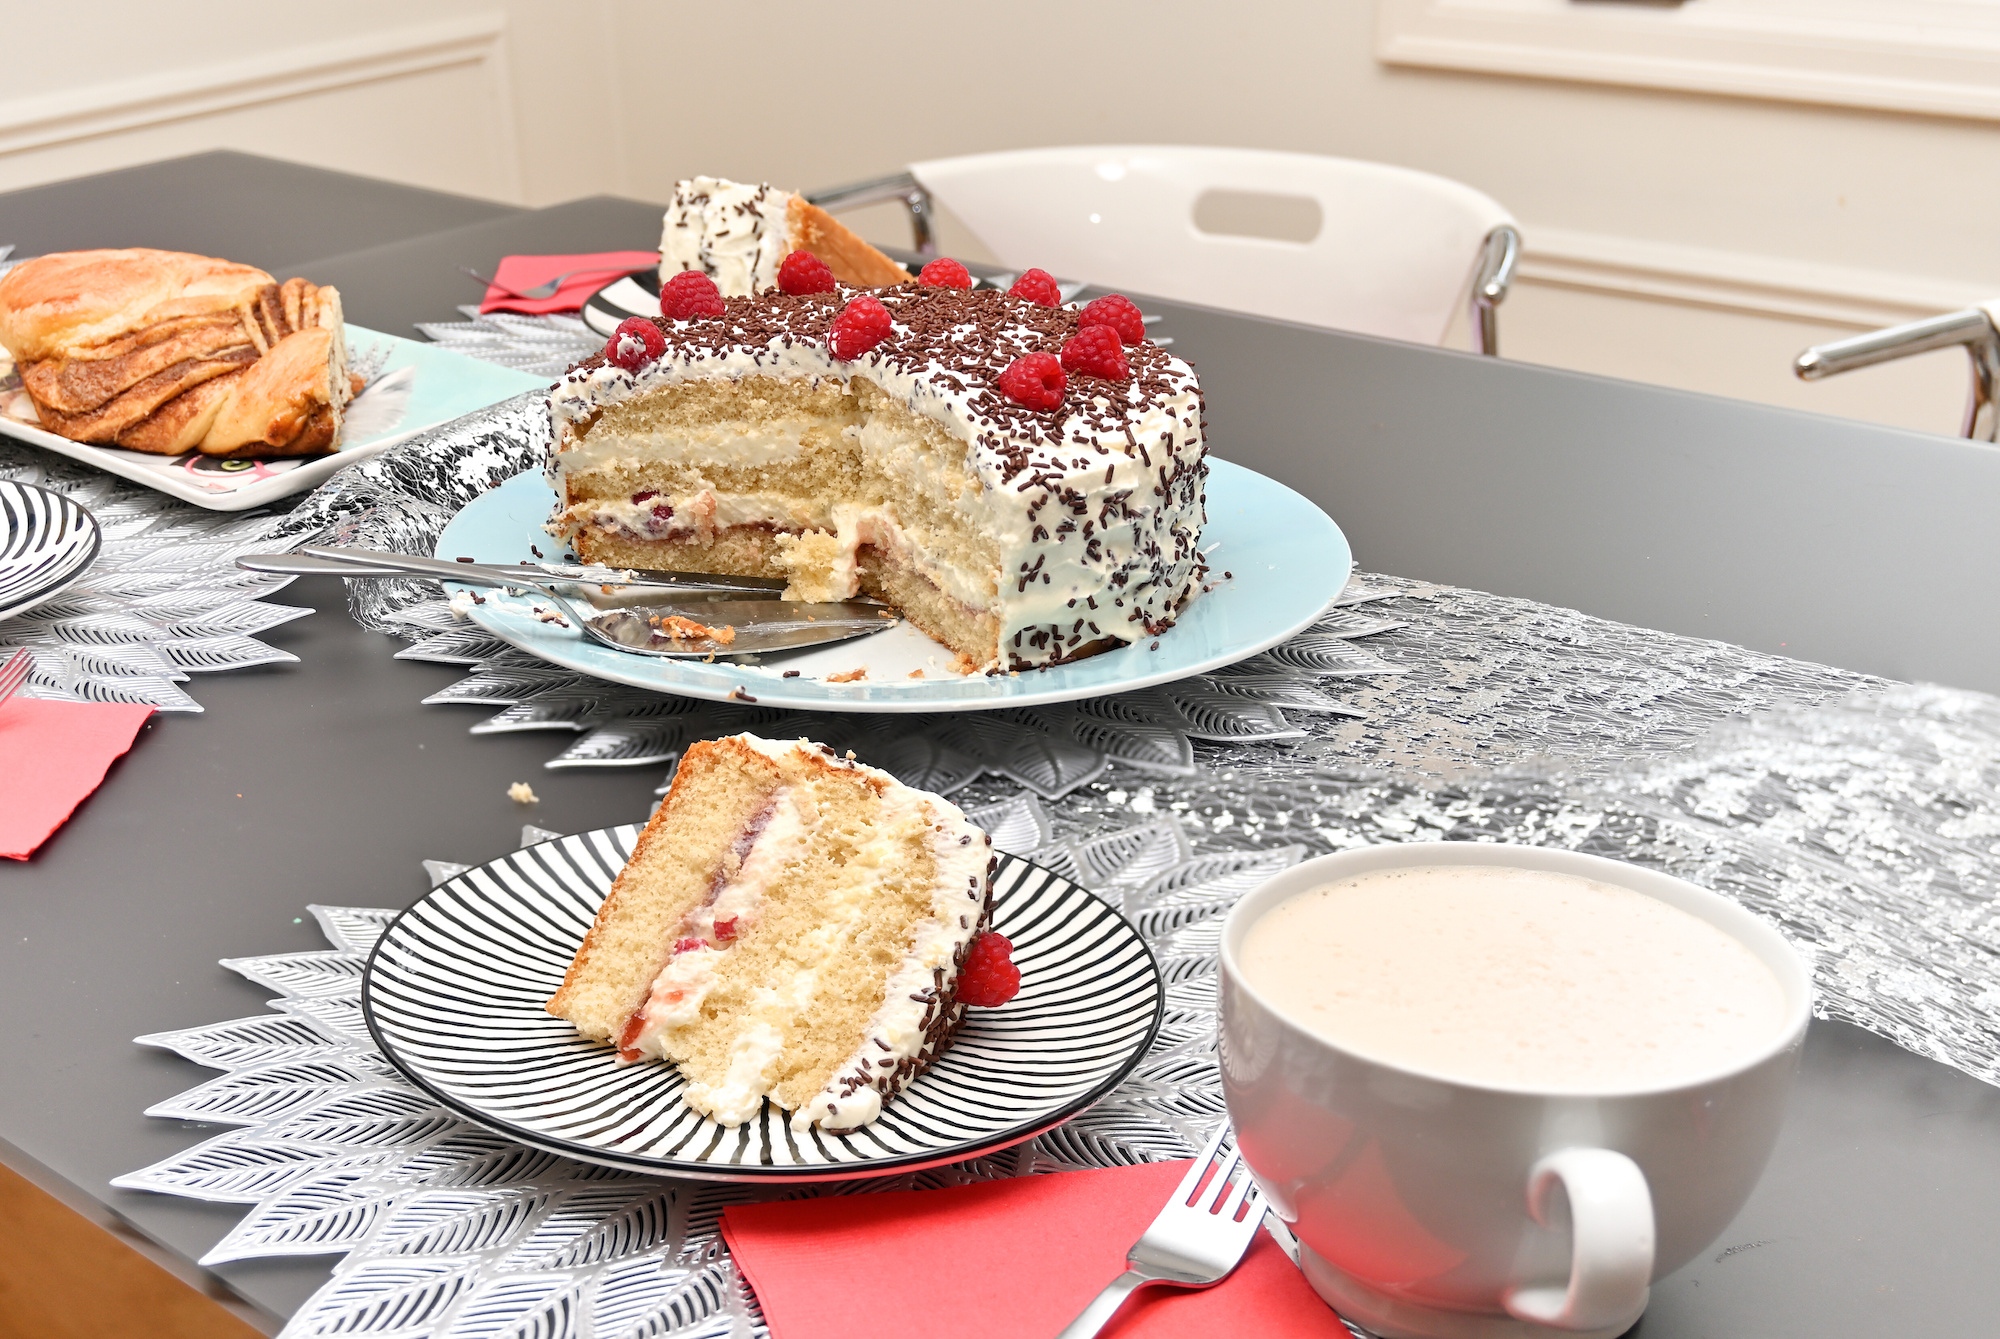
Und um die Tiefenschärfe zu erhöhen, wird das Focus-Stacking angewendet, siehe Combine pictures with PTGui, Focus stacking
Mehrere Bilder werden mit verschiedenen Fokussierungspunkten aufgenommen und kombiniert.
In PTGui werden die Masken mit den fokussierten Bereichen gemalt und dann kombiniert.