-
Silvester 2025 🎉🥂
Zwischen Rückblick und Ausblick liegt dieser Augenblick.
1/30s f/5,6 ISO 800/30° 16-50mm f/2,8 VR f=50mm/75mm
1/125s f/2,8 ISO 2800 16-50mm f/2,8 VR f=33mm/49mm
1/30s f/5,6 ISO 3200/36° 16-50mm f/2,8 VR f=33mm/49mm
-
Sommerzeit-EXIF automatisch korrigieren mit PowerShell
Ein häufiges Problem bei Digitalkameras: Die Sommerzeit ist noch in der Kamera aktiviert, obwohl bereits Winterzeit ist. Die Zeitstempel in den Fotos sind dadurch eine Stunde falsch und das fällt oft erst später auf, wenn man die Bilder sortiert oder mit anderen Fotos abgleicht.
Viele Kameras speichern die Sommerzeit-Einstellung in den EXIF-Daten. Bei Nikon-Kameras findet sich das "Daylight Savings"-Flag in den MakerNotes. Solange dieses auf "Yes" steht, sind die Zeitstempel um eine Stunde vorgestellt.
Das PowerShell-Script durchsucht alle Bilddateien (z.B. NEF bei Nikon), prüft ob das Sommerzeit-Flag noch aktiv ist, und korrigiert dann:
Die EXIF-Zeitstempel werden um 1 Stunde zurückgestellt Das Sommerzeit-Flag wird deaktiviert Die Windows-Datei-Zeitstempel (Erstellt/Geändert) werden angepasst.
Das Script nutzt das kostenlose Tool exiftool und zeigt für jede Datei übersichtlich an, was geändert wurde. Dateien mit bereits korrekter Zeit werden einfach übersprungen.Der exiftool-Pfad ist oben im Script konfigurierbar. Einfach das Script im Foto-Ordner ausführen. Unterordner werden automatisch durchsucht.
Das Ergebnis: Konsistente, korrekte Zeitstempel in allen Fotos, ohne manuelle Arbeit.
# PowerShell Script zur Korrektur der Sommerzeit in NEF-Dateien # Stellt die EXIF-Zeit um eine Stunde vor für Dateien, die Sommerzeit in Nikon MakerNotes haben # Testaufruf um DaylightSavings auszulesen: # C:\tools\exiftool -DaylightSavings DSC_1234.NEF # Daylight Savings : No # ===== KONFIGURATION ===== $exiftoolPath = "C:\tools\exiftool" # ========================= # Pfad zum aktuellen Verzeichnis $baseDir = $PSScriptRoot # Alle NEF-Dateien finden $nefFiles = Get-ChildItem -Path $baseDir -Recurse -Filter "*.NEF" Write-Host "Gefundene NEF-Dateien: $($nefFiles.Count)" -ForegroundColor Cyan $correctedCount = 0 $skippedCount = 0 foreach ($file in $nefFiles) { Write-Host "`nPrüfe: $($file.FullName)" -ForegroundColor Yellow try { # Lese Nikon Daylight Savings Flag aus MakerNotes $daylightSavings = & $exiftoolPath -s -s -s -DaylightSavings $file.FullName 2>&1 if ($LASTEXITCODE -ne 0) { Write-Host "⚠ Konnte MakerNotes nicht lesen" -ForegroundColor DarkYellow $skippedCount++ continue } Write-Host "Daylight Savings: $daylightSavings" -ForegroundColor Cyan # Prüfe, ob Sommerzeit aktiviert ist (Yes oder On) if ($daylightSavings -match "Yes|On") { Write-Host "→ Sommerzeit ist aktiviert - Korrektur erforderlich" -ForegroundColor Magenta # Zeige aktuelle Zeit $currentTime = & $exiftoolPath -s -s -s -DateTimeOriginal $file.FullName Write-Host "Aktuelle Zeit: $currentTime" -ForegroundColor White # Stellt die Zeit um 1 Stunde zurück (-1 Stunde) # -AllDates betrifft DateTimeOriginal, CreateDate und ModifyDate Write-Host "Stelle Zeit um 1 Stunde zurück und setze Sommerzeit zurück..." -ForegroundColor Magenta & $exiftoolPath -AllDates-=1:0:0 -DaylightSavings=No -overwrite_original $file.FullName 2>&1 | Out-Null if ($LASTEXITCODE -eq 0) { $newTime = & $exiftoolPath -s -s -s -DateTimeOriginal $file.FullName $newDST = & $exiftoolPath -s -s -s -DaylightSavings $file.FullName Write-Host "✓ Erfolgreich aktualisiert: $newTime" -ForegroundColor Green Write-Host " Sommerzeit jetzt: $newDST" -ForegroundColor Green # Setze Windows-Datei-Zeitstempel auf korrigierte EXIF-Zeit try { $exifDateTime = [DateTime]::ParseExact($newTime, "yyyy:MM:dd HH:mm:ss", $null) $file.CreationTime = $exifDateTime $file.LastWriteTime = $exifDateTime Write-Host " Datei-Zeitstempel aktualisiert" -ForegroundColor Green } catch { Write-Host " ⚠ Konnte Datei-Zeitstempel nicht setzen: $_" -ForegroundColor DarkYellow } $correctedCount++ } else { Write-Host "✗ Fehler beim Aktualisieren" -ForegroundColor Red } <# #> } else { Write-Host "→ Keine Sommerzeit - wird übersprungen" -ForegroundColor Gray $skippedCount++ } } catch { Write-Host "✗ Fehler: $_" -ForegroundColor Red Write-Host "Stelle sicher, dass exiftool installiert ist und im PATH verfügbar ist." -ForegroundColor Yellow break } } Write-Host "`n=== Fertig ===" -ForegroundColor Cyan Write-Host "Korrigierte Dateien: $correctedCount" -ForegroundColor Green Write-Host "Übersprungene Dateien: $skippedCount" -ForegroundColor Gray Write-Host "Gesamt geprüft: $($nefFiles.Count)" -ForegroundColor Cyan -
Building an MCP Server on ESP32: Connecting AI Assistants to Real-World Devices
Connecting AI to the Physical World with Model Context Protocol
As detailed in StickyMCP: Notes That Stick, Even in the Cloud, MCP servers open the door for AI systems to interact with real-world tools far beyond their usual diet of static training data and existential boredom.
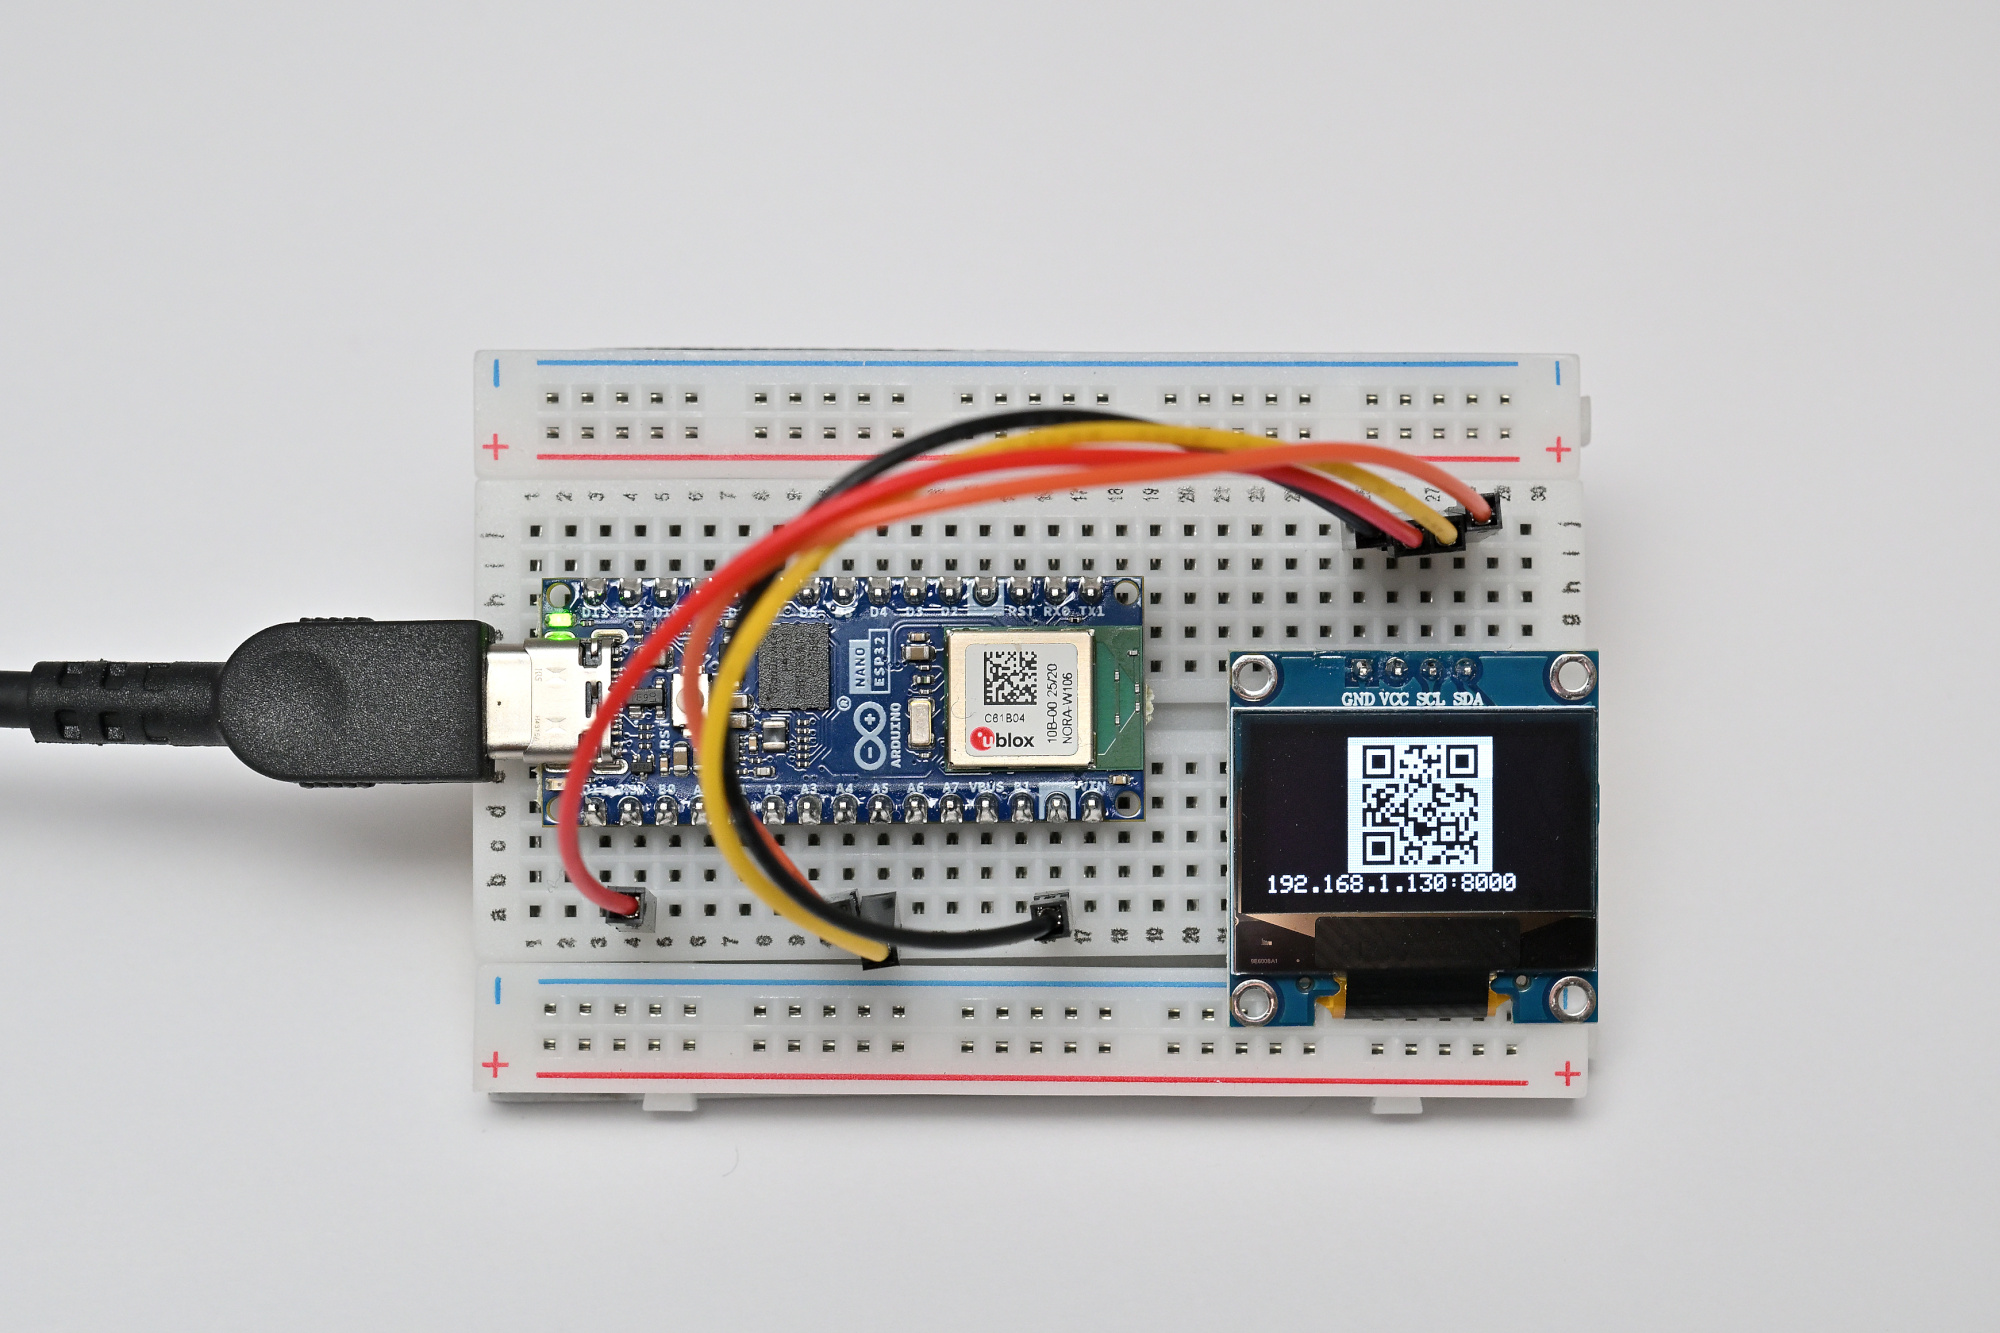
This project brings together two cutting-edge technologies: the Model Context Protocol (MCP) and Arduino Microcontroller. The result is an MCP server running directly on an Arduino Nano ESP32, allowing AI assistants control physical hardware in real-time.
(Some prompts were typed a bit wrong because I had the camera in the way, but Copilot Chat did not mind at all)
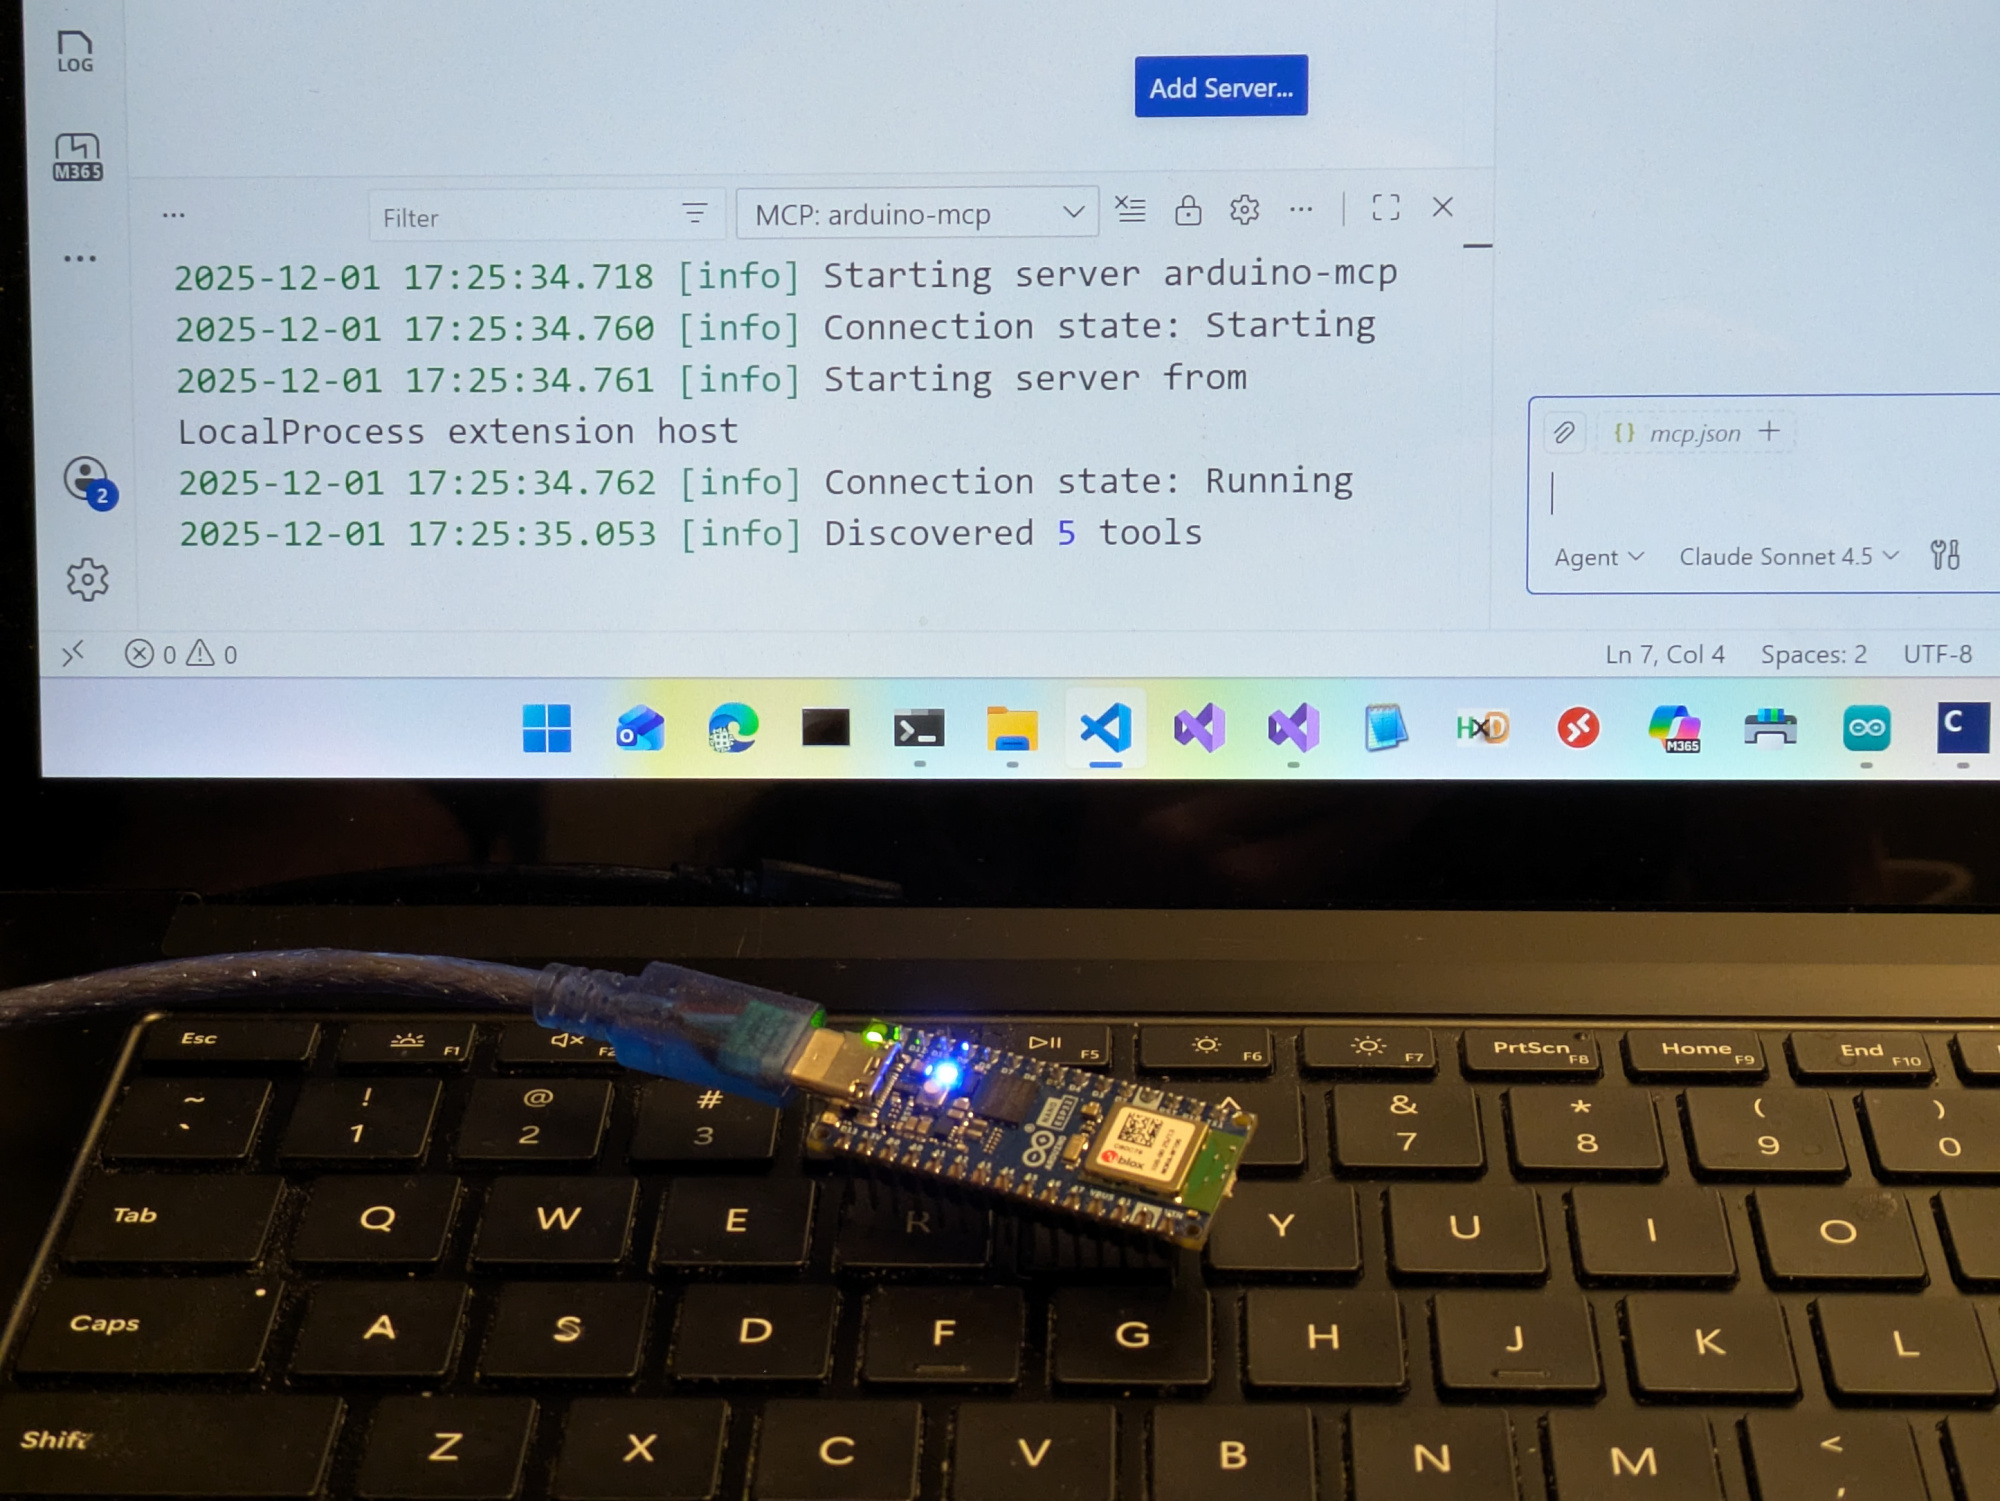
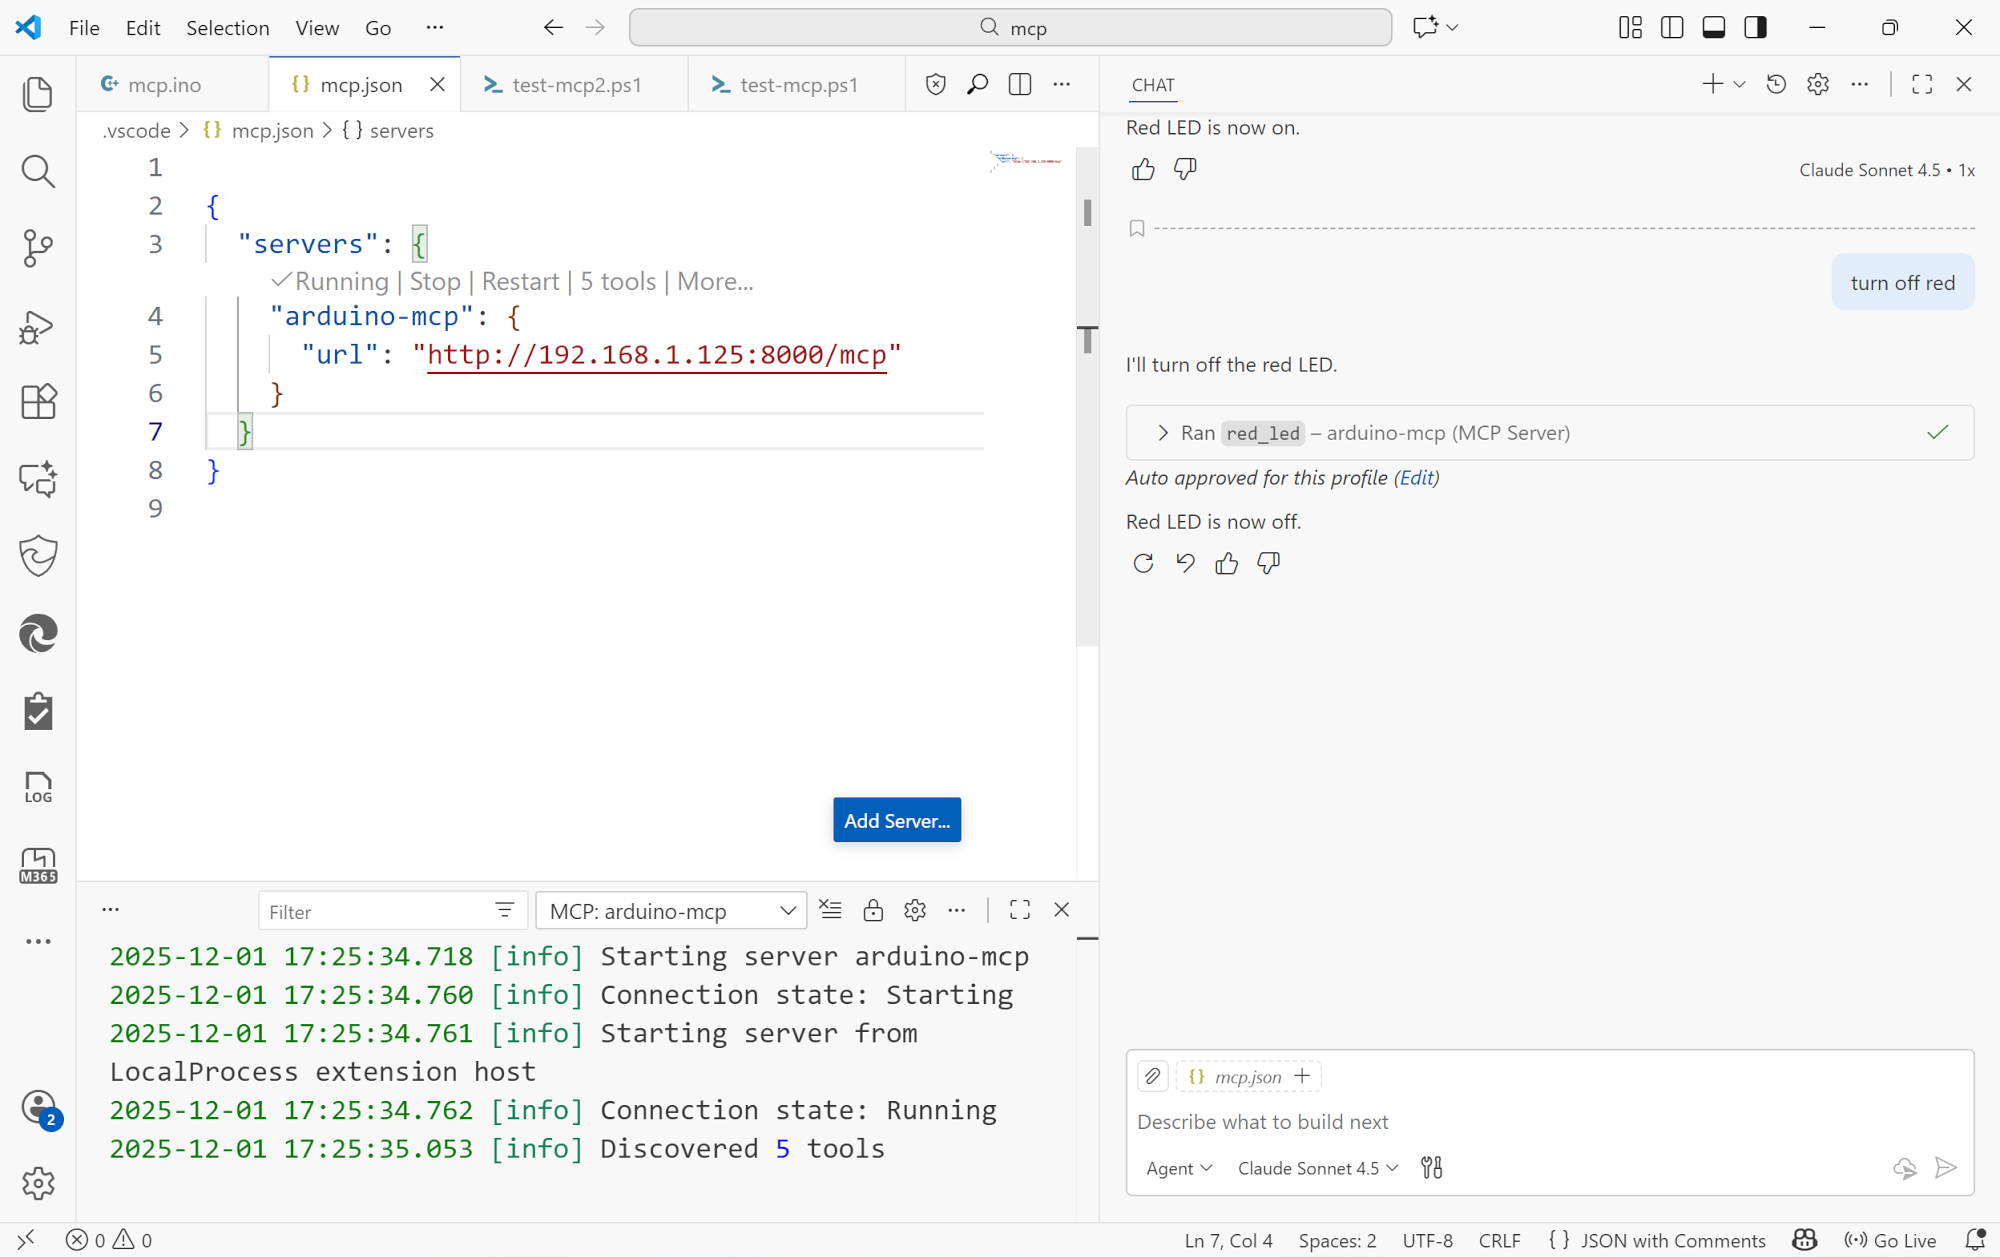
Since no official C++ MCP SDK exists, I built one optimized for embedded systems. Features automatic JSON schema generation, registry-based tool discovery, and memory-safe execution. Architecture mirrors official SDKs (TypeScript/Python) while addressing embedded constraints. Demonstrates full MCP protocol compliance with hardware control tools. I kept it small and readable, and made it work to run simple tools like switching lights on and off.
What is it?
This project implements a fully-compliant JSON-RPC 2.0 MCP server on an Arduino Nano ESP32 microcontroller. It exposes hardware controls (LEDs in this case) as MCP "tools" that can be invoked by AI assistants through natural language commands.
Key Features
- MCP Protocol Support: Implements the MCP 2024-11-05 specification with proper initialization, tool listing, and tool execution
- JSON-RPC 2.0 Compliance: Standard protocol interface for reliable communication
- WiFi-Enabled: Runs a web server on port 8000, making it accessible over the network
- Server-Sent Events (SSE): Real-time notifications and logging stream for monitoring
- Multiple LED Controls: Manages built-in LED plus RGB LEDs (red, green, blue) independently
- Echo Tool: Simple text echo for testing and demonstration
Technical Implementation
The server uses the ESPAsyncWebServer library for handling HTTP requests and ArduinoJson for JSON parsing/serialization. It exposes two main endpoints:
POST /mcp- Main JSON-RPC 2.0 endpoint for all MCP methodsGET /sse- Server-Sent Events stream for real-time notifications
Each LED is implemented as an MCP tool with a simple boolean parameter to turn it on or off. The server handles all the MCP lifecycle methods including initialization, capability negotiation, and tool invocation.
Real-World Applications
This project demonstrates how AI assistants can seamlessly control physical devices. Instead of writing custom scripts or manual API calls, you can simply tell an AI assistant "turn on the red LED" and it happens. This opens up possibilities for:
- Smart home automation controlled by natural language
- Laboratory equipment control through AI assistants
- Educational demonstrations of AI-hardware integration
- Rapid prototyping of IoT devices with conversational interfaces
Technical Stack:
- Arduino Nano ESP32
- ESPAsyncWebServer
- ArduinoJson
- Model Context Protocol (MCP) 2024-11-05
- JSON-RPC 2.0
-
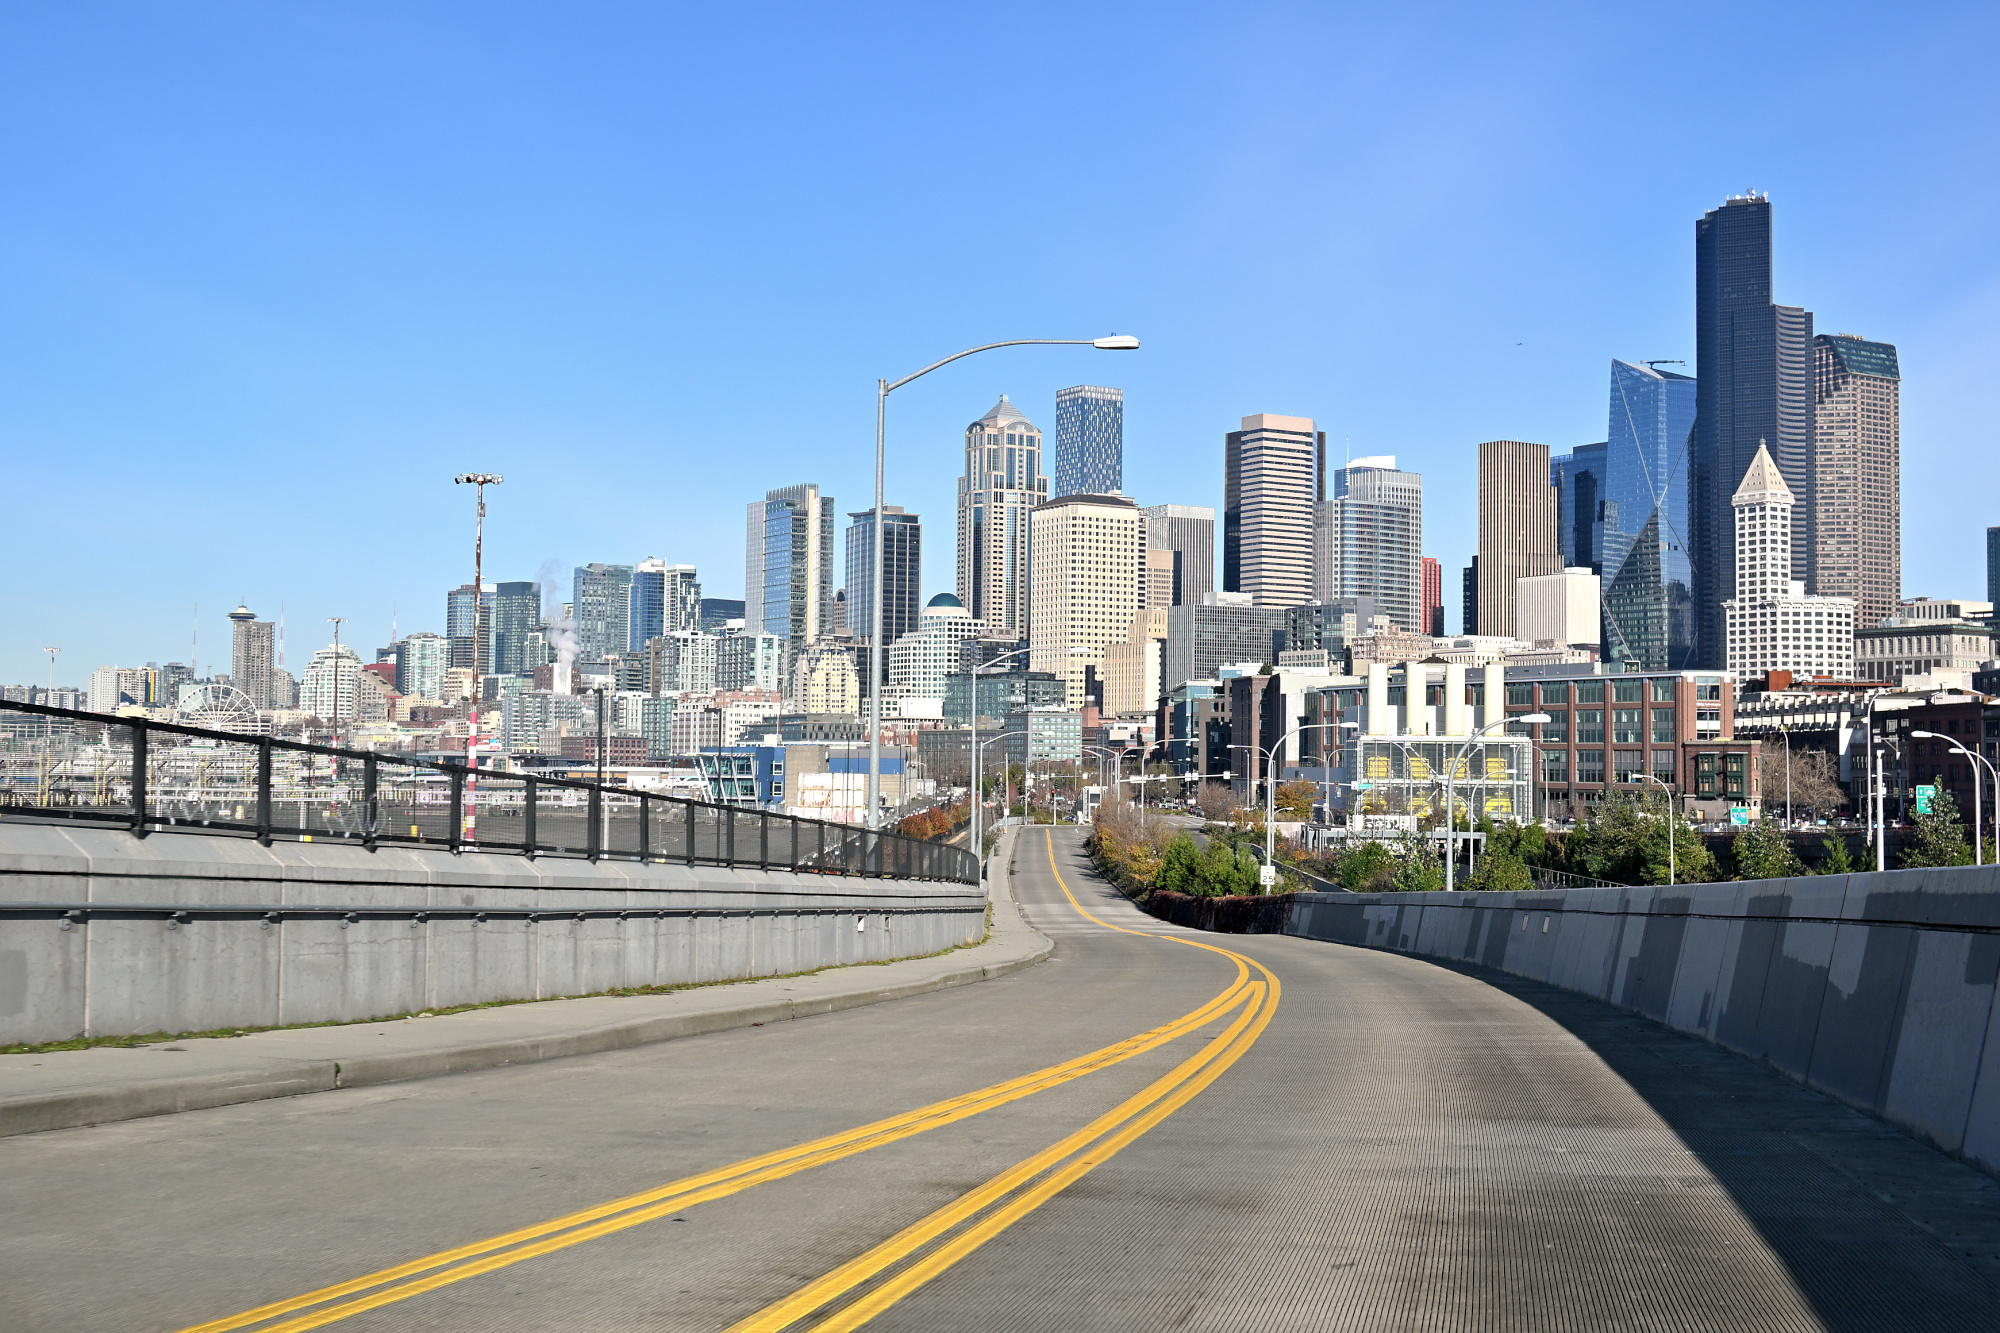
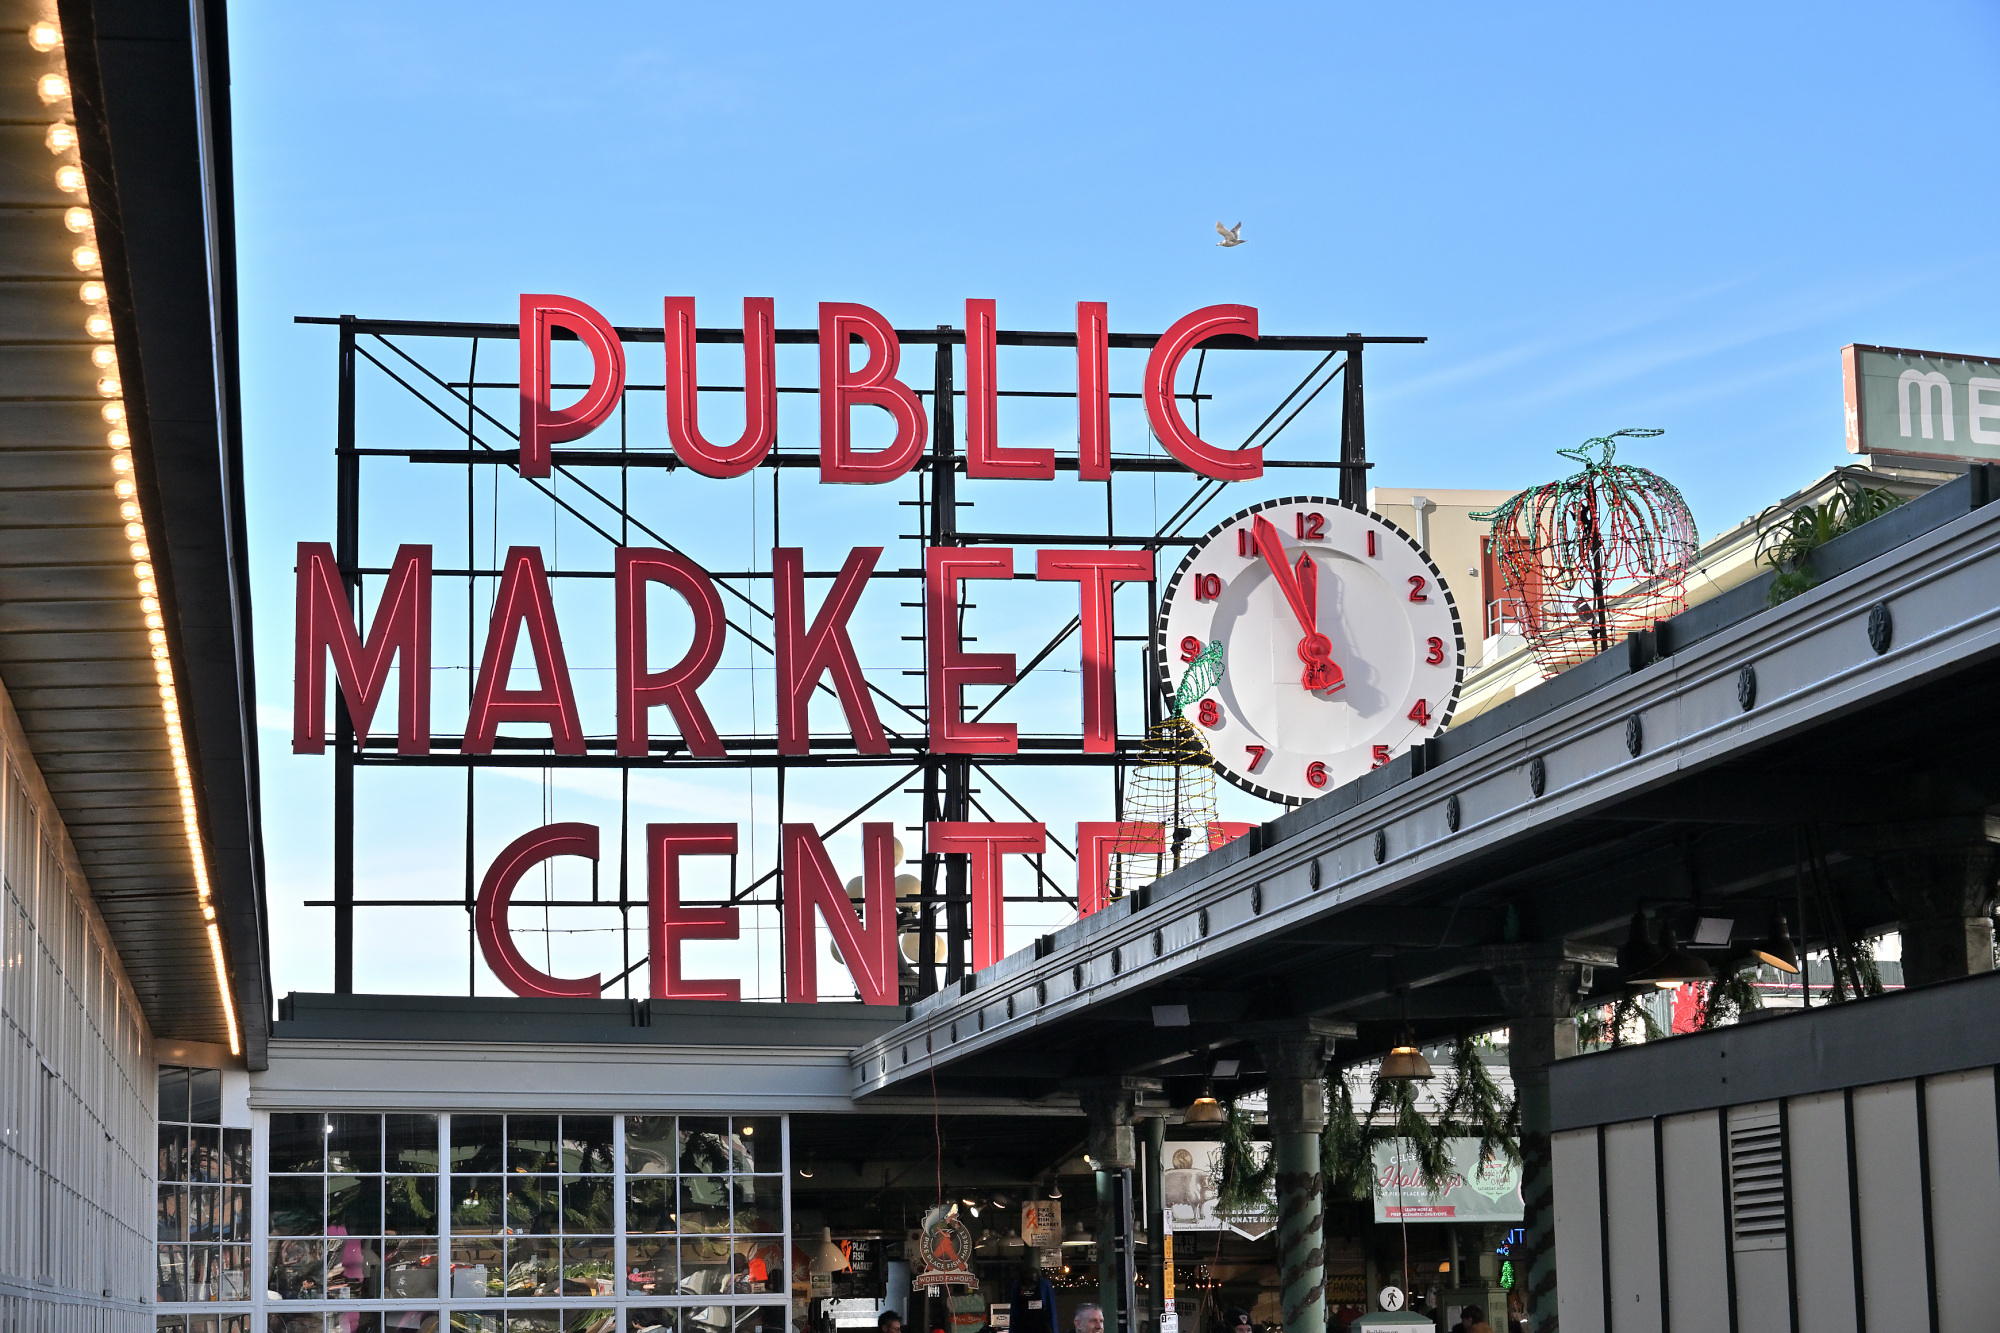
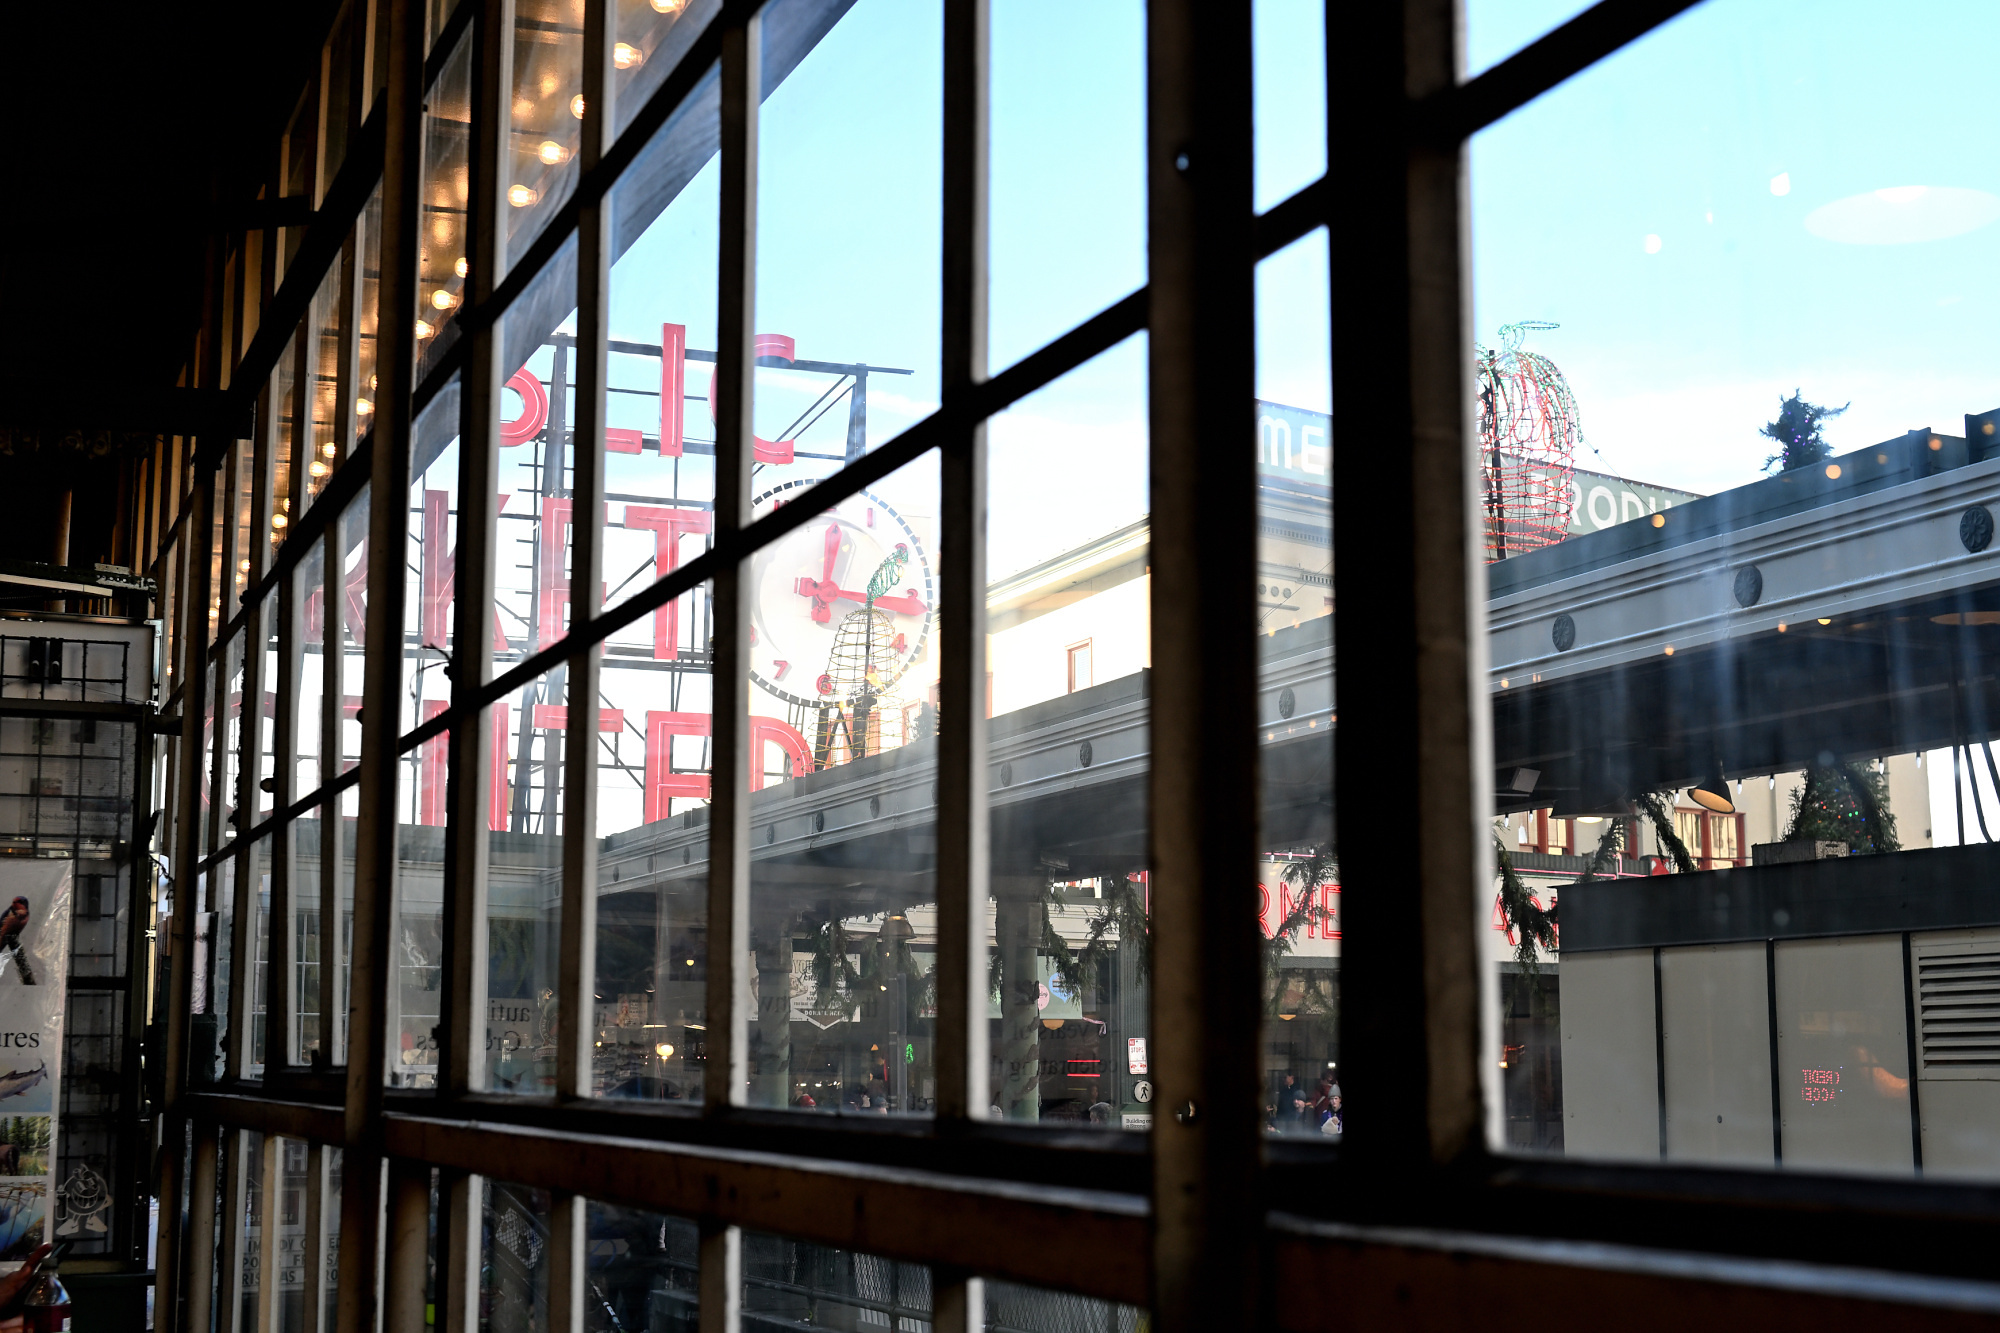
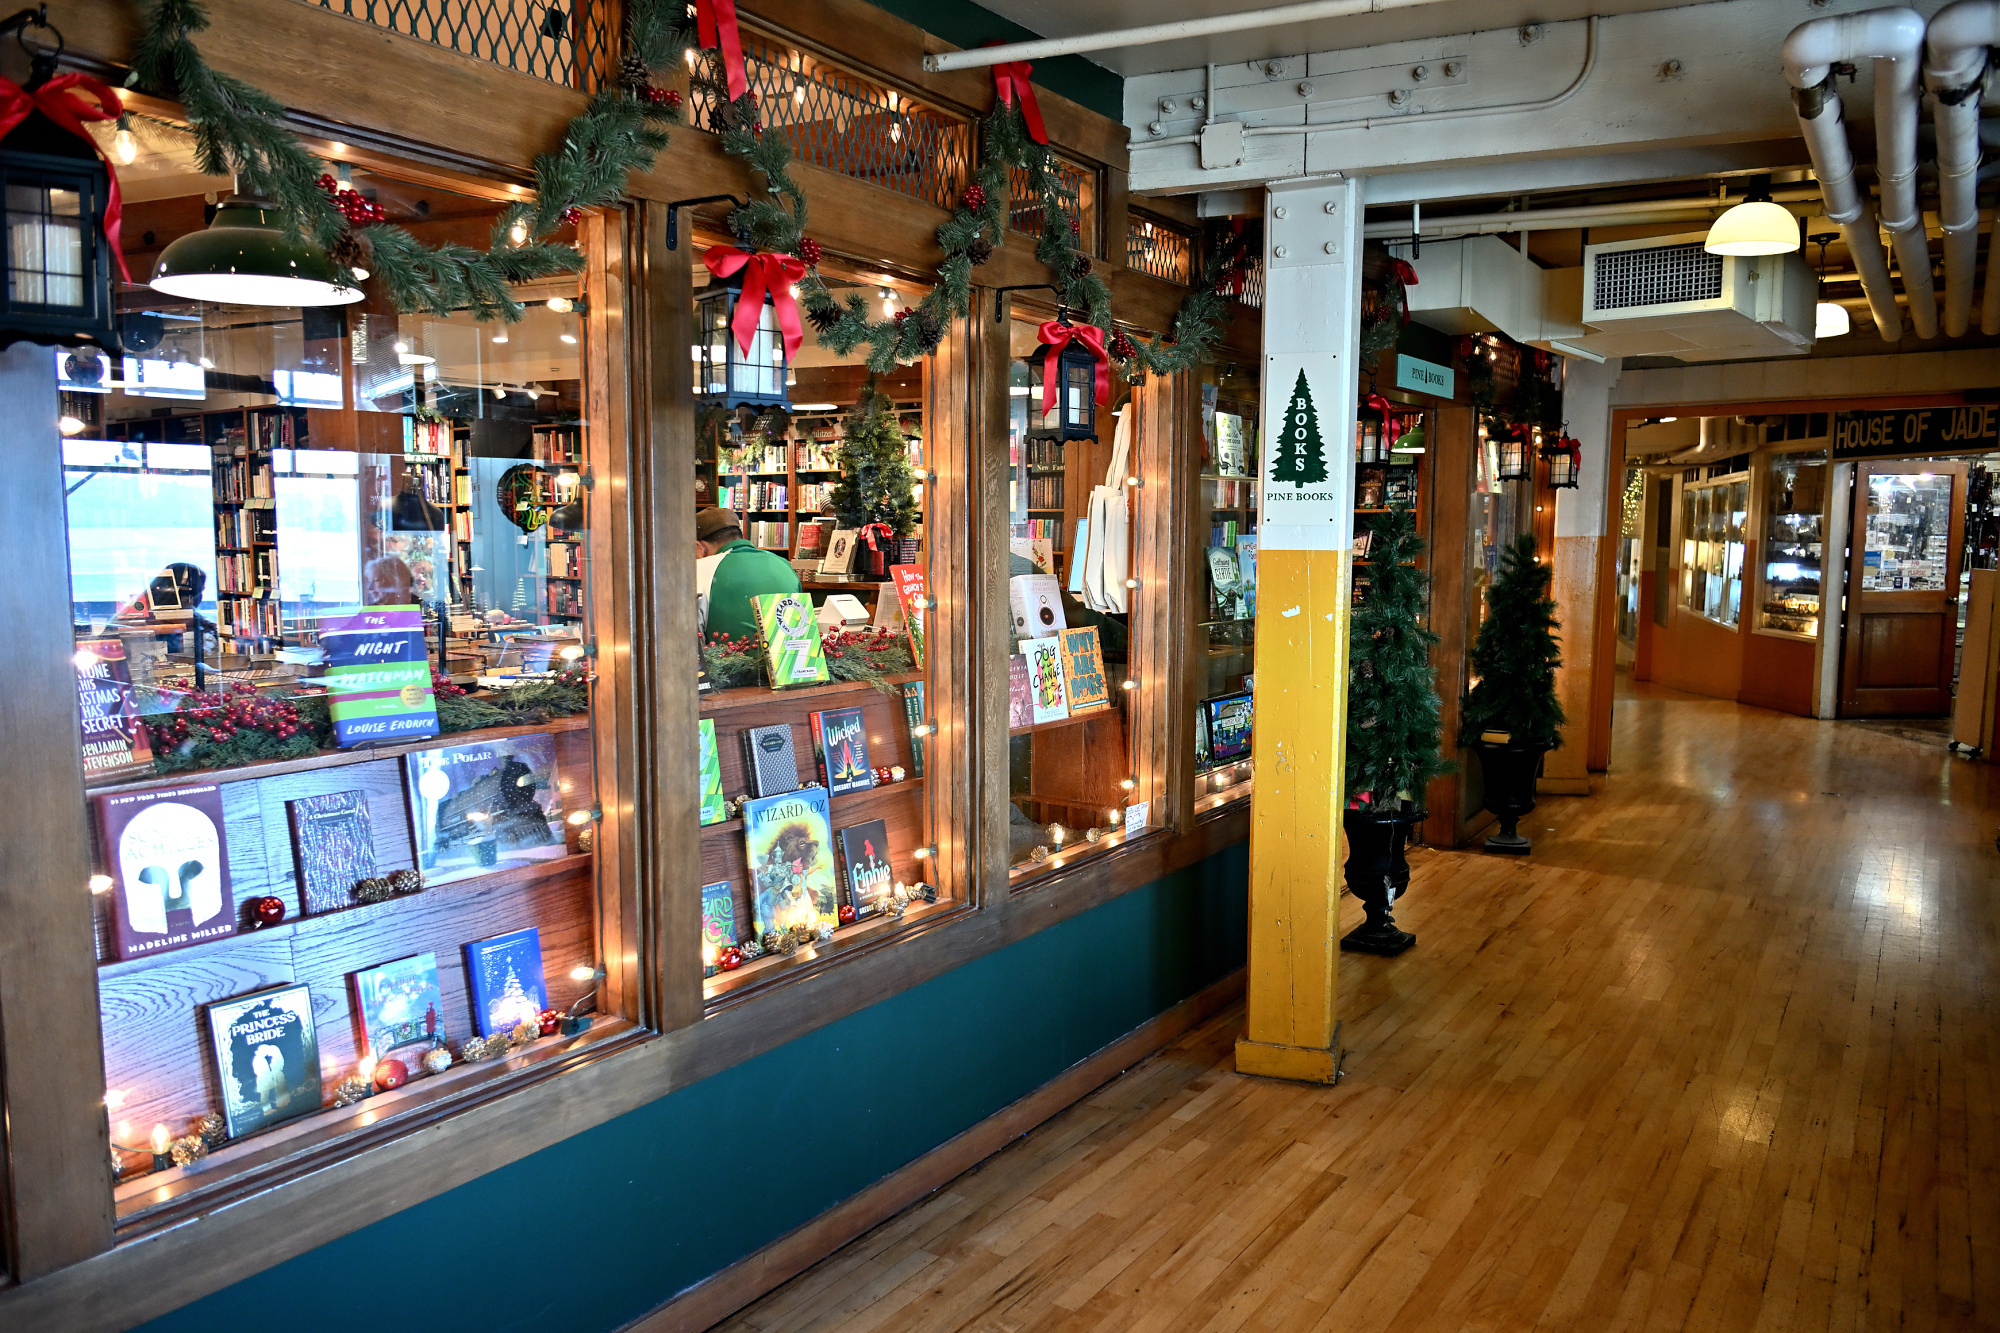
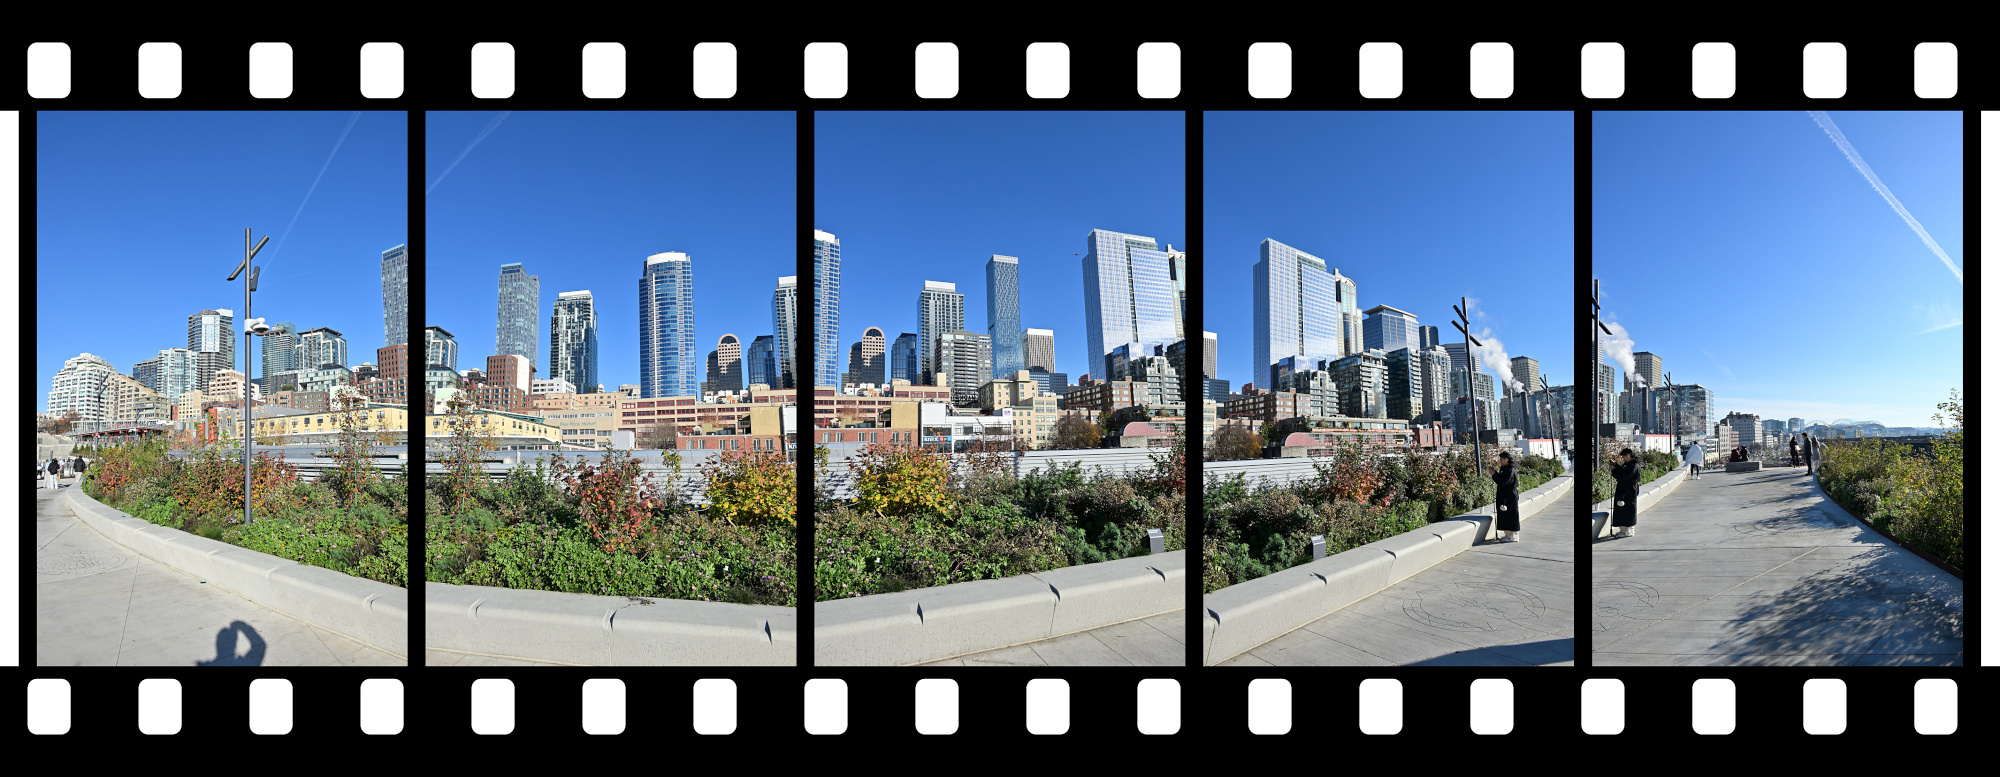
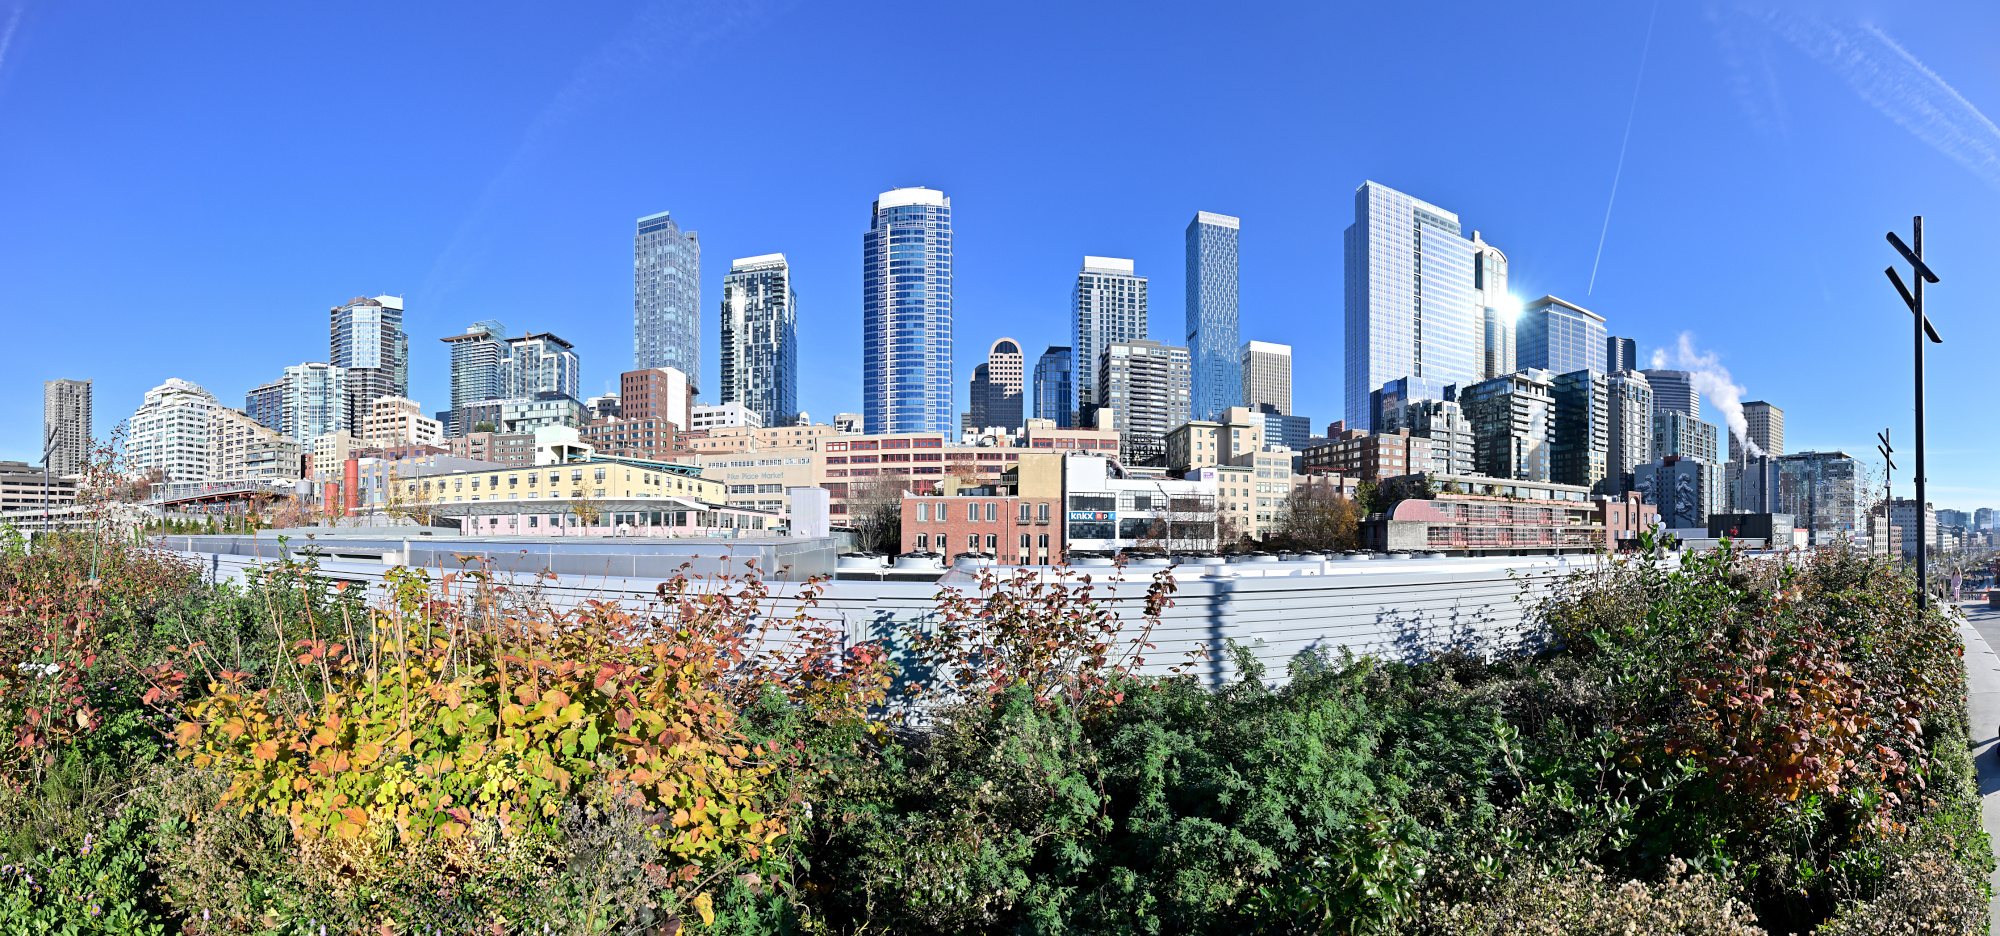
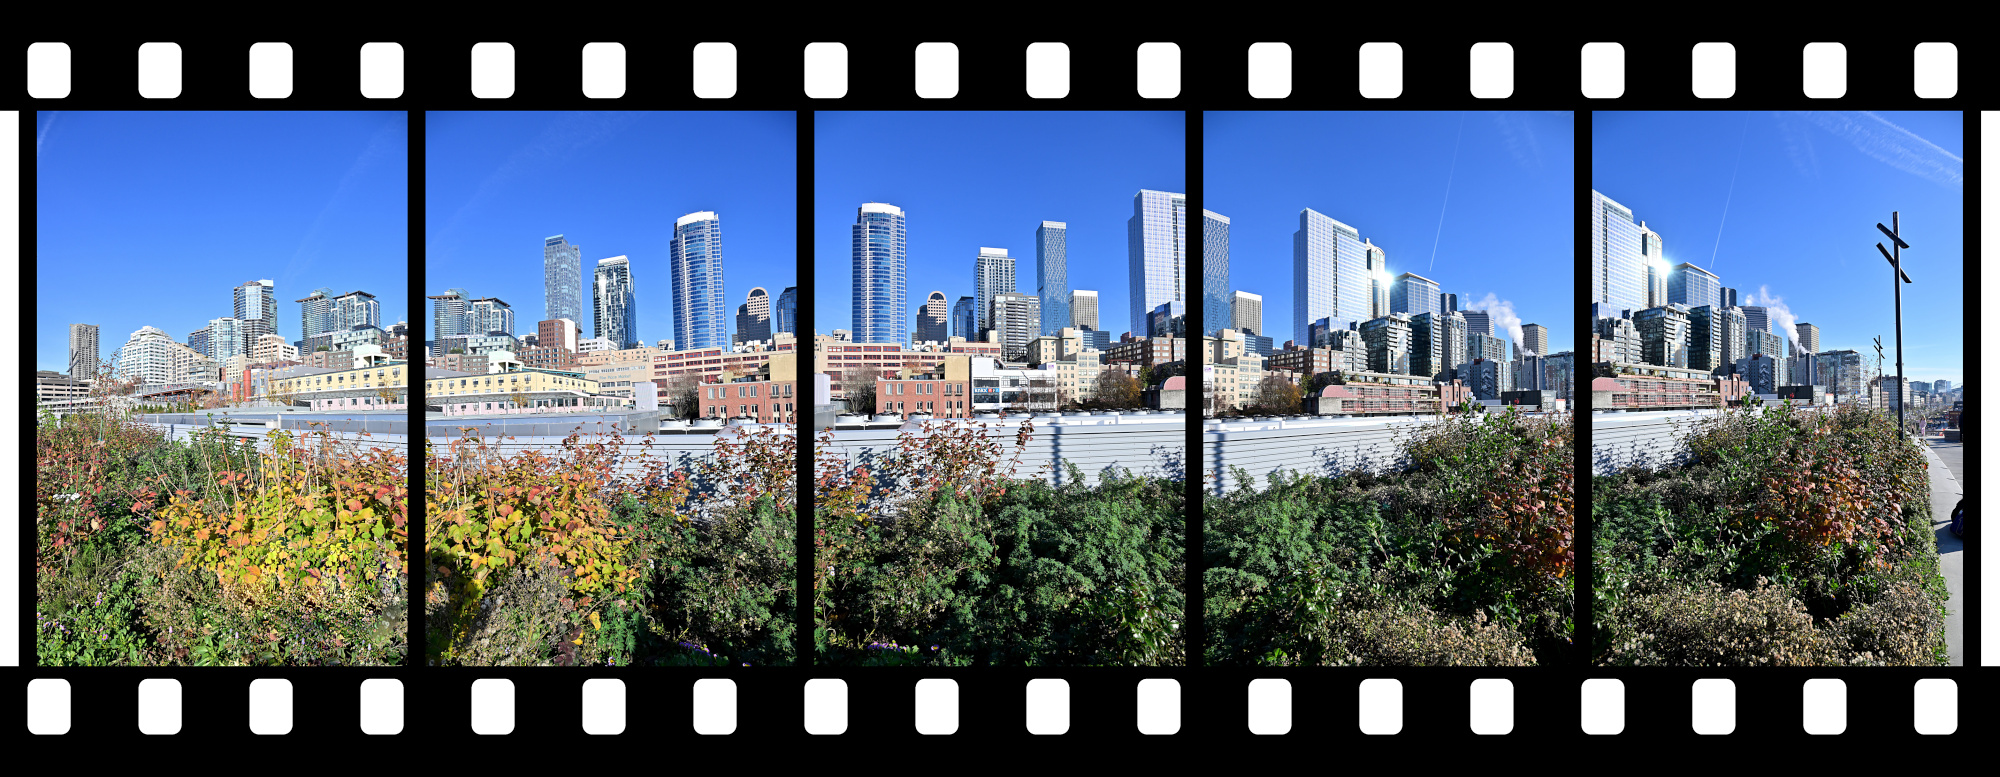
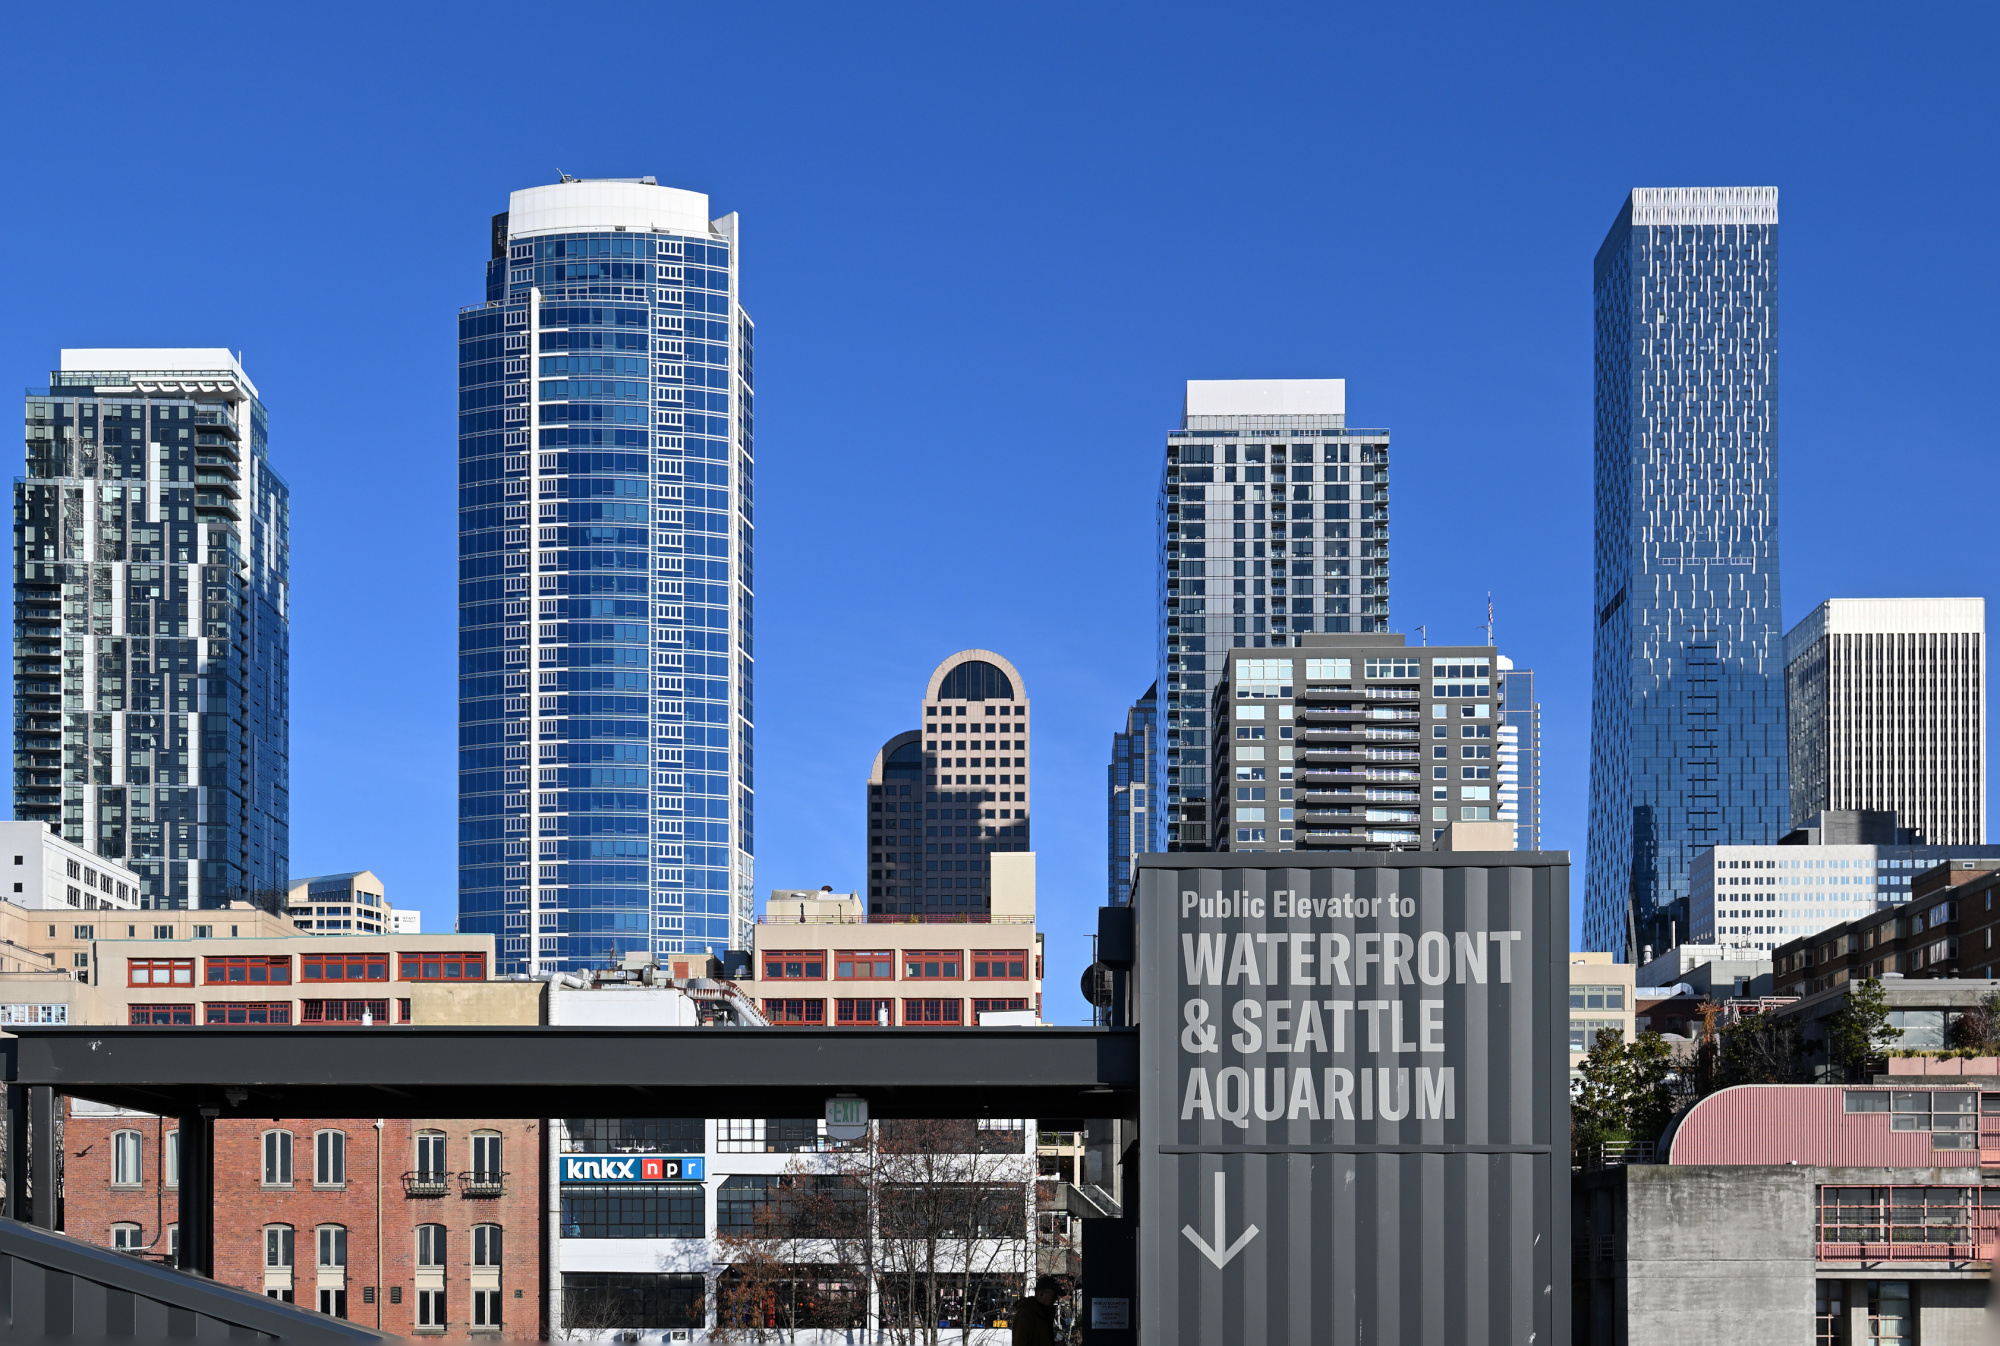
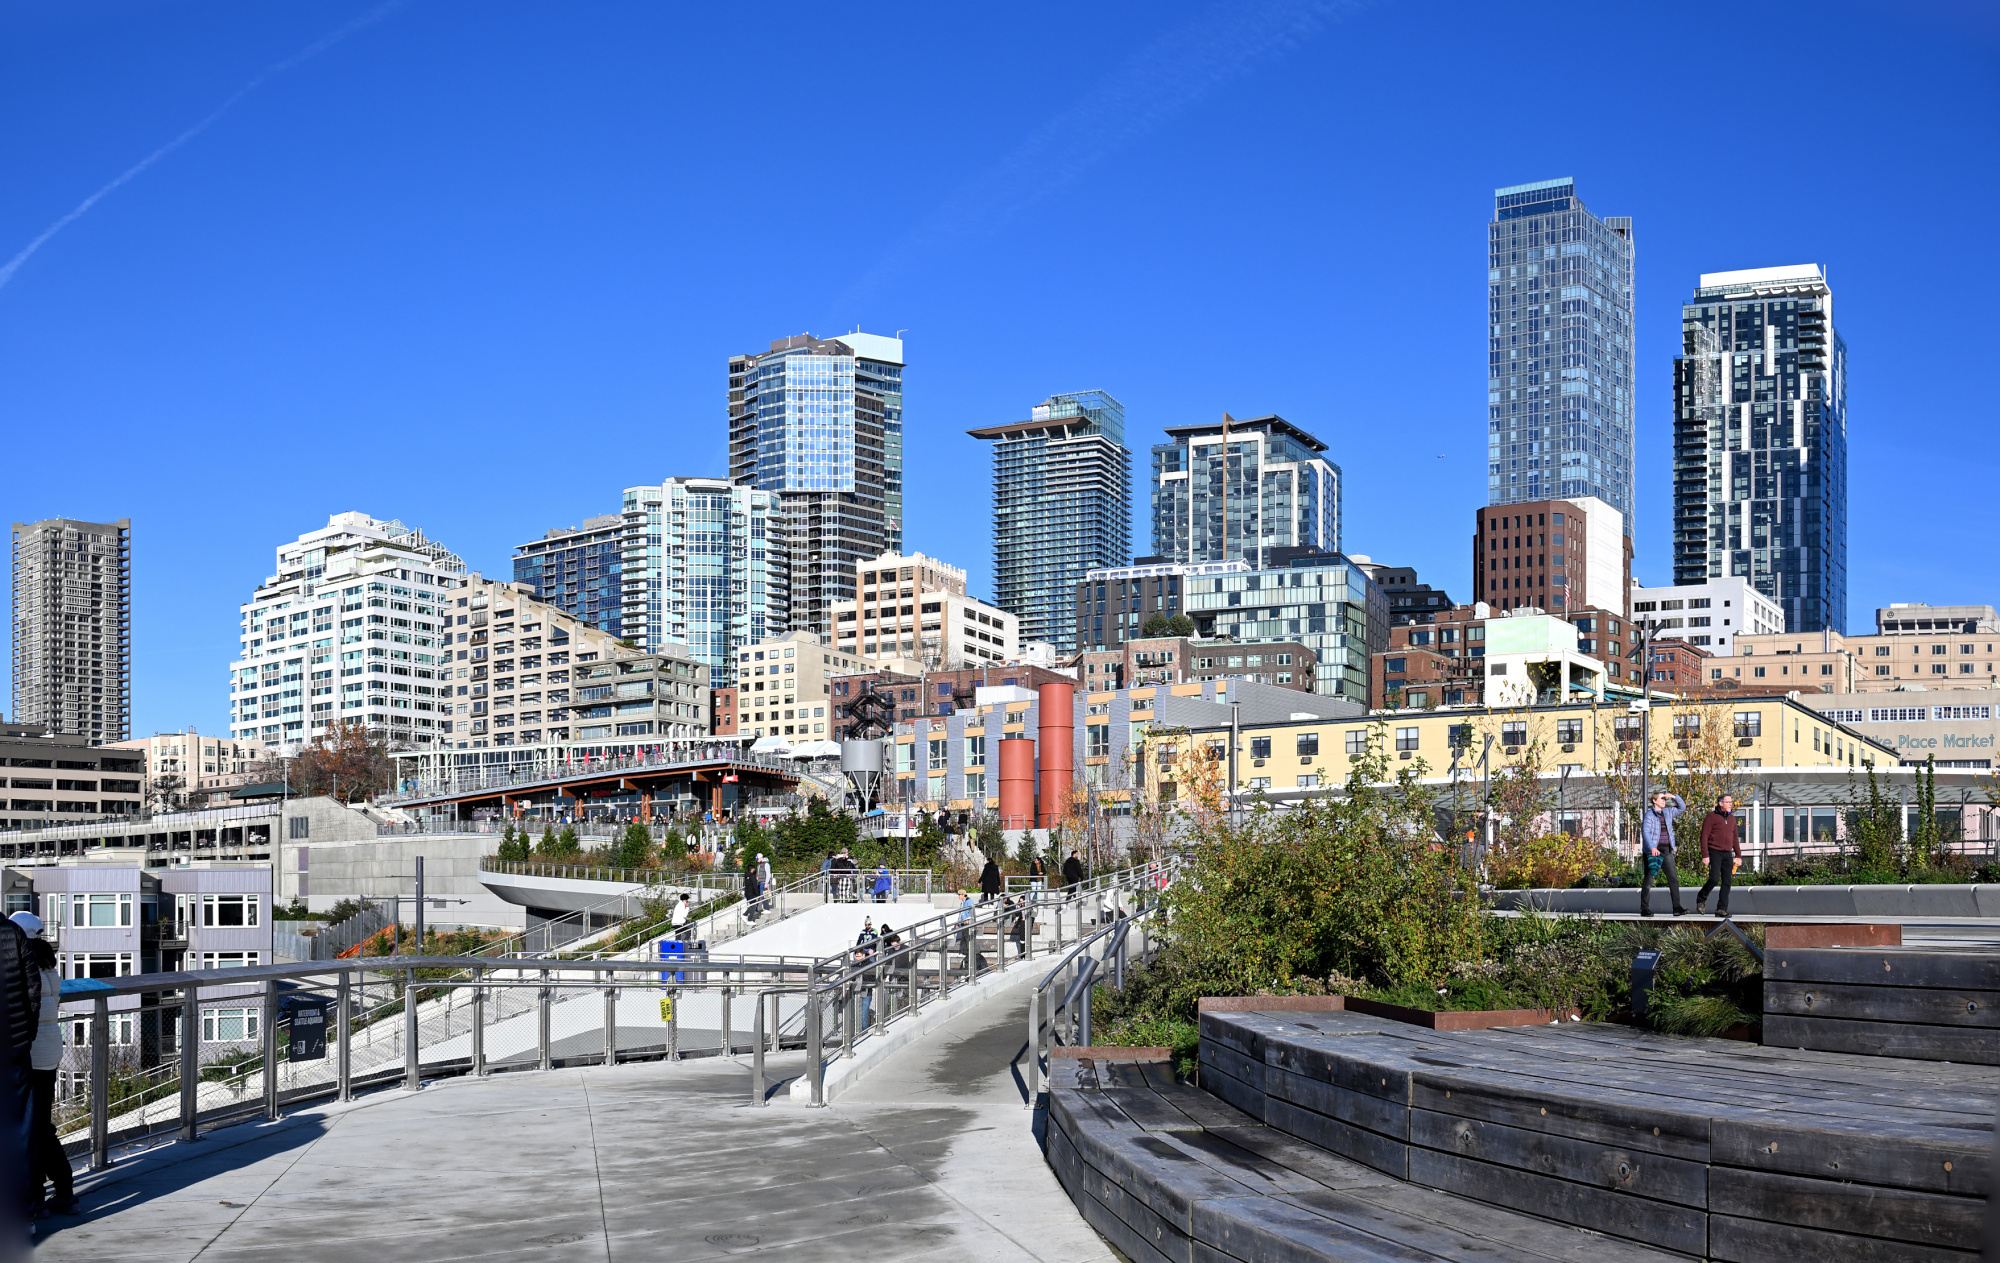
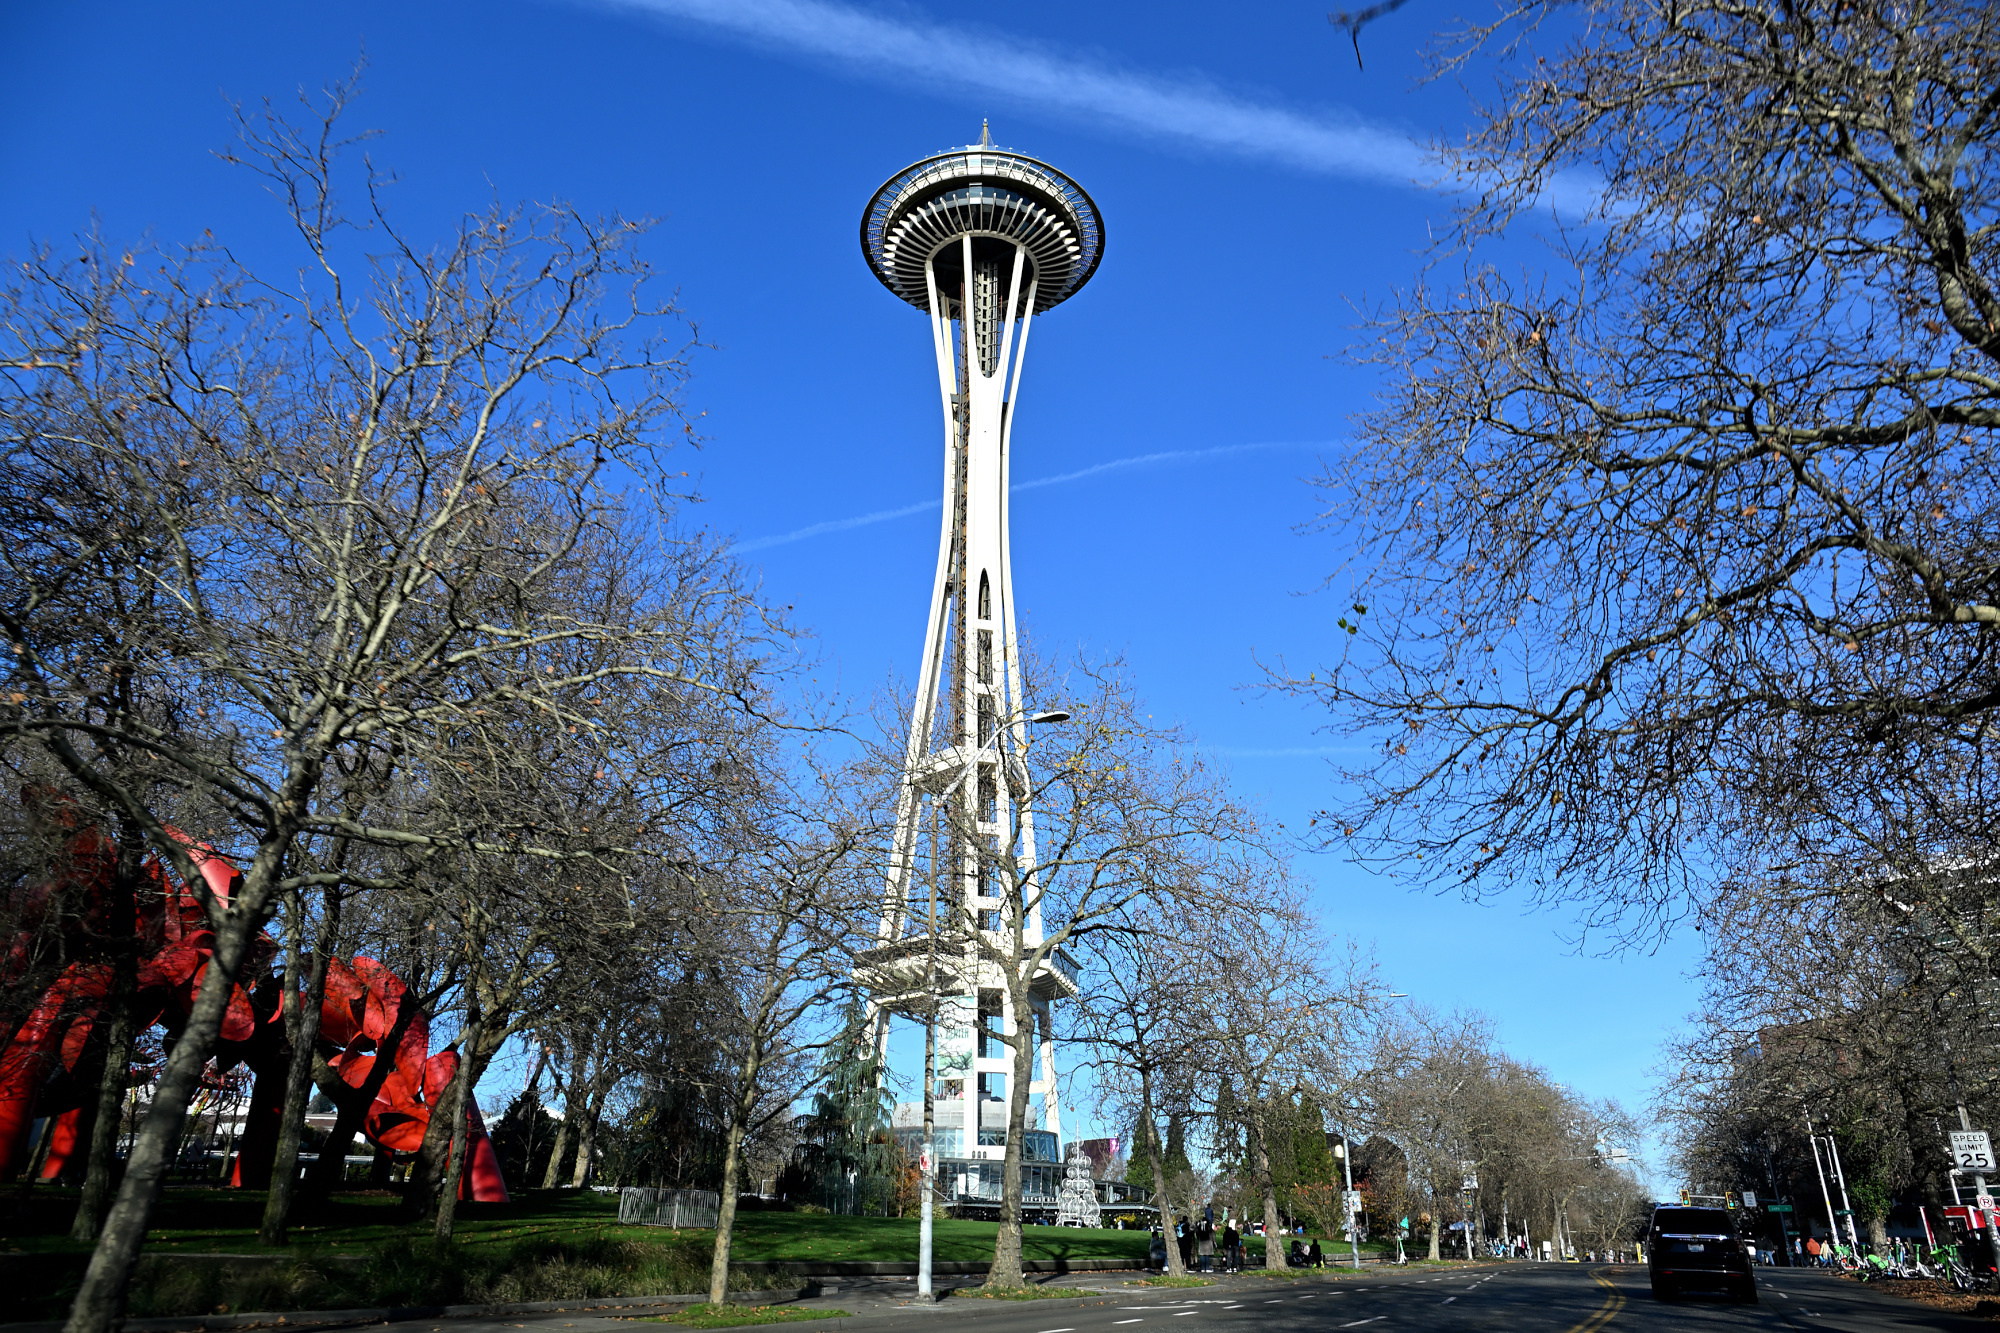
Seattle Skyline and Market on a Sunny Sunday
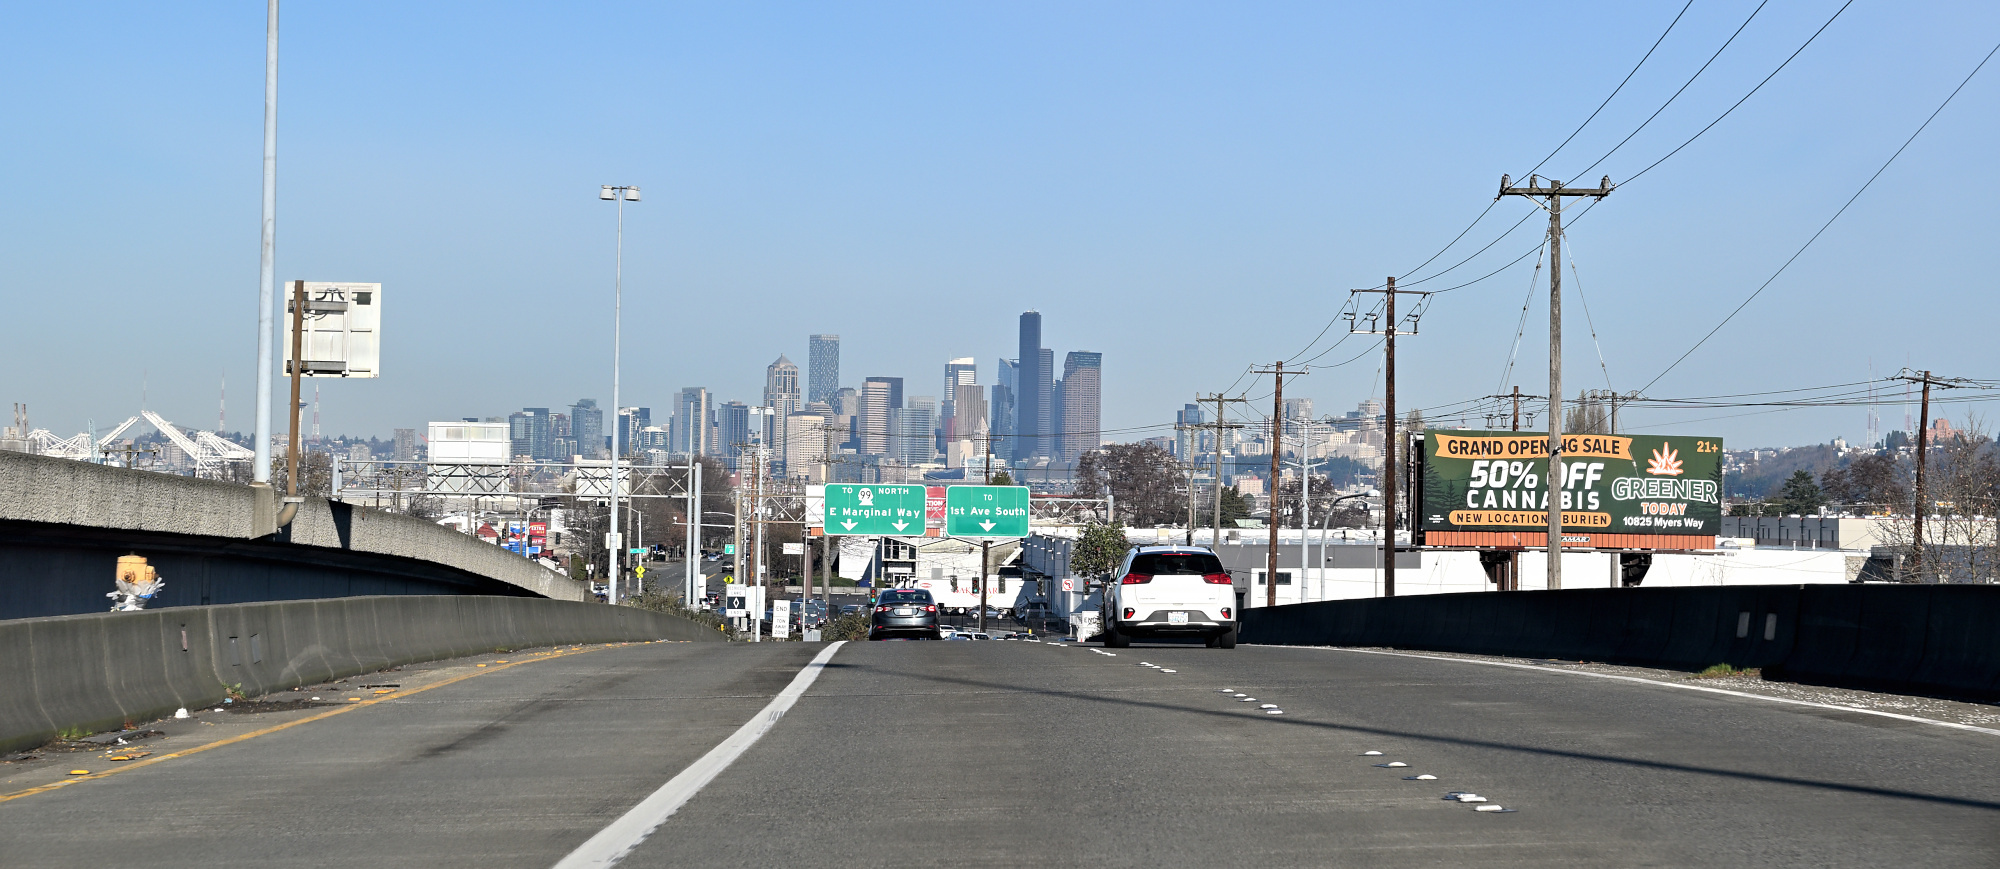
The day began bright and clear, the kind of winter light that makes everything sharp and calm. We drove toward Seattle with the skyline slowly rising ahead, glass and steel catching the sun as the streets narrowed into the heart of the city.
1/500s f/8 ISO 100/21° 16-50mm f/2,8 VR f=50mm/75mm
1/400s f/7,1 ISO 100/21° 16-50mm f/2,8 VR f=27mm/40mm
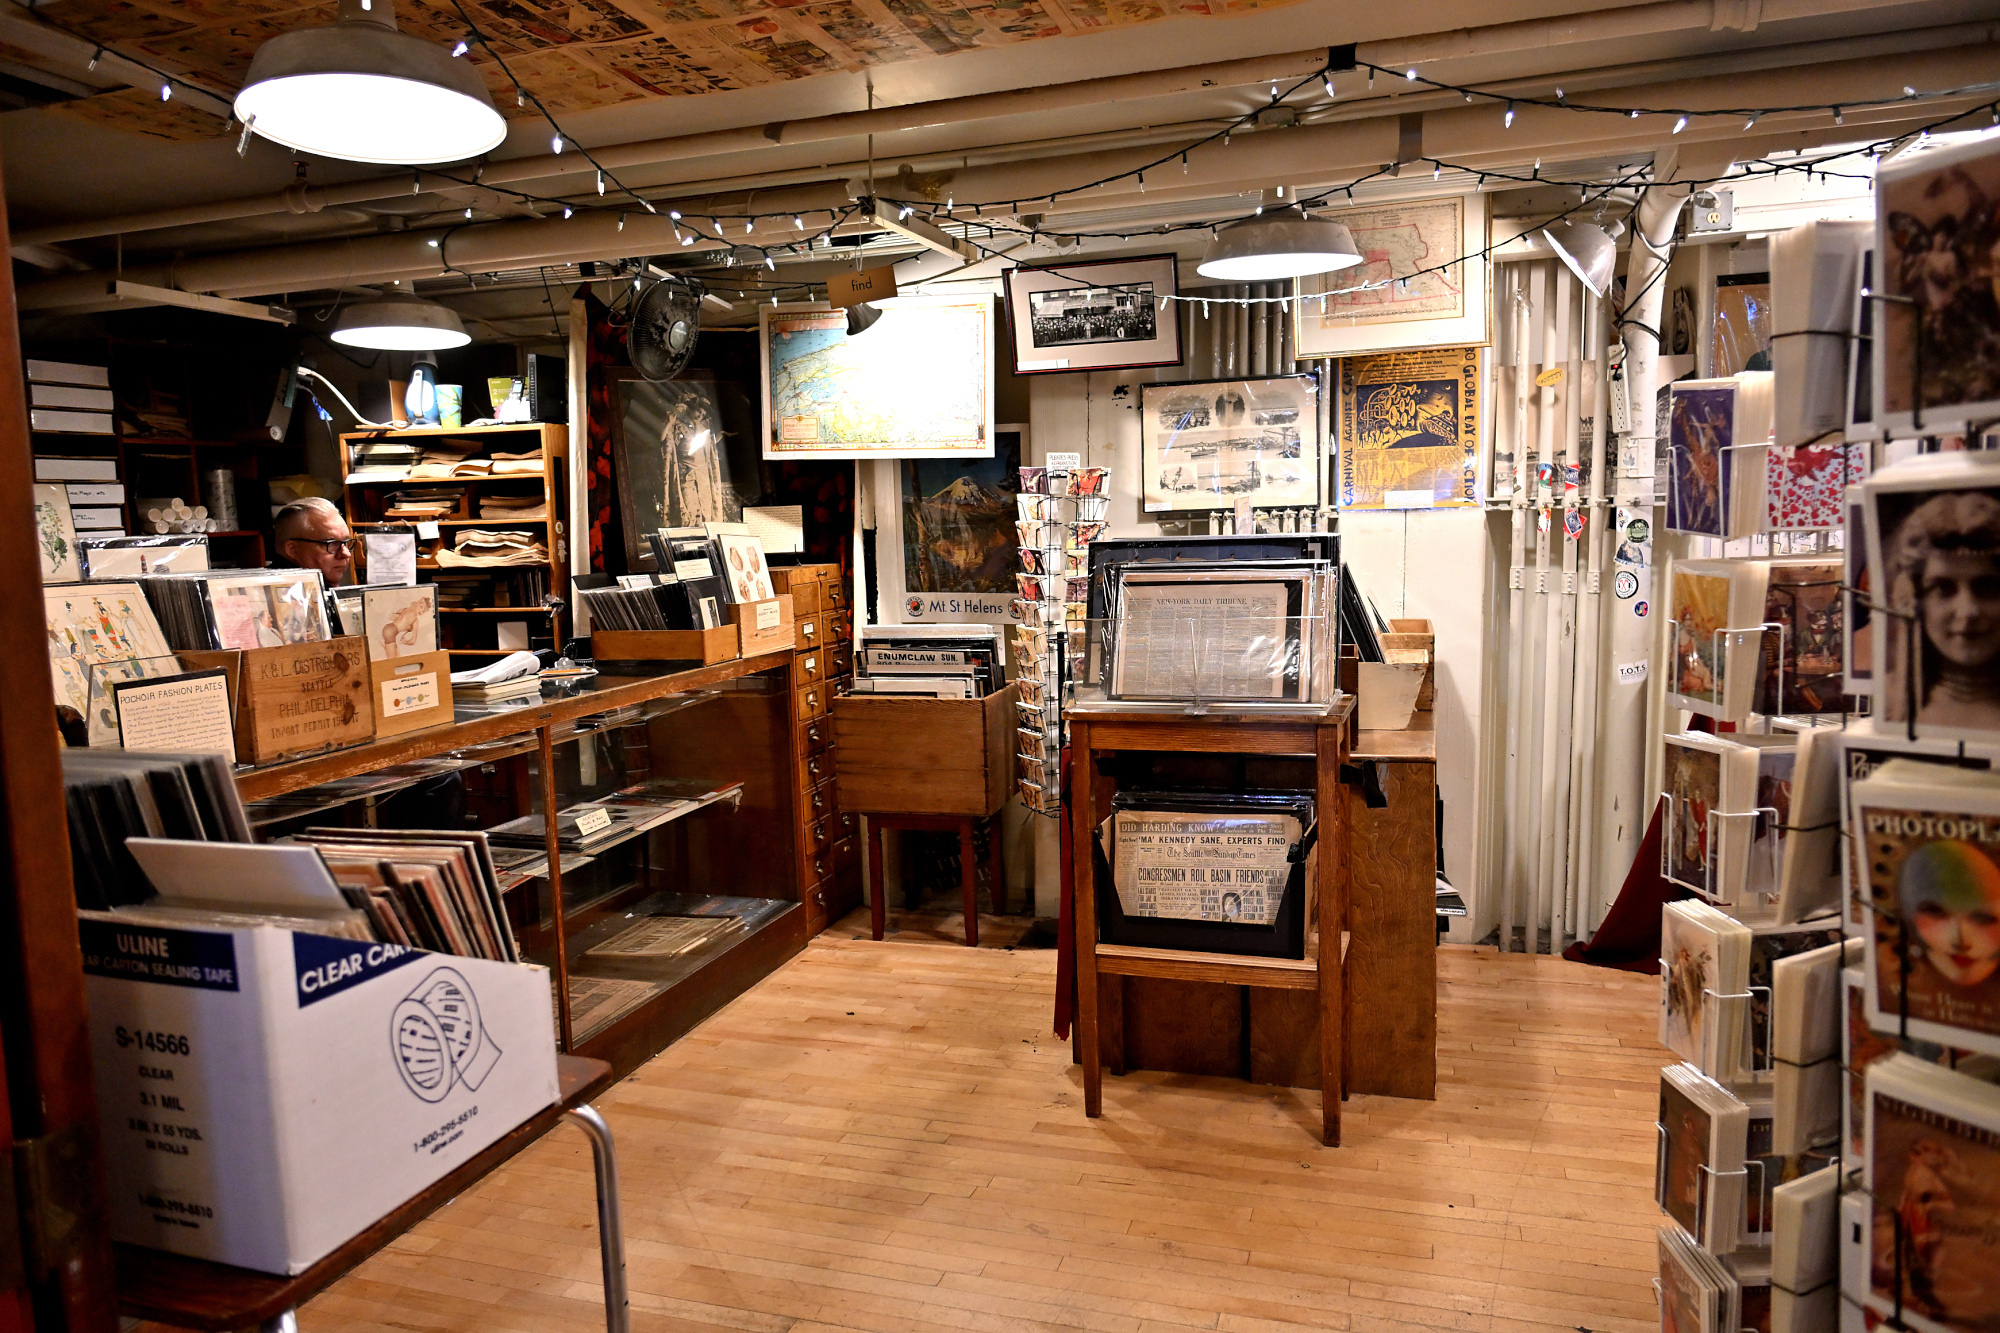
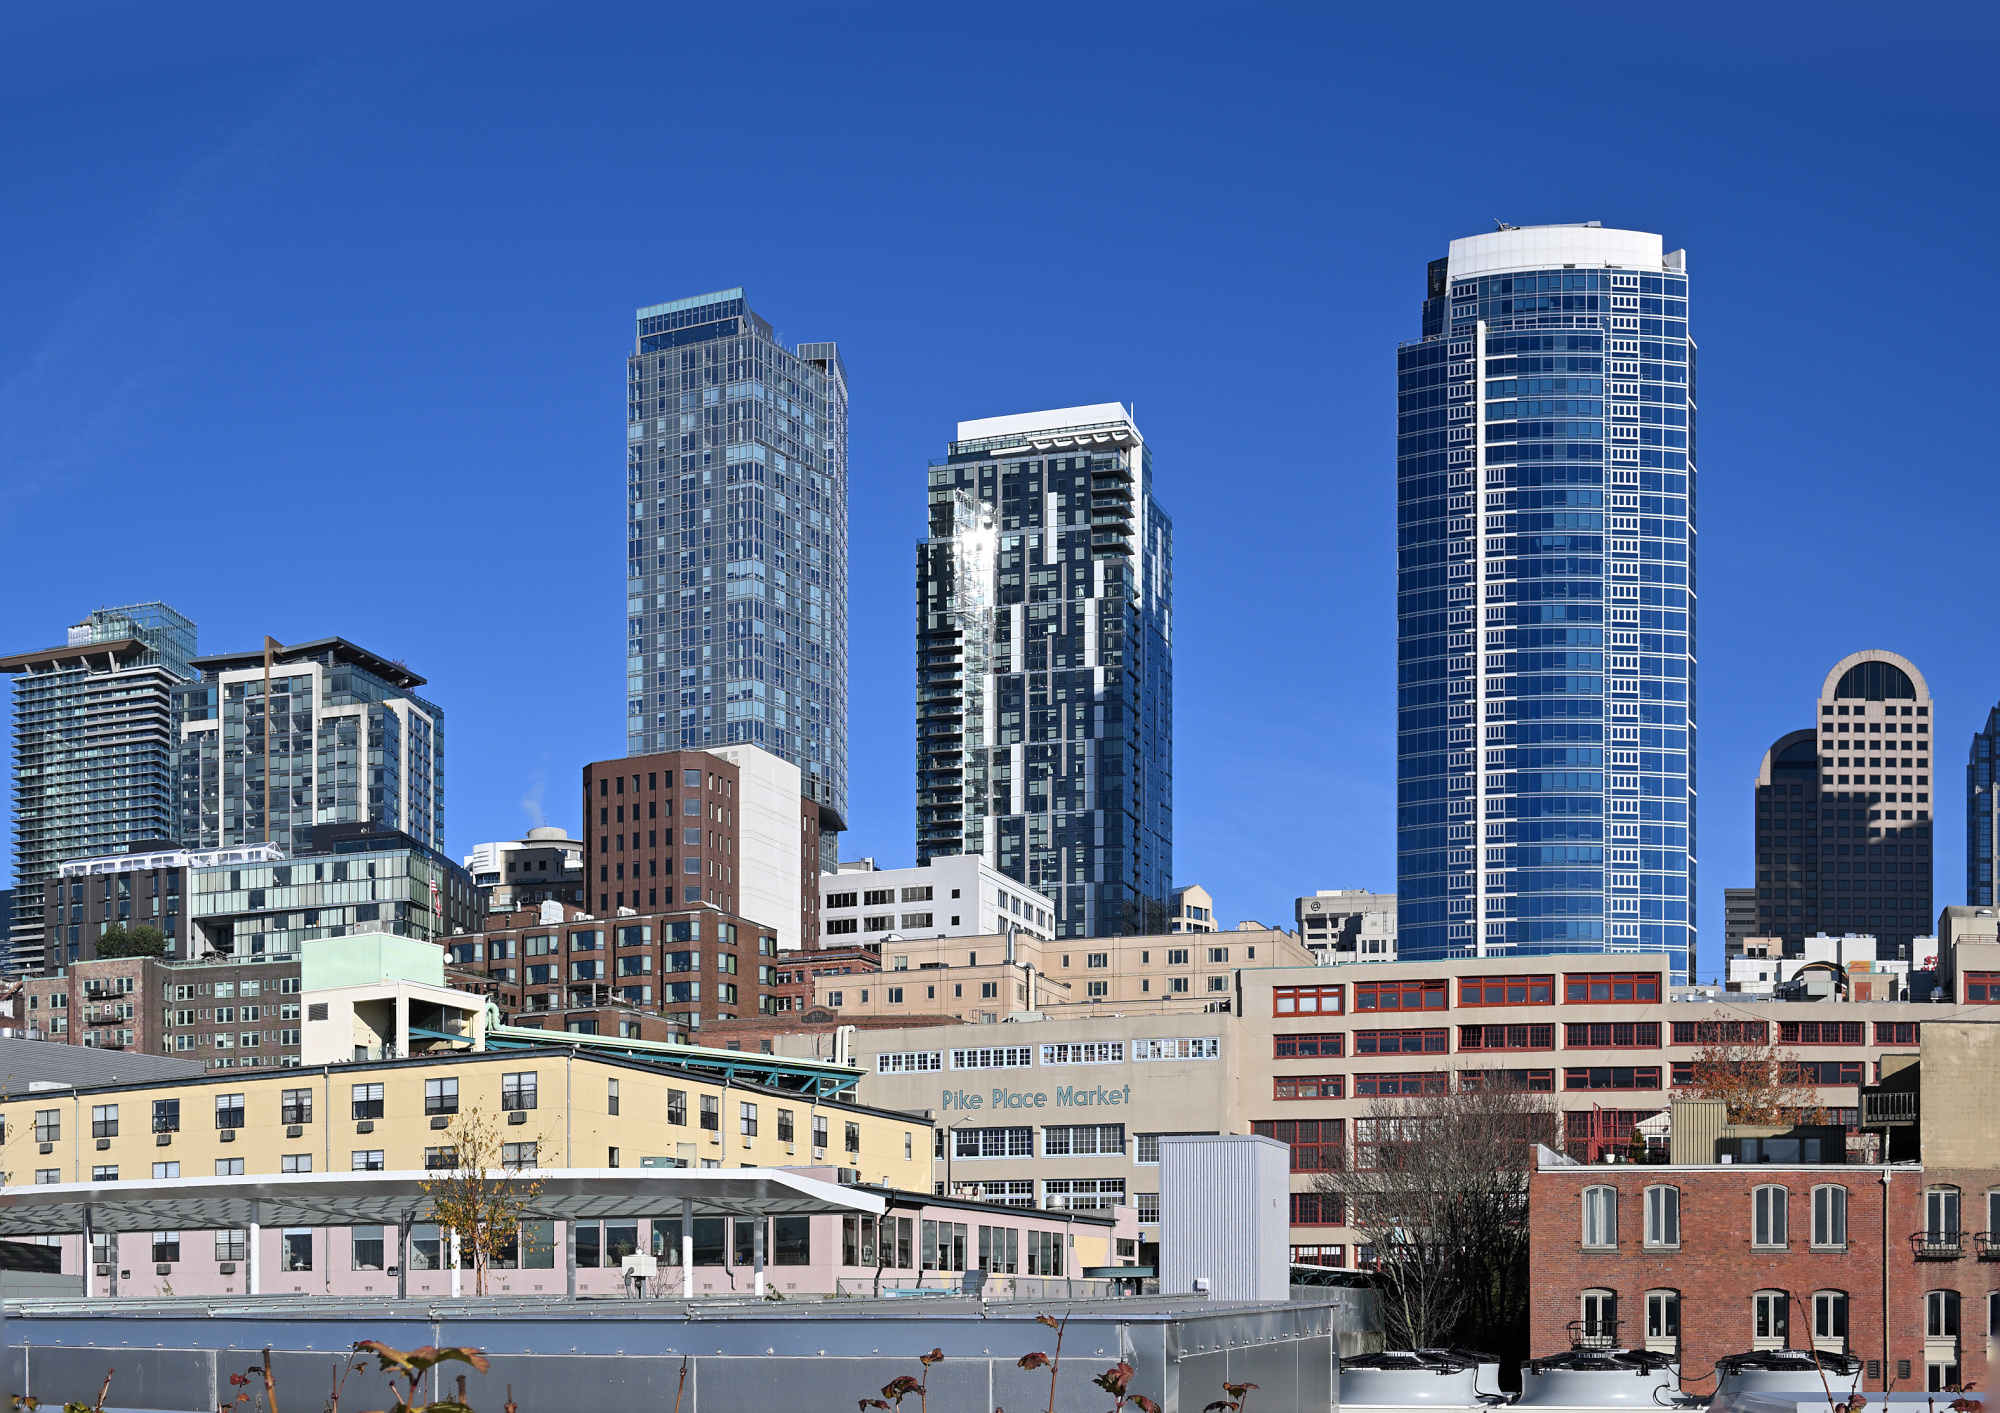
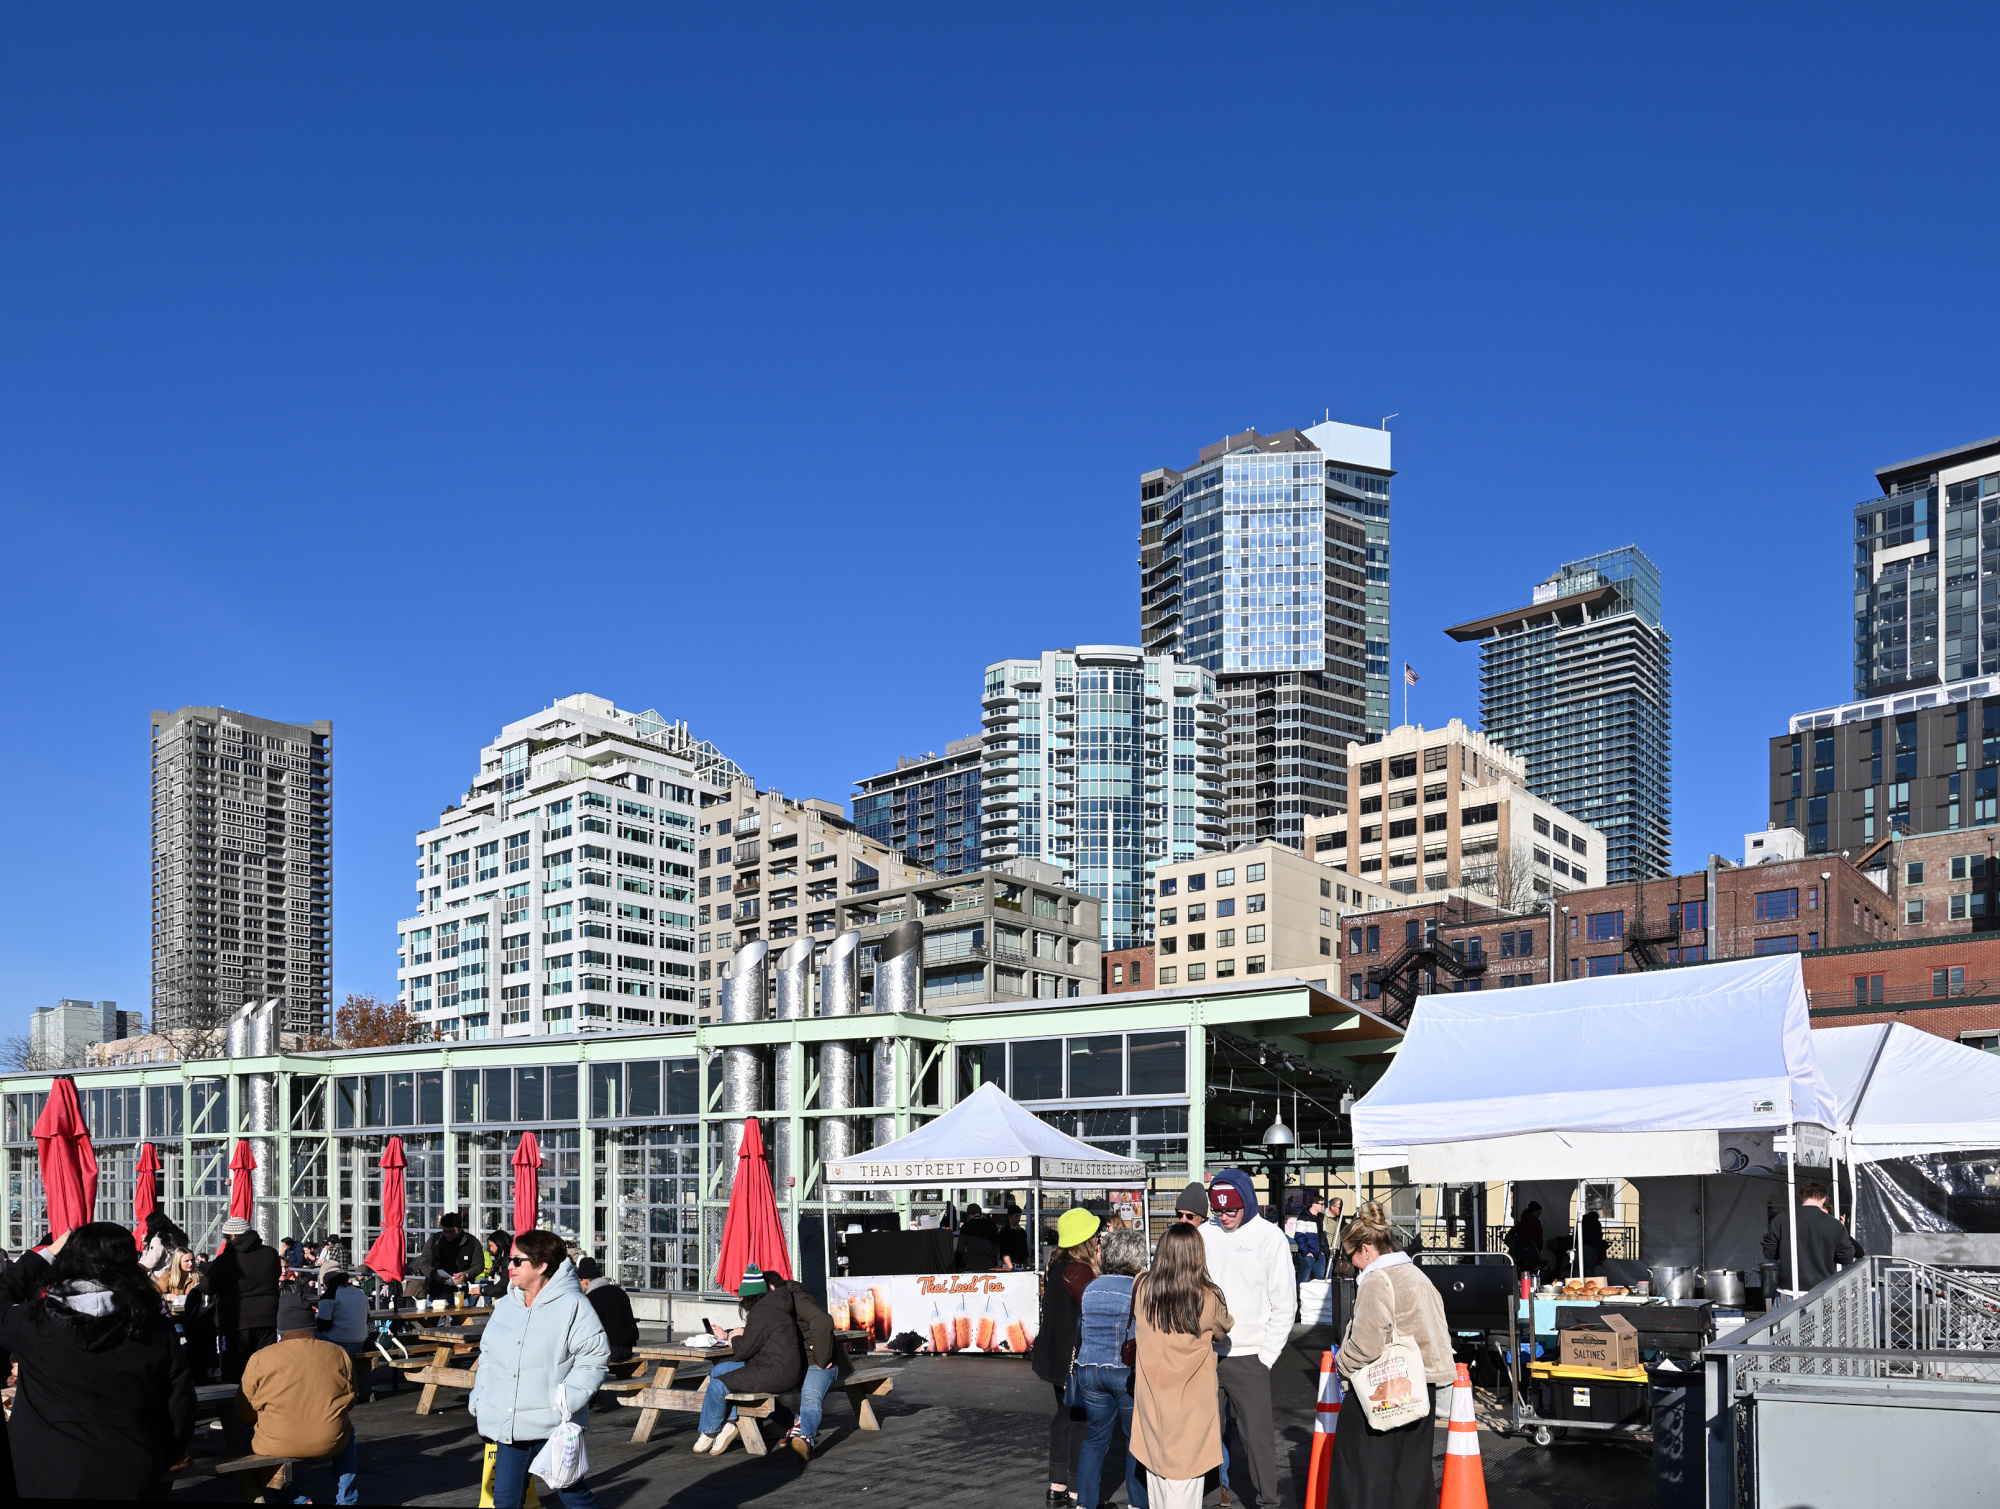
Pike Place Market was alive with its familiar rhythm. Old wooden storefronts and neon signs stood like markers of time, while the scent of coffee drifted through the crowd. Vendors called out, voices mingling with the hum of conversation, and for a moment it felt like the city was speaking in its own language.
1/500s f/8 ISO 200/24° 16-50mm f/2,8 VR f=50mm/75mm
1/250s f/5 ISO 200/24° 16-50mm f/2,8 VR f=31mm/47mm
1/125s f/2,8 ISO 400/27° 16-50mm f/2,8 VR f=16mm/24mm
1/125s f/2,8 ISO 900 16-50mm f/2,8 VR f=16mm/24mm
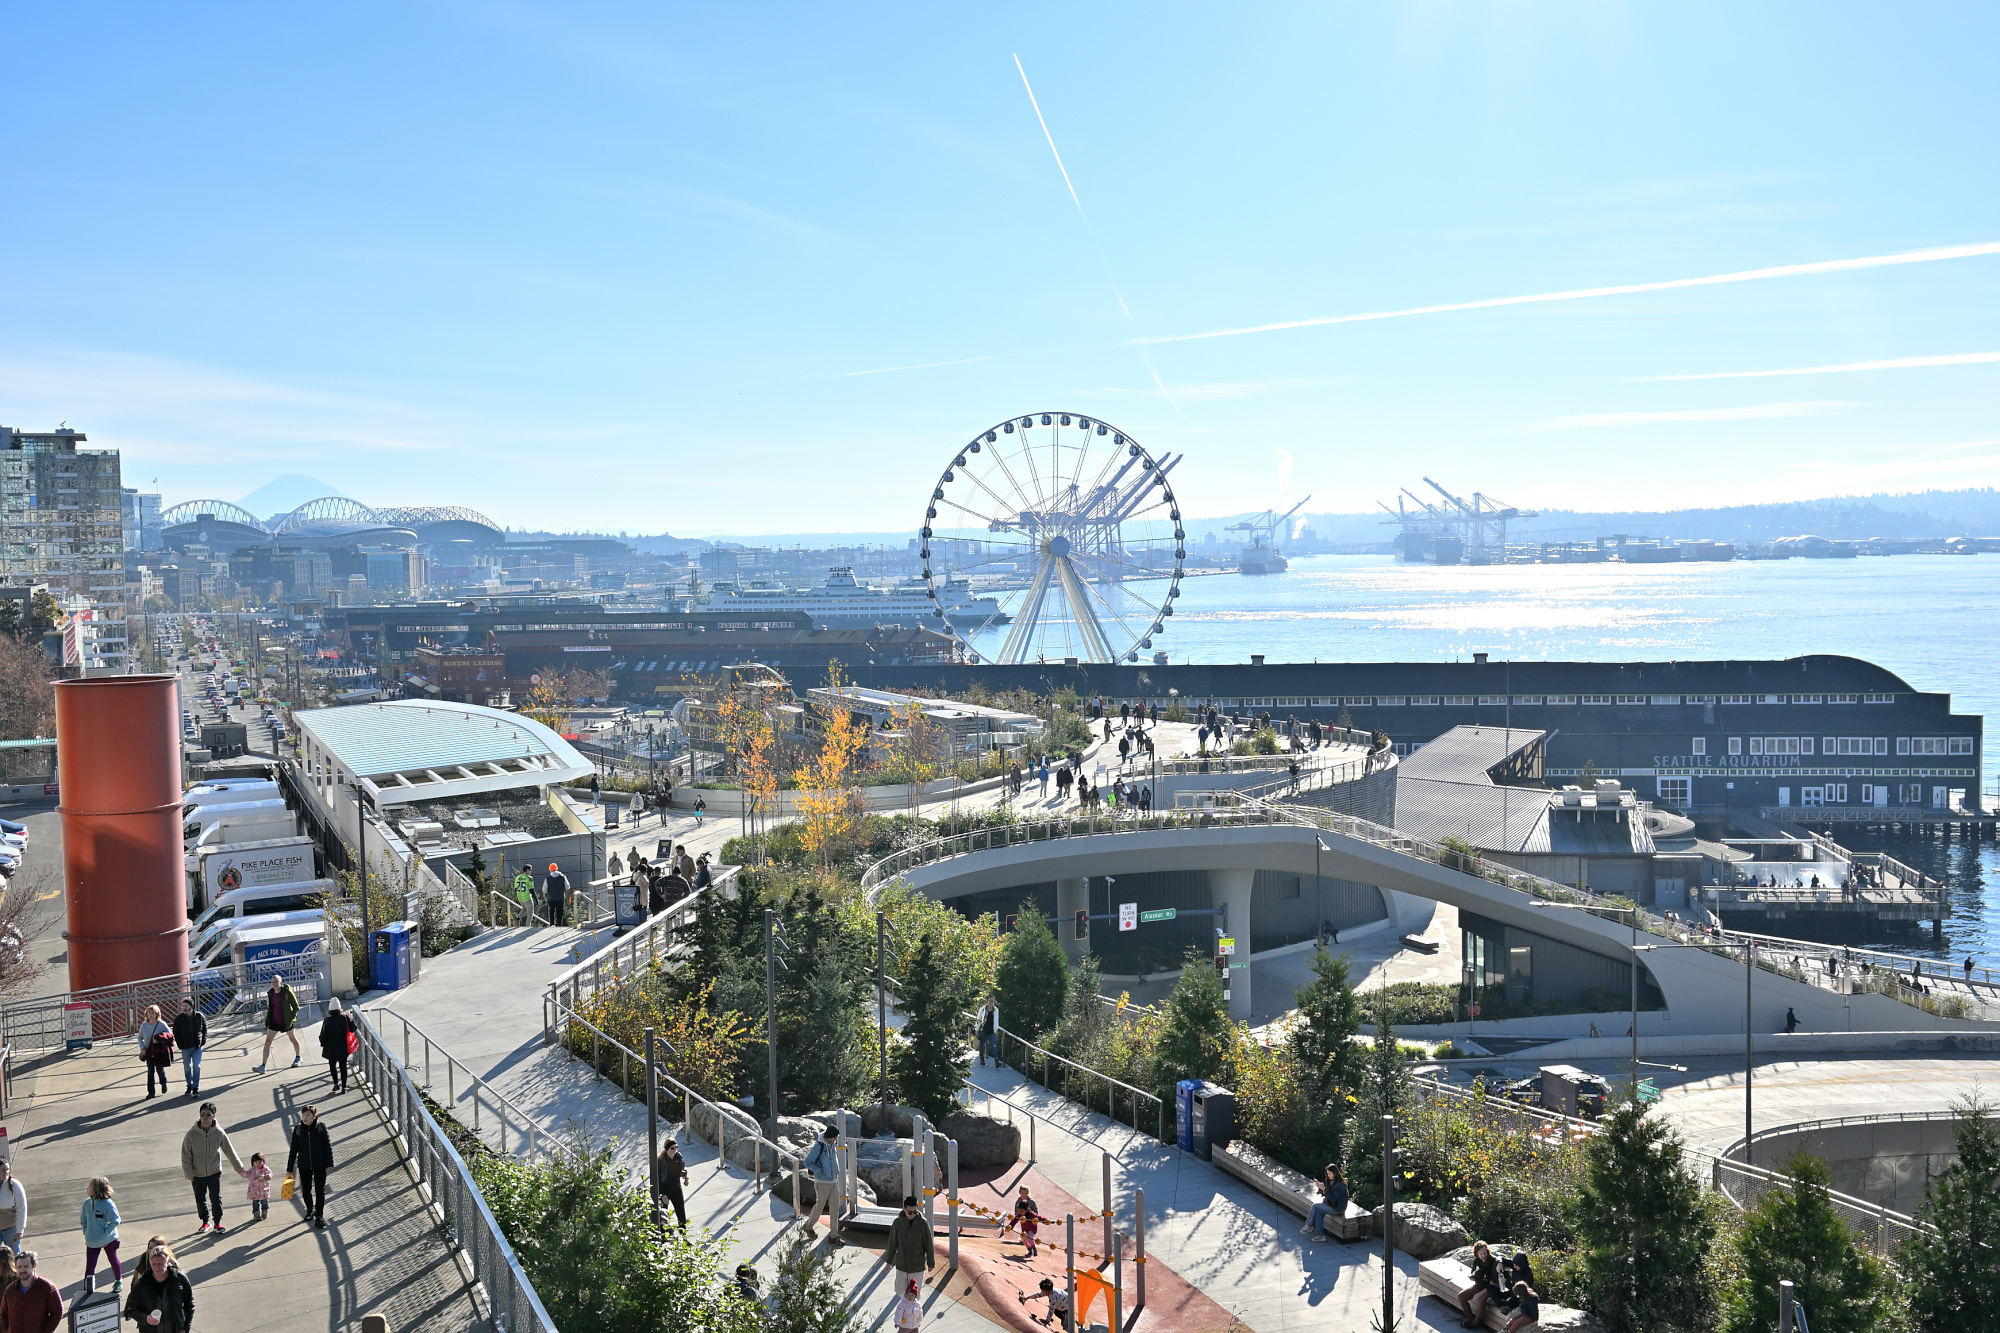
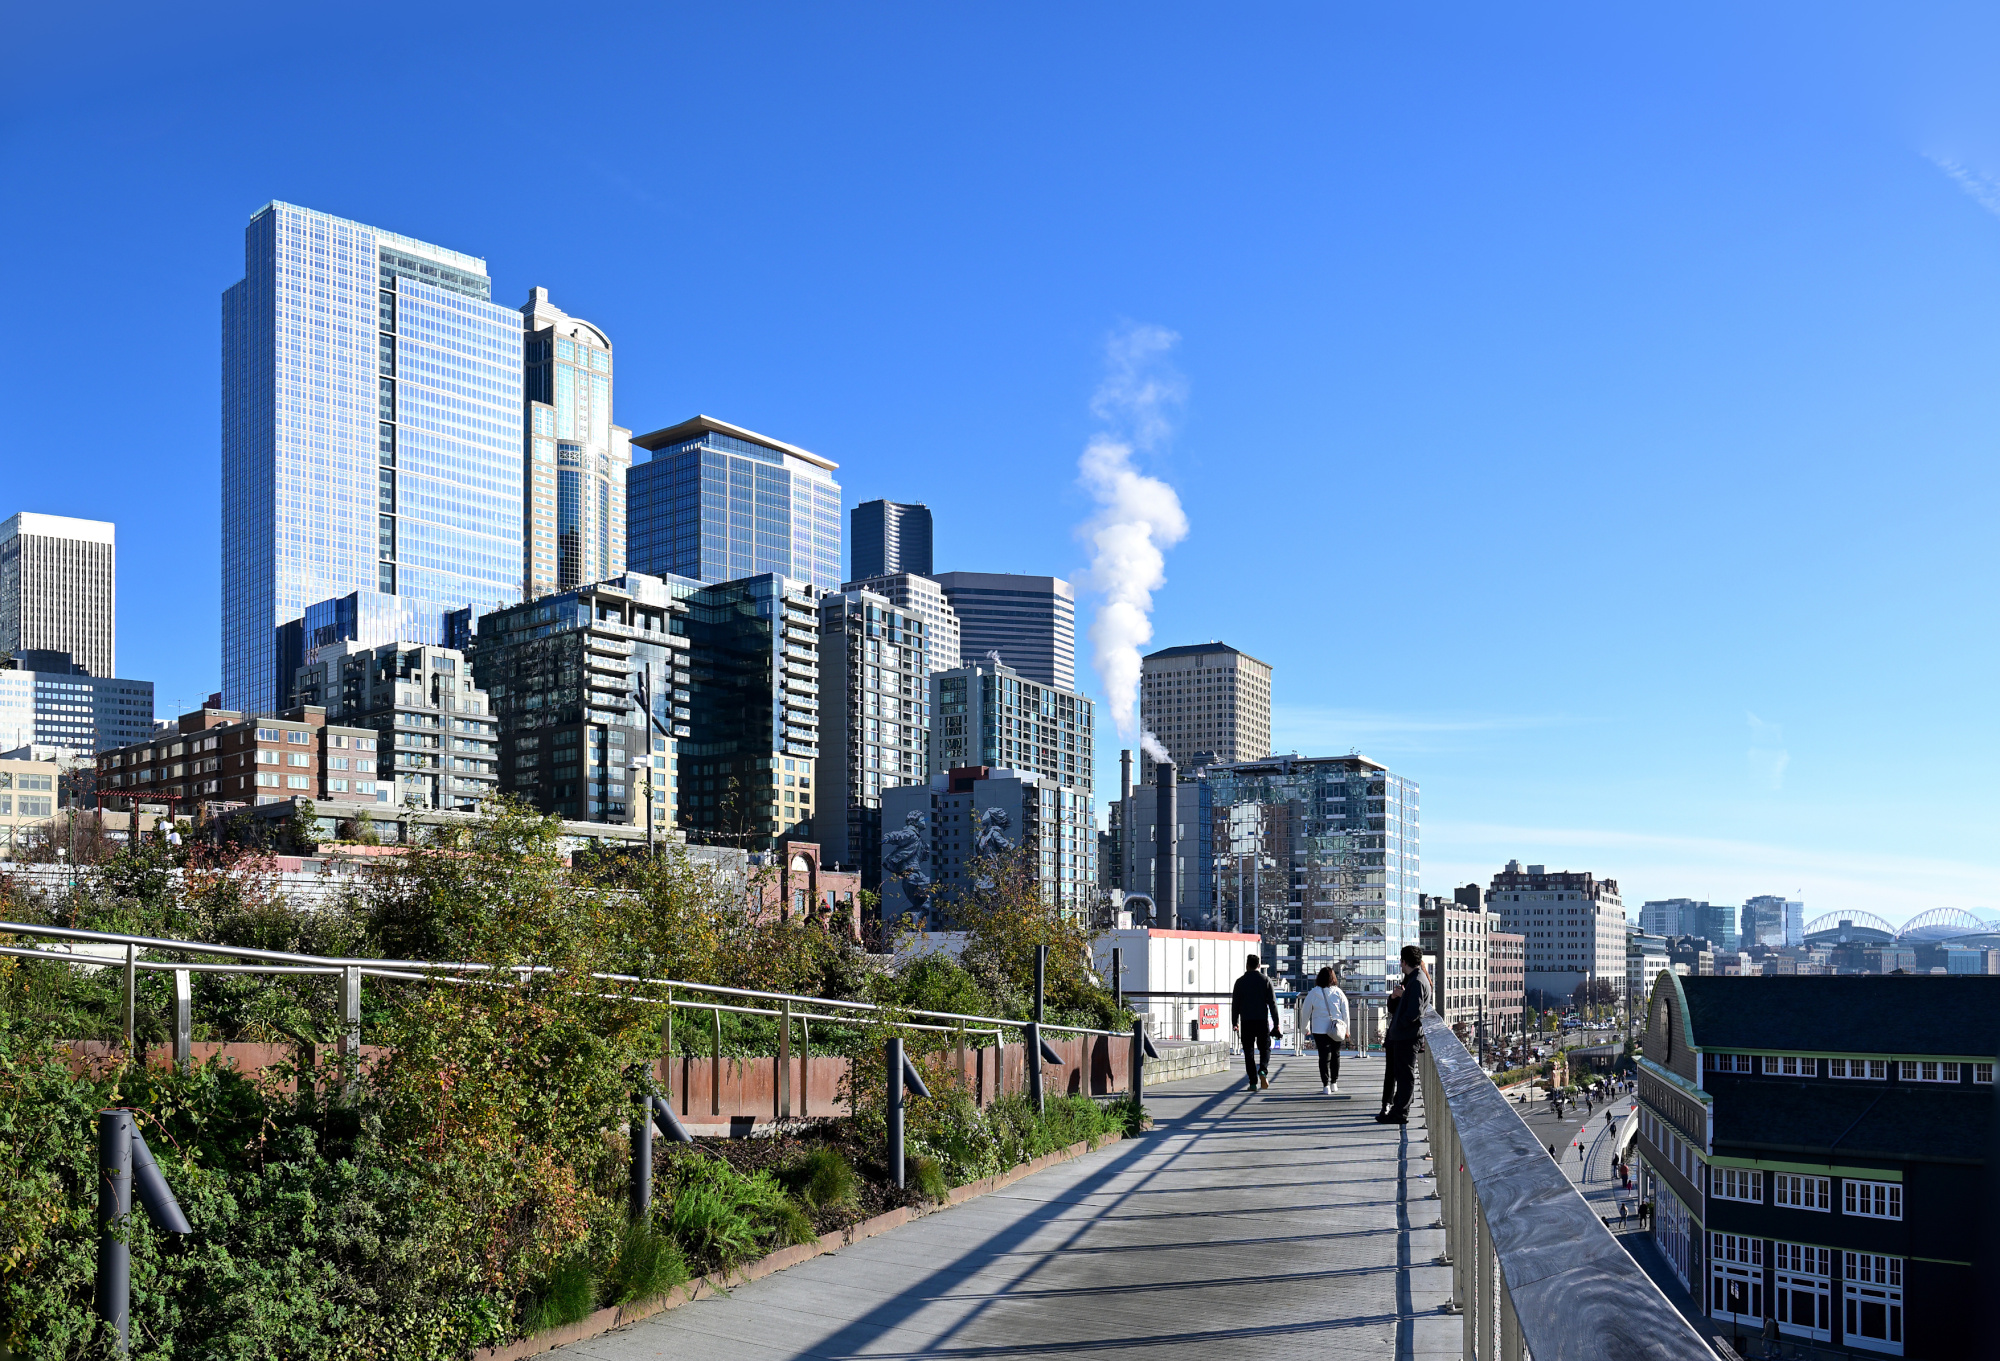
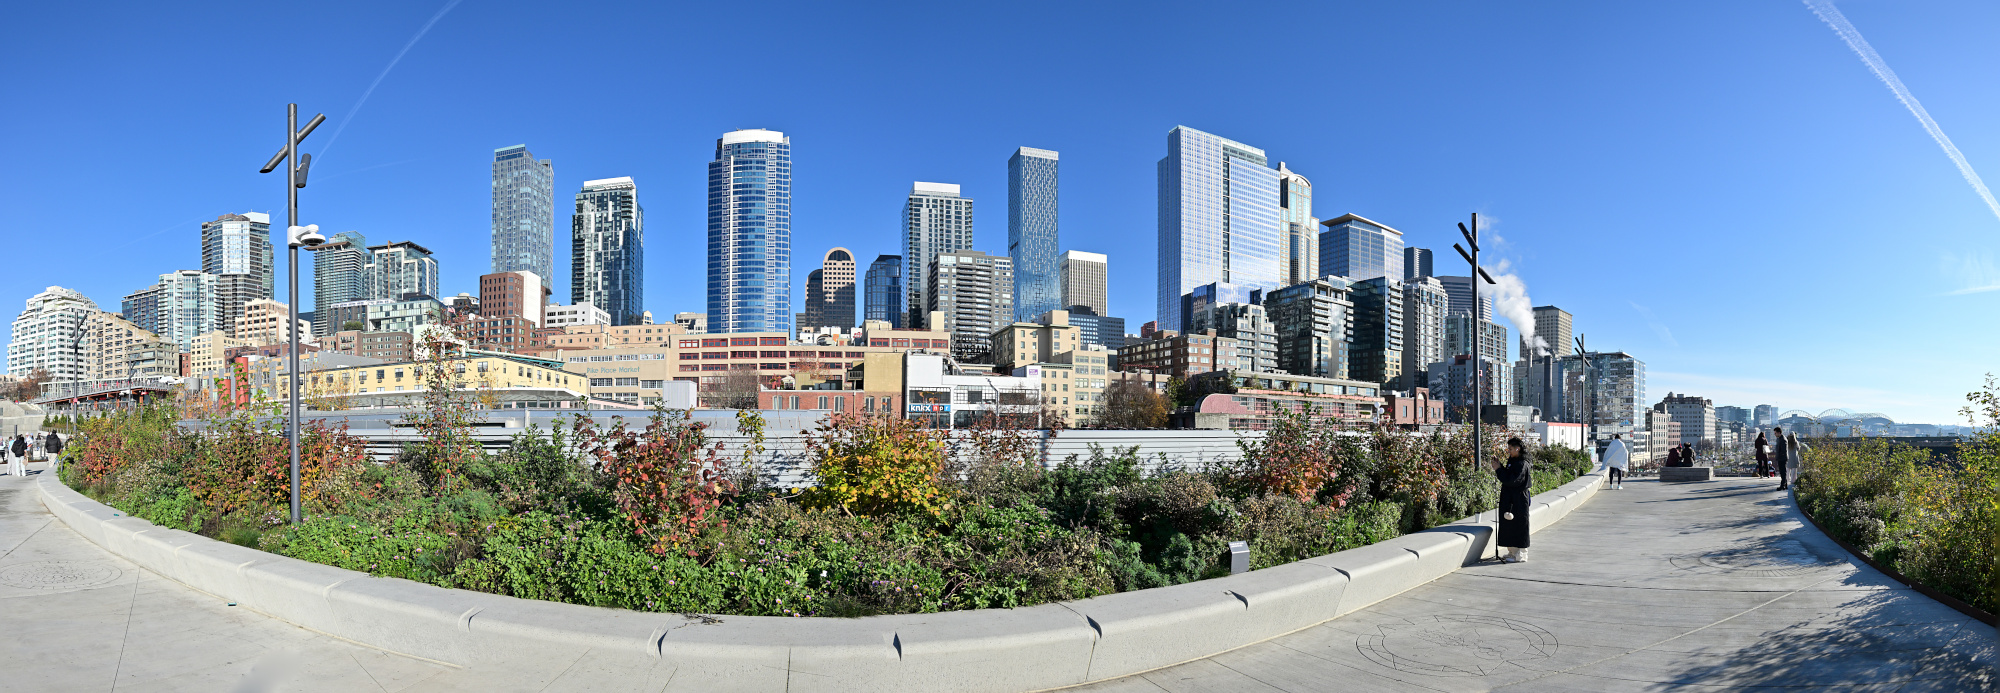
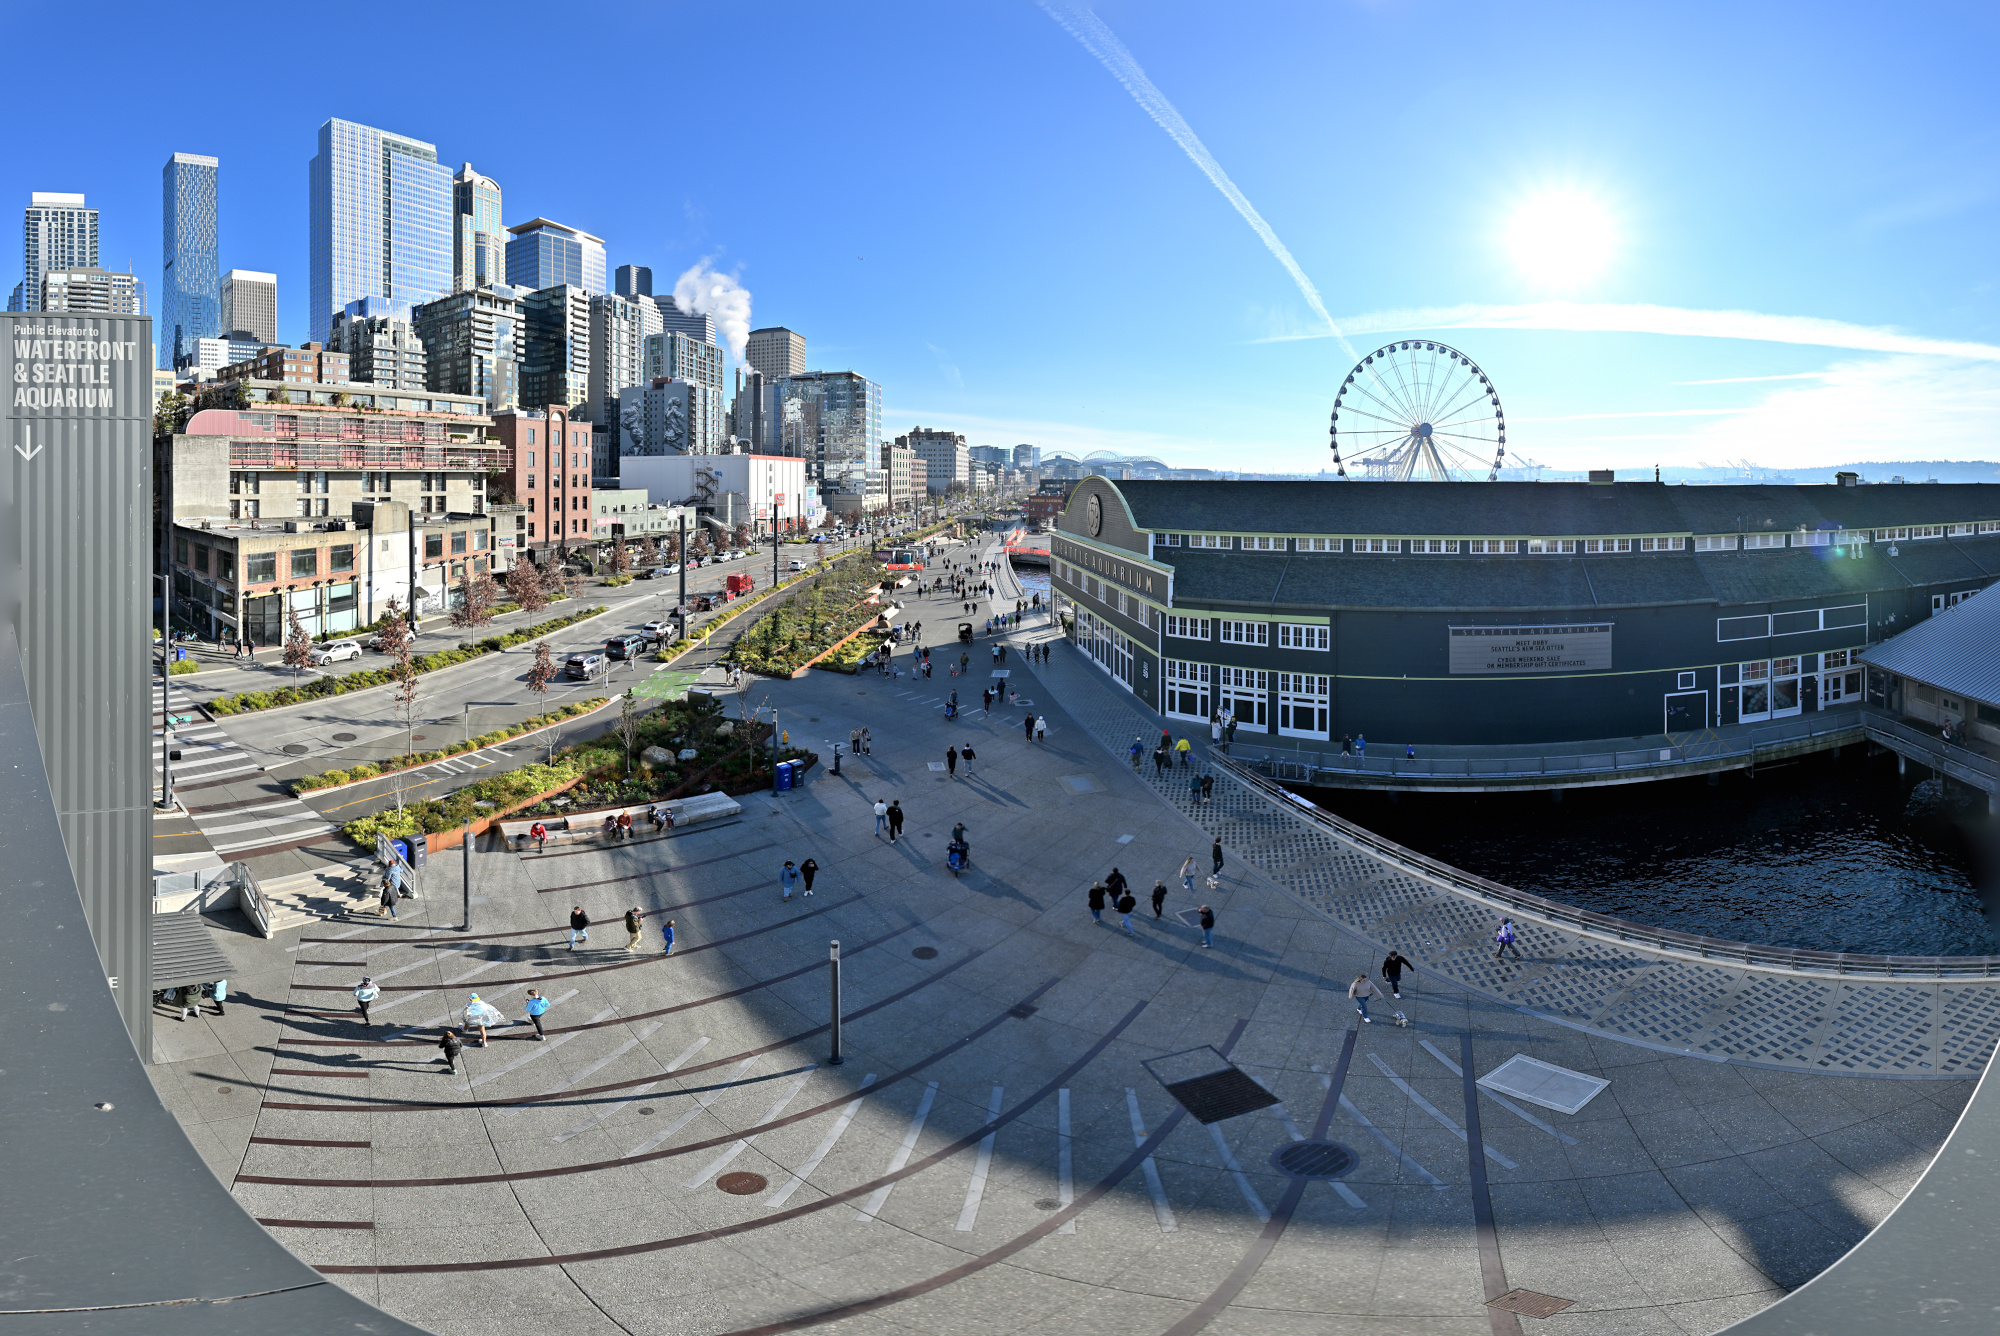
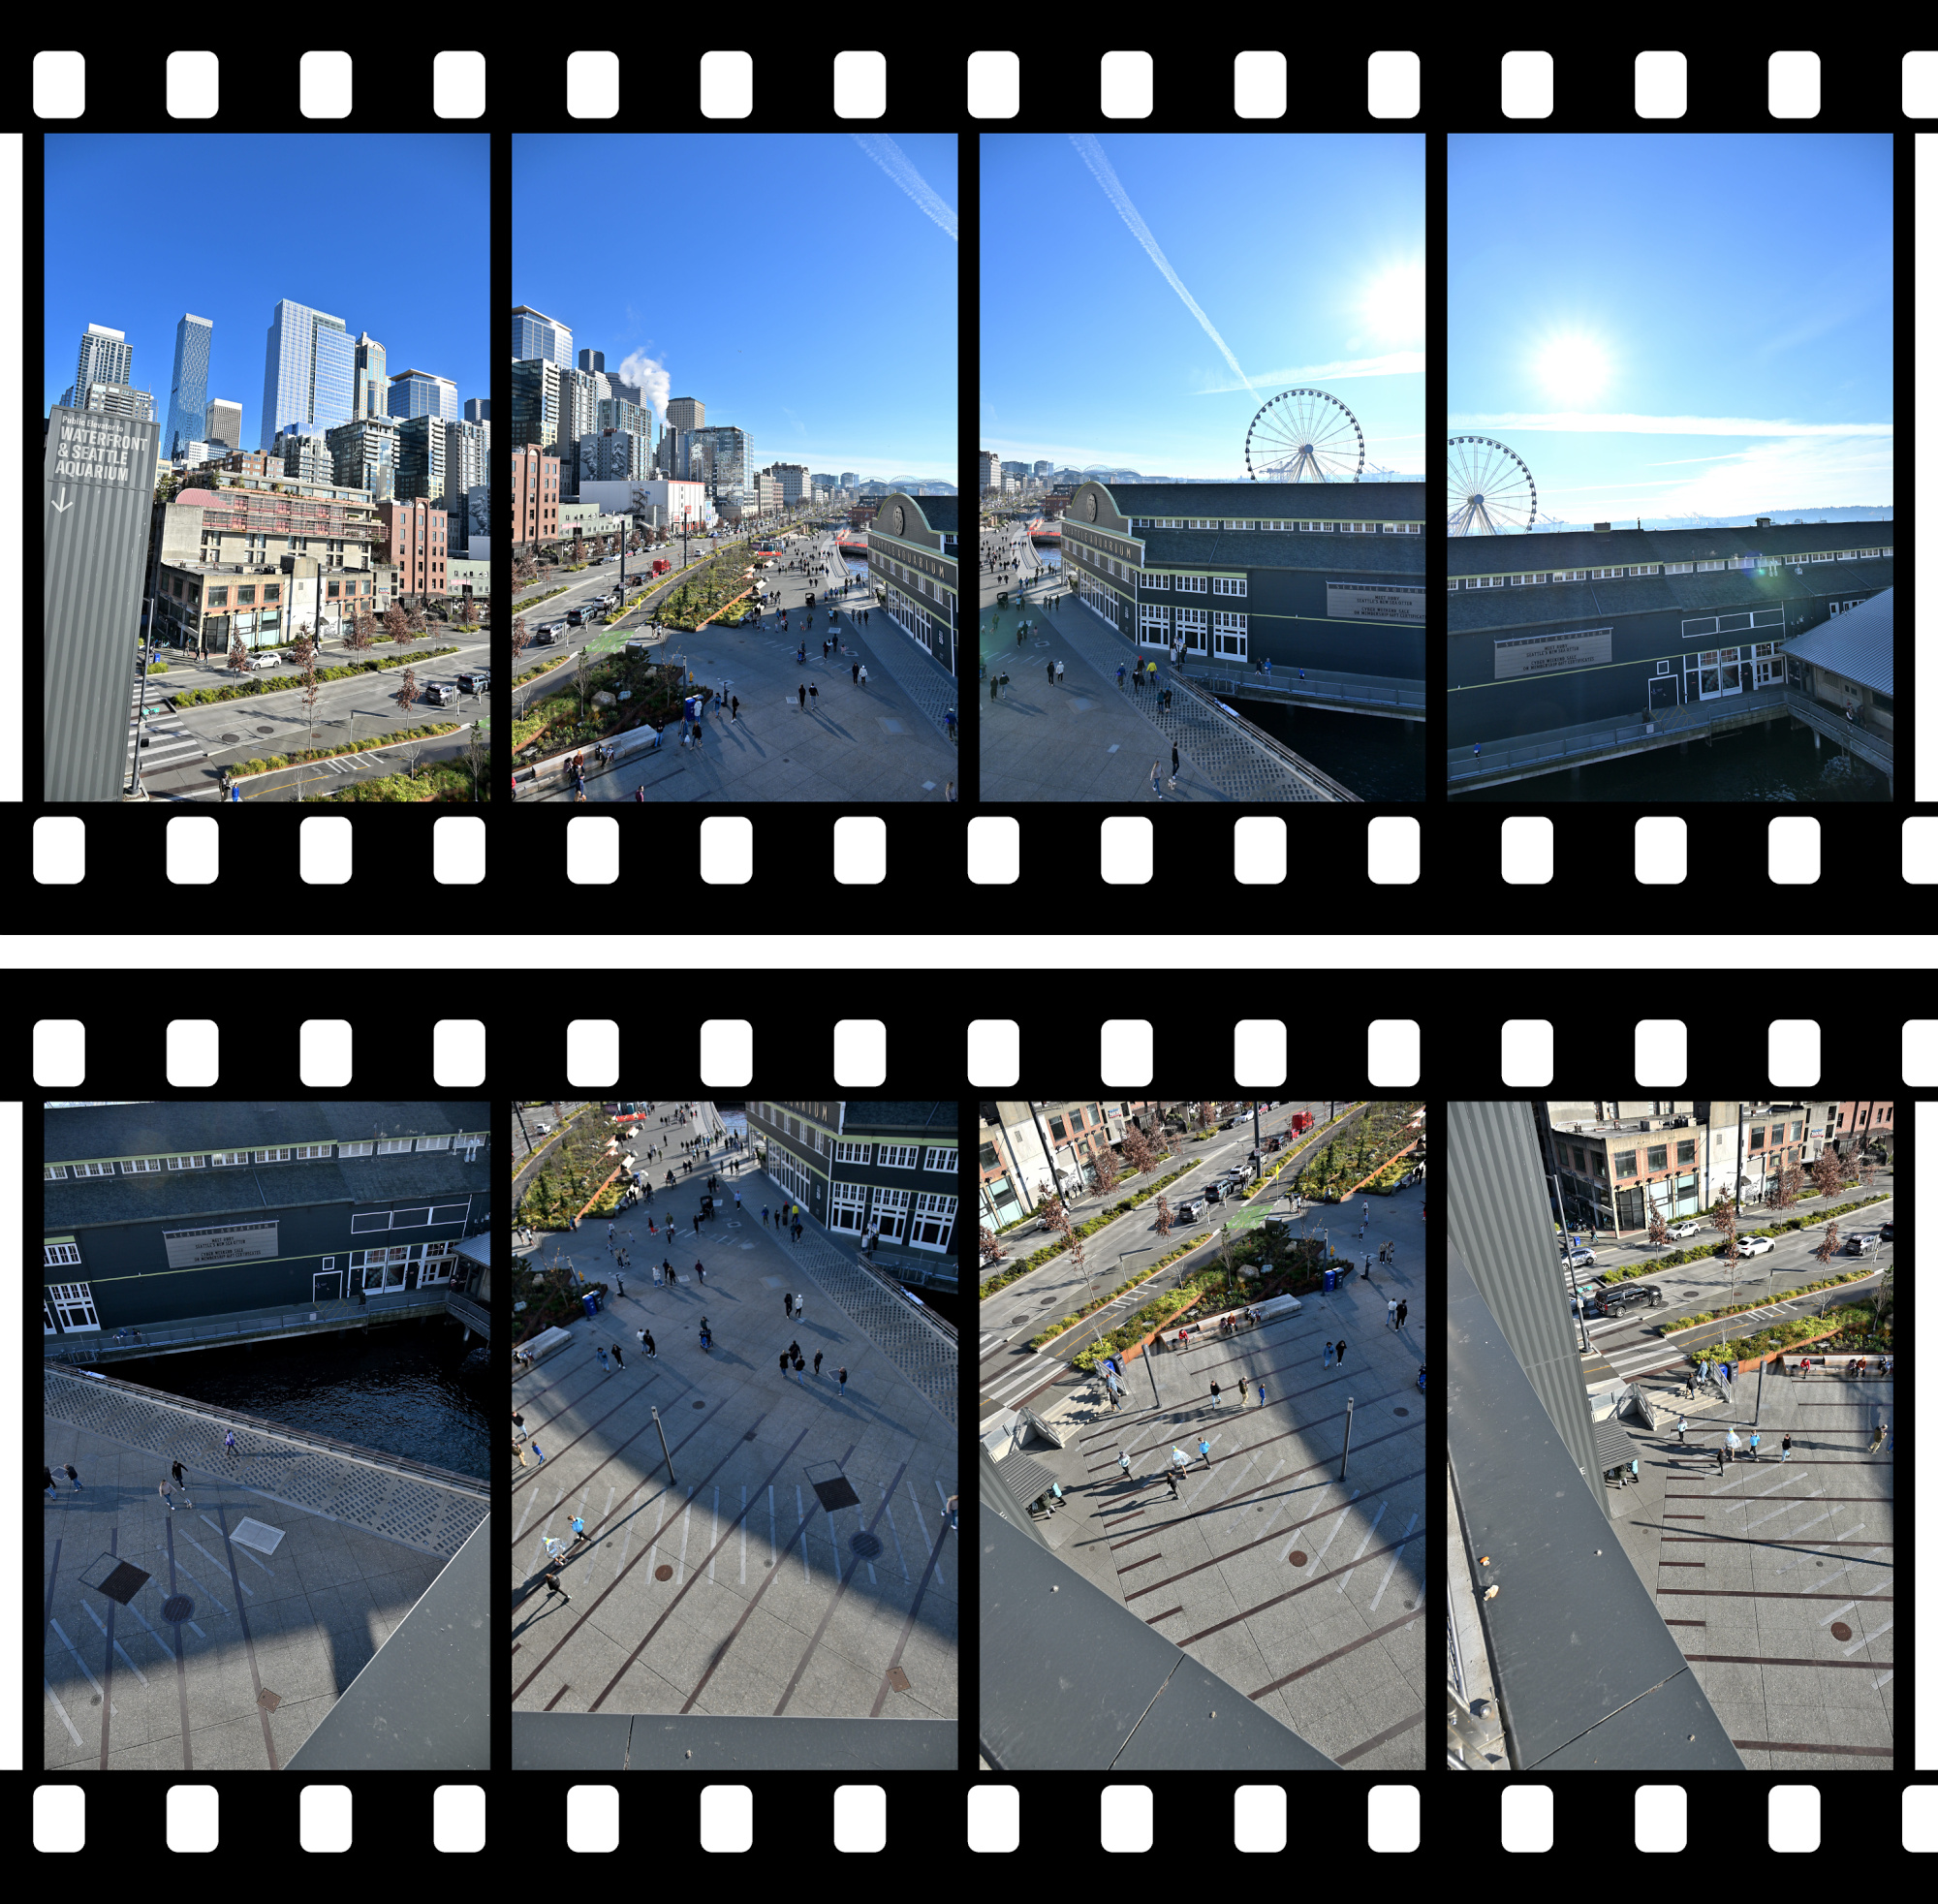
From the Overlook Walk, the view opened wide. The waterfront stretched below, ferries tracing slow lines across the bay, and behind it all the skyline stood still against the pale sky. The skyline panorama frames capture the city in one continuous sweep, holding its full breadth in a single image.
1/500s f/8 ISO 100/21° 16-50mm f/2,8 VR f=23mm/35mm
1/320s f/6,3 ISO 100/21° 16-50mm f/2,8 VR f=16mm/24mm
1/1000s f/5,6 ISO 100/21° 16-50mm f/2,8 VR f=18mm/27mm
1/400s f/7,1 ISO 100/21° 16-50mm f/2,8 VR f=16mm/24mm
1/500s f/8 ISO 100/21°
1/400s f/8 ISO 100/21°
1/800s f/5,6 ISO 100/21° 16-50mm f/2,8 VR f=16mm/24mm
1/400s f/7,1 ISO 100/21° 16-50mm f/2,8 VR f=35mm/52mm

1/500s f/8 ISO 100/21° f=16mm/17mm
1/400s f/7,1 ISO 100/21° 16-50mm f/2,8 VR f=16mm/24mm
On the way back, the Space Needle appeared again, sudden and familiar against the clear blue. One last glance, one last photo, and the day folded into the drive home: simple, bright, and easy to remember.
1/320s f/6,3 ISO 100/21° 16-50mm f/2,8 VR f=16mm/24mm
-
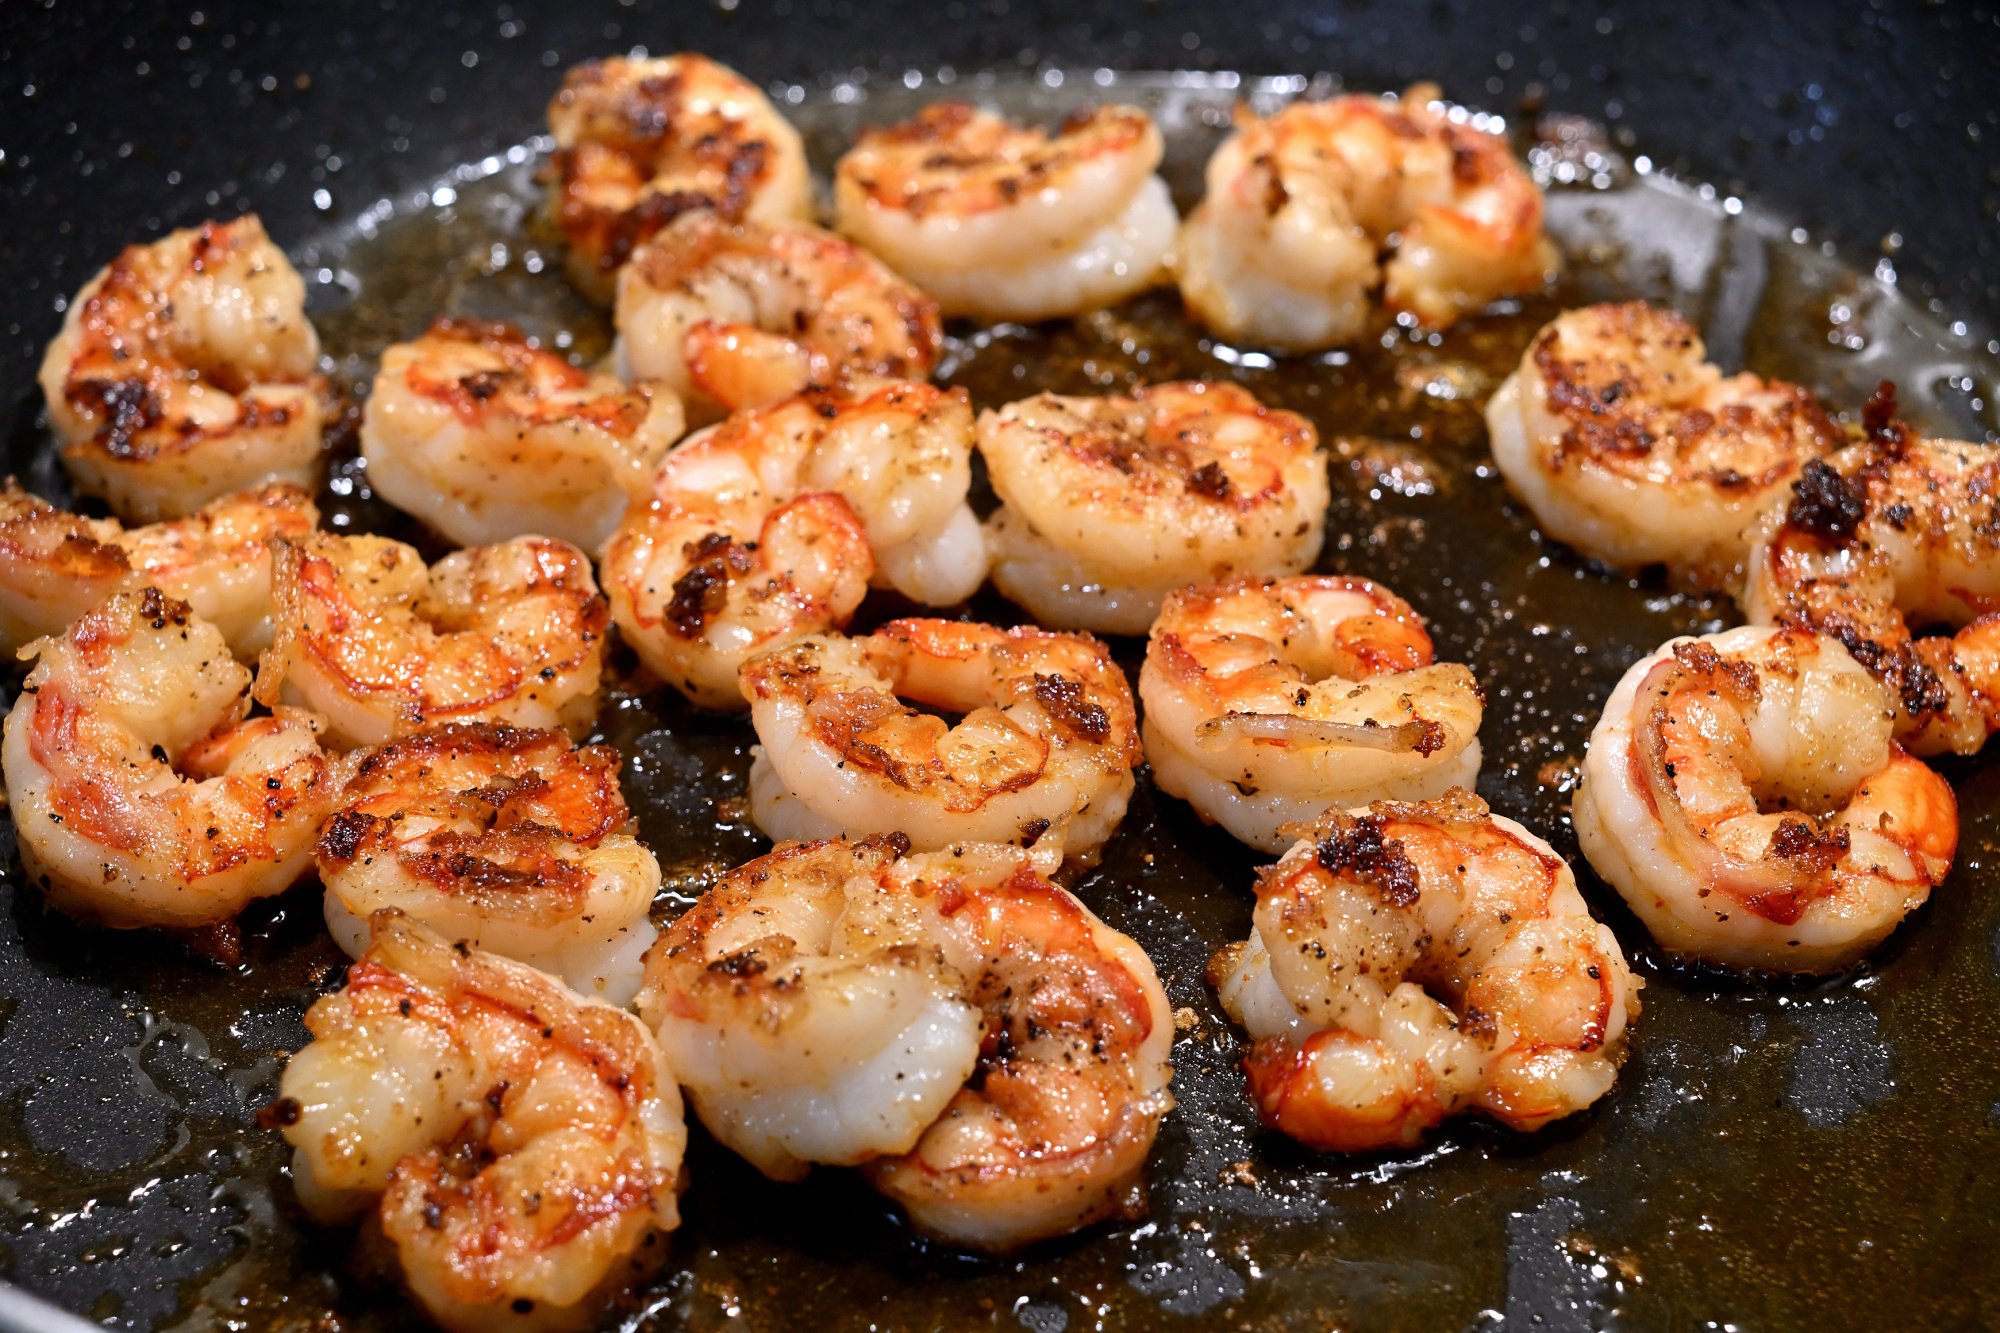
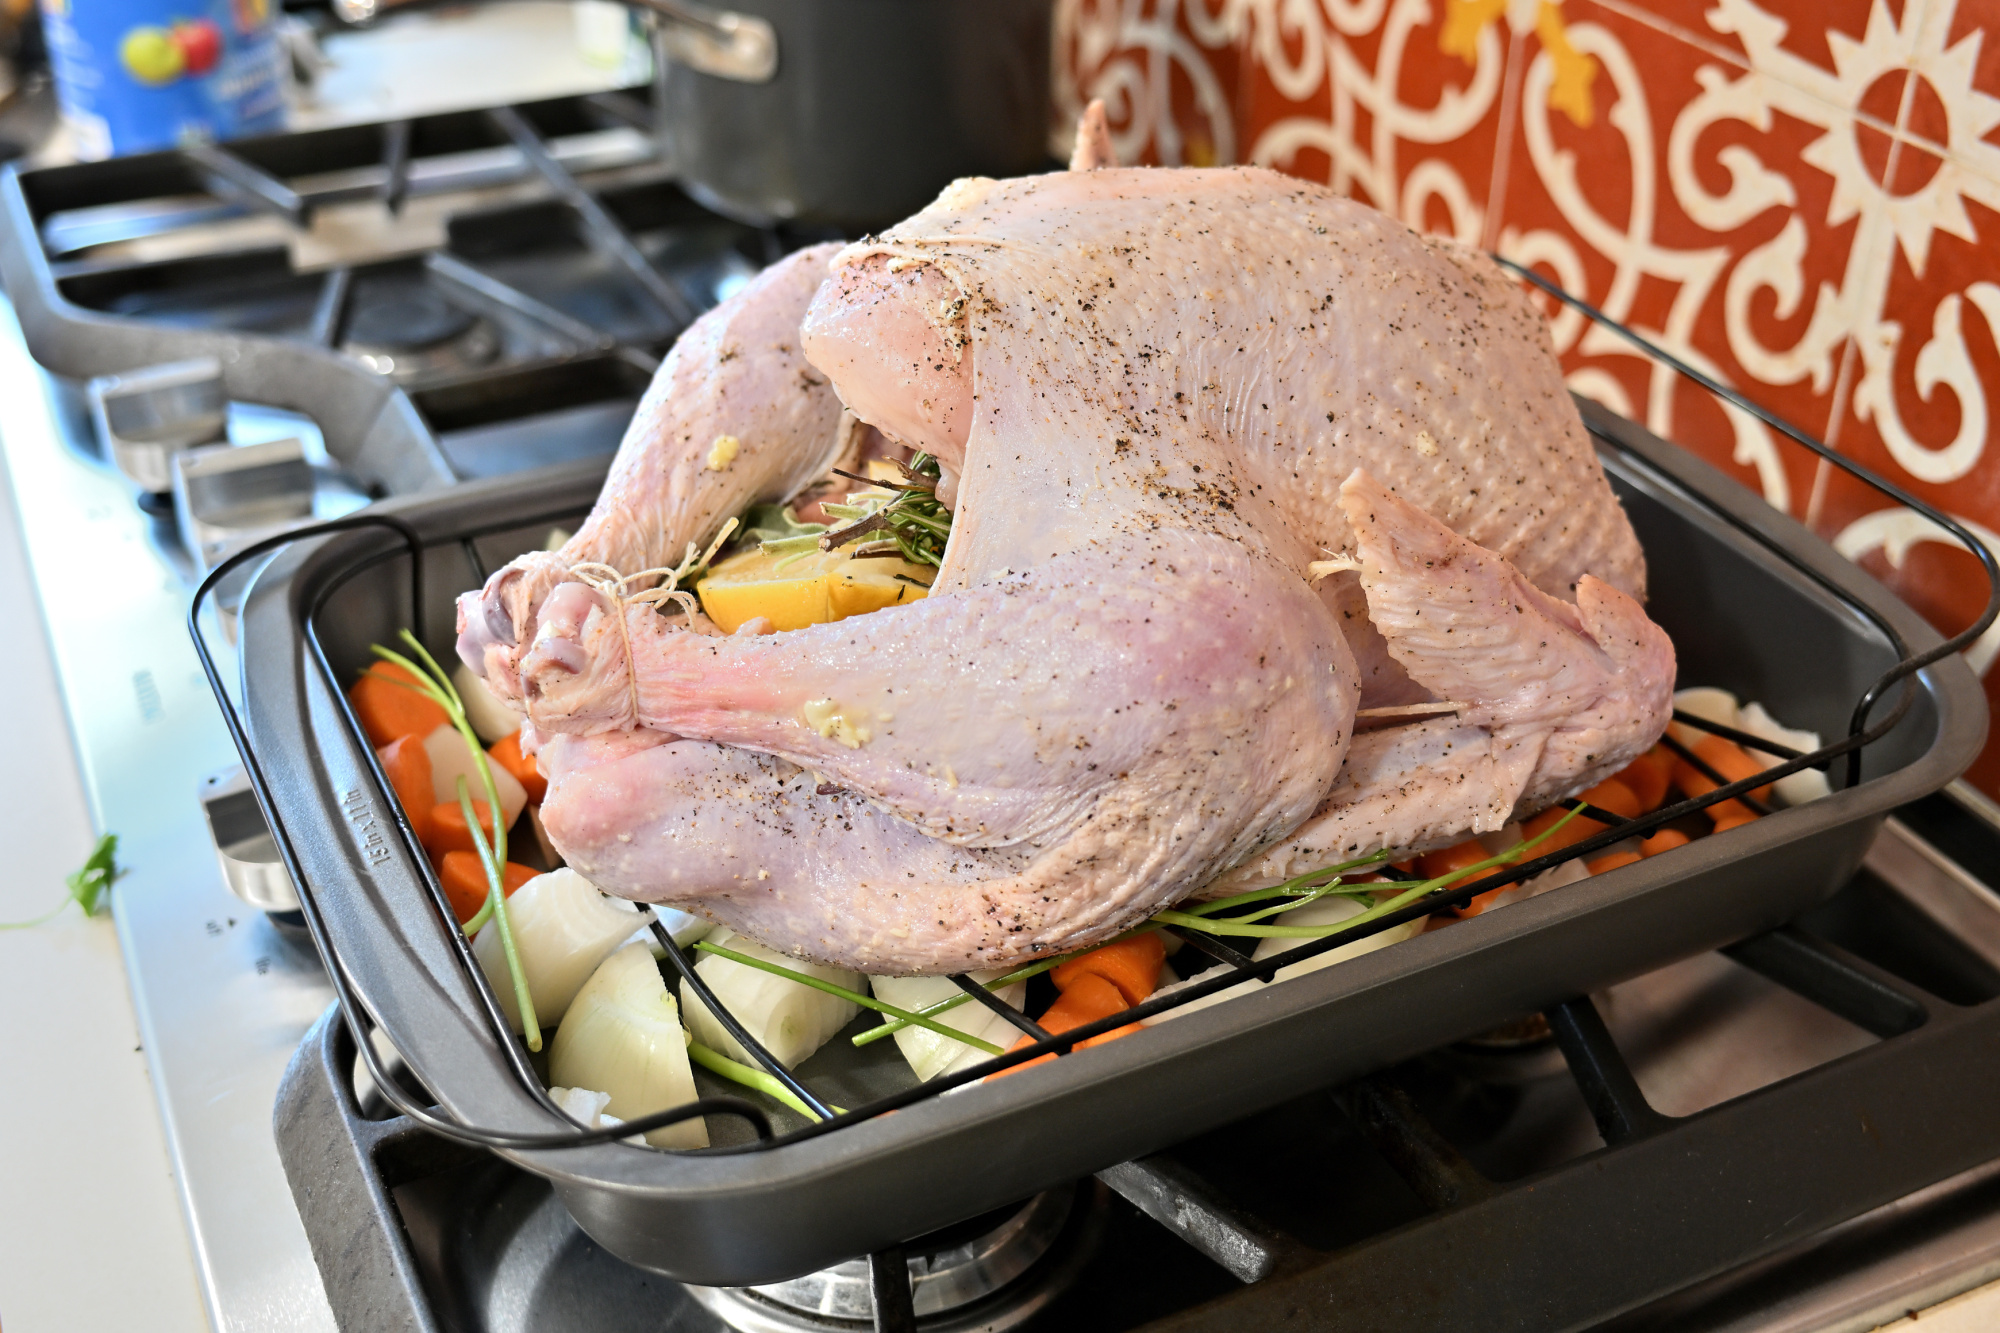
The Evolution of the Turkey 🦃
Every masterpiece begins in silence. The 👩🏻🍳 sets the stage, then time, heat and patience compose a quiet piece of culinary art.
Stage 1: Raw Ambition
A turkey in its natural state is like an unread book, full of potential, but mostly cold and uninviting. At this point, the only evolution is your growing doubt about oven size.
1/13s f/2,8 ISO 250/25° 16-50mm f/2,8 VR f=28mm/42mm
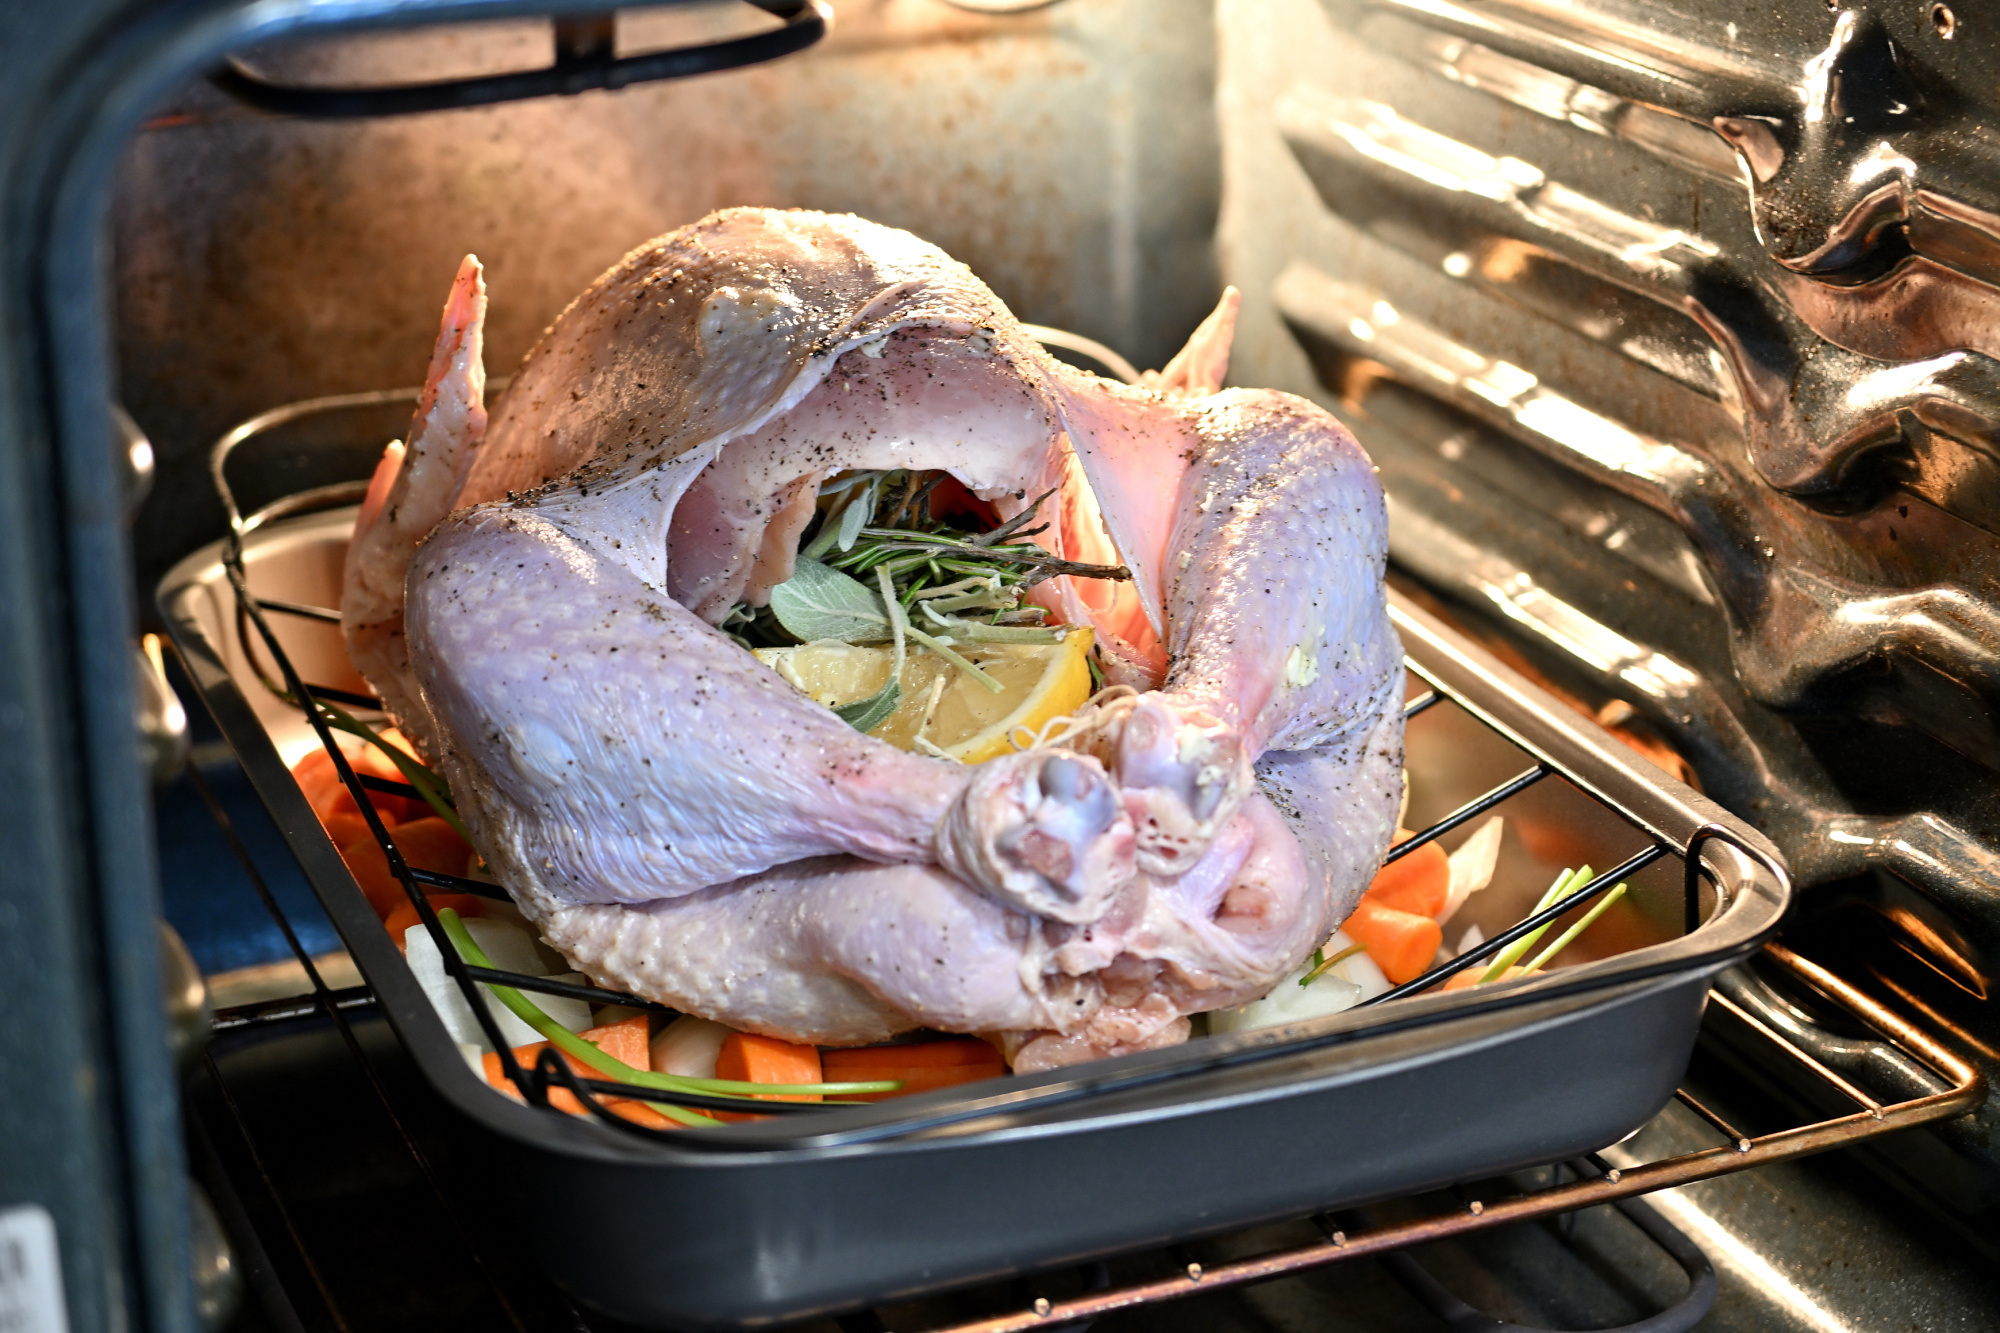
Stage 2: The Great Migration
It moves from countertop to oven, a journey as inevitable as Monday mornings. Here, transformation begins quietly under heat and time.
1/10s f/2,8 ISO 250/25° 16-50mm f/2,8 VR f=44mm/66mm
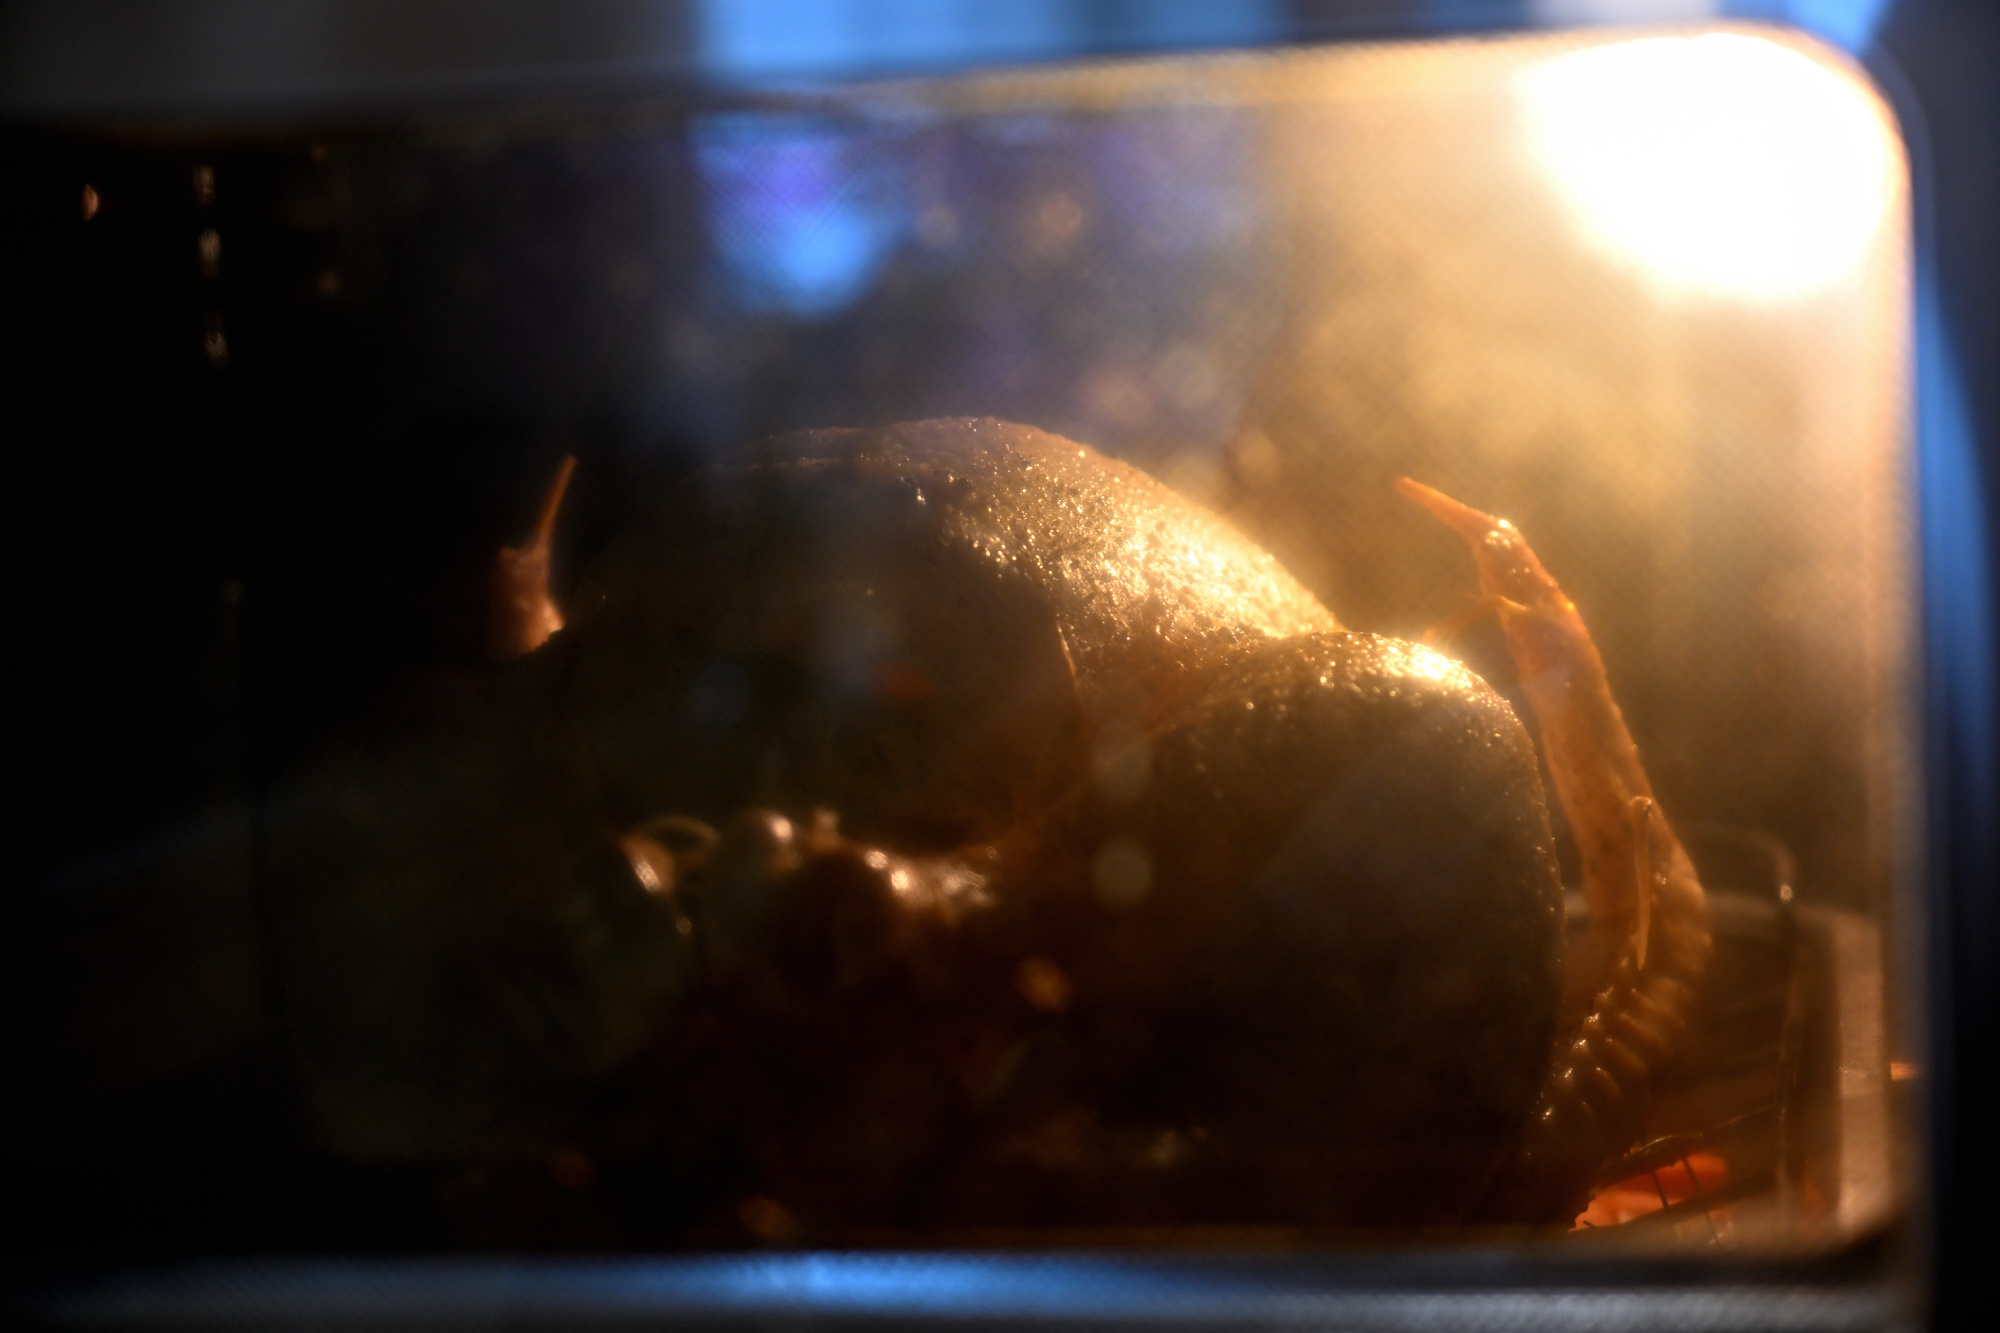
Stage 3: The Slow Enlightenment
Hours pass. The turkey meditates in 170°C silence, contemplating its purpose. It emerges wiser, crispier, and slightly golden, proof that patience and heat can turn blandness into brilliance.
1/40s f/3,2 ISO 250/25° 16-50mm f/2,8 VR f=50mm/75mm1
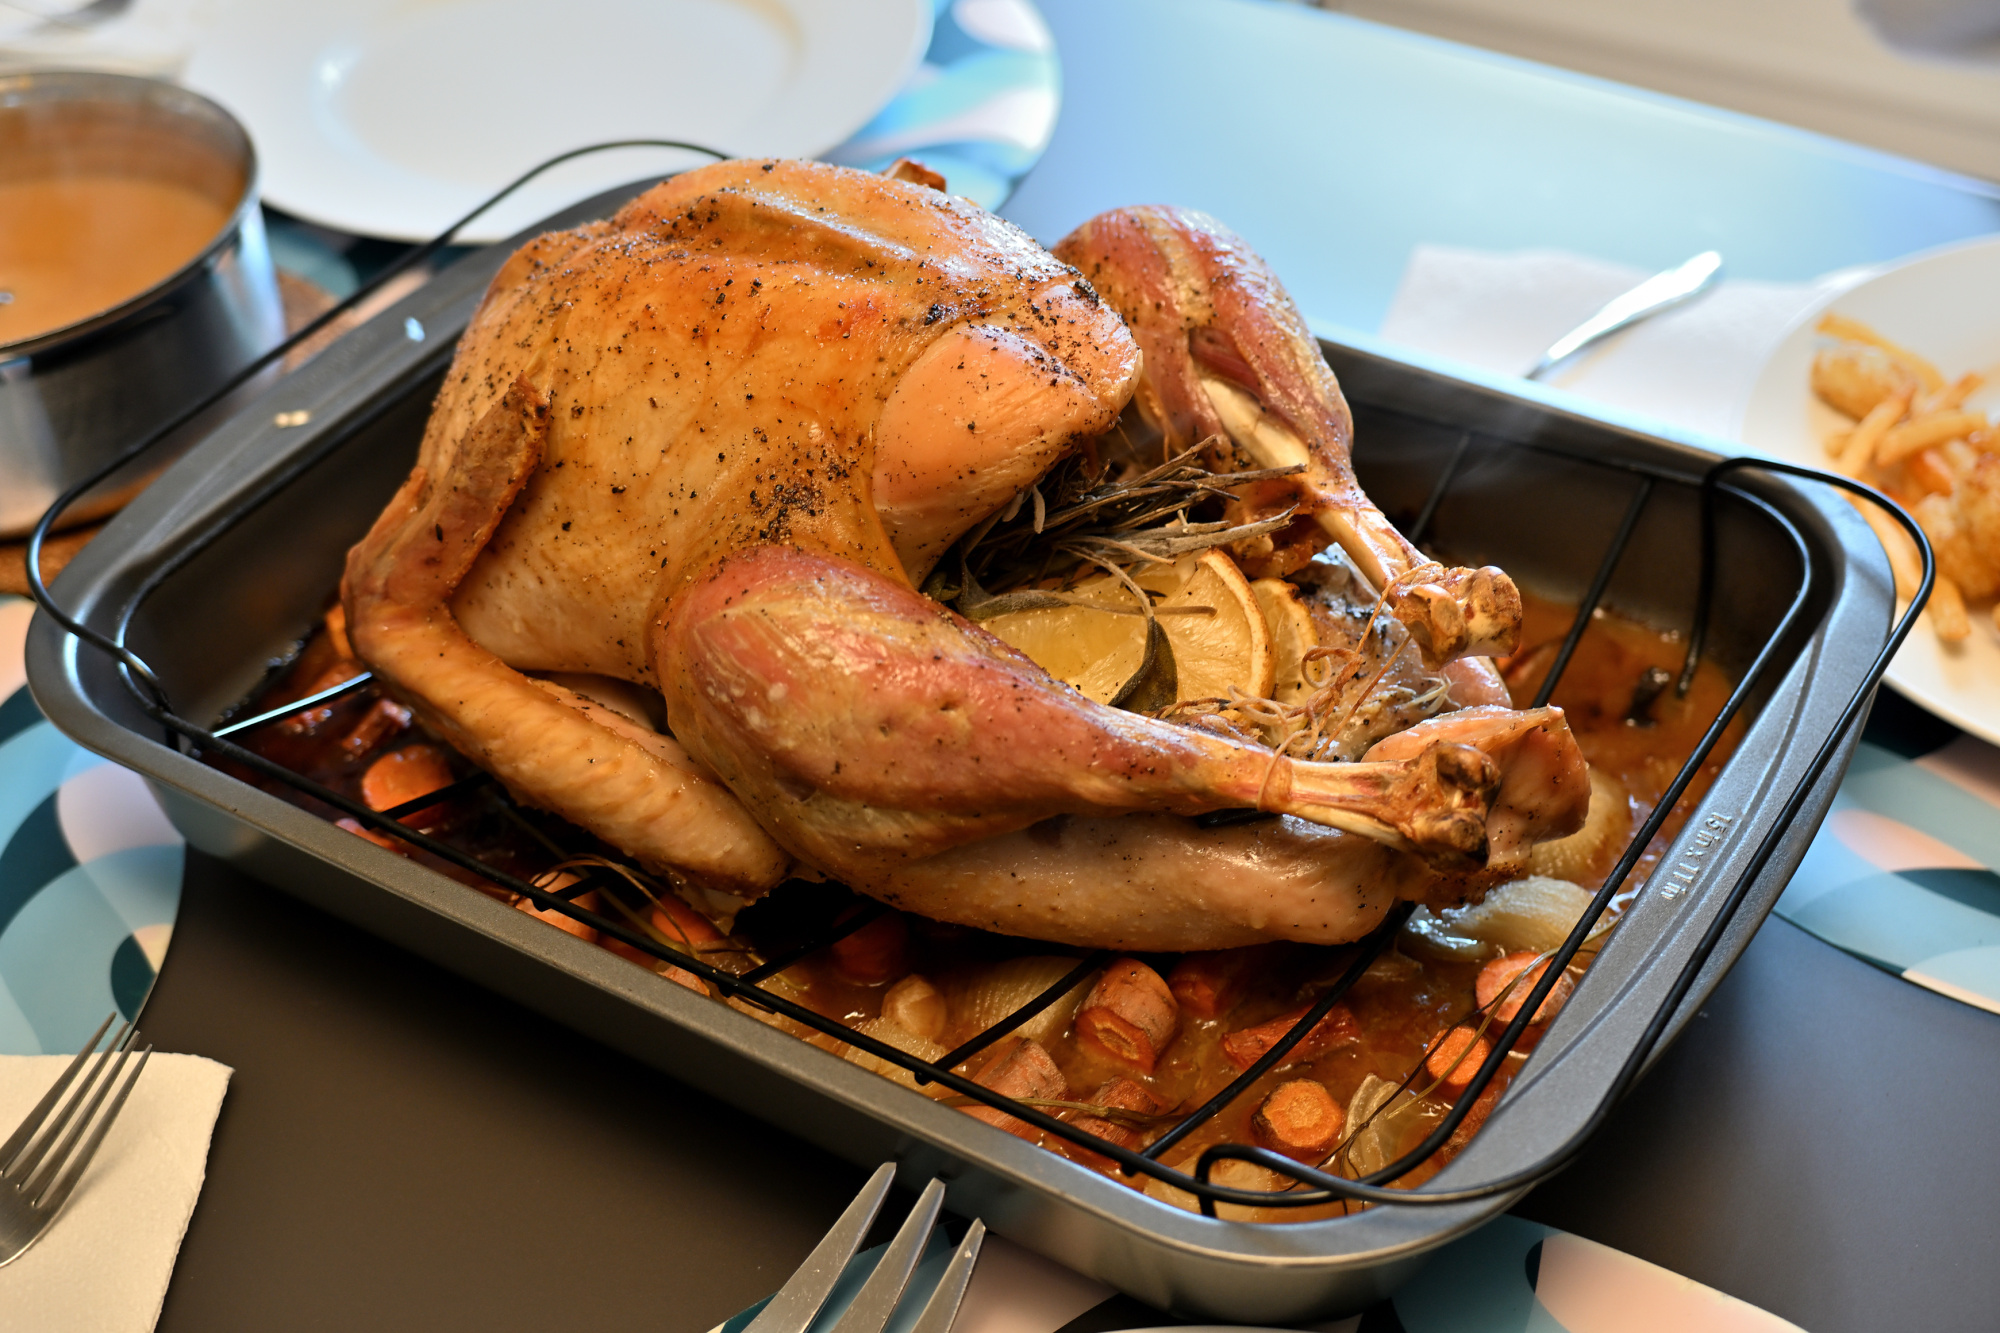
Stage 4: The Final Form
On the table, surrounded by sides and expectations, the turkey achieves peak relevance. For a brief moment, it is the influencer of the dining room. Then, like all trends, it is consumed and forgotten.
1/20s f/2,8 ISO 400/27° 16-50mm f/2,8 VR f=34mm/51mm
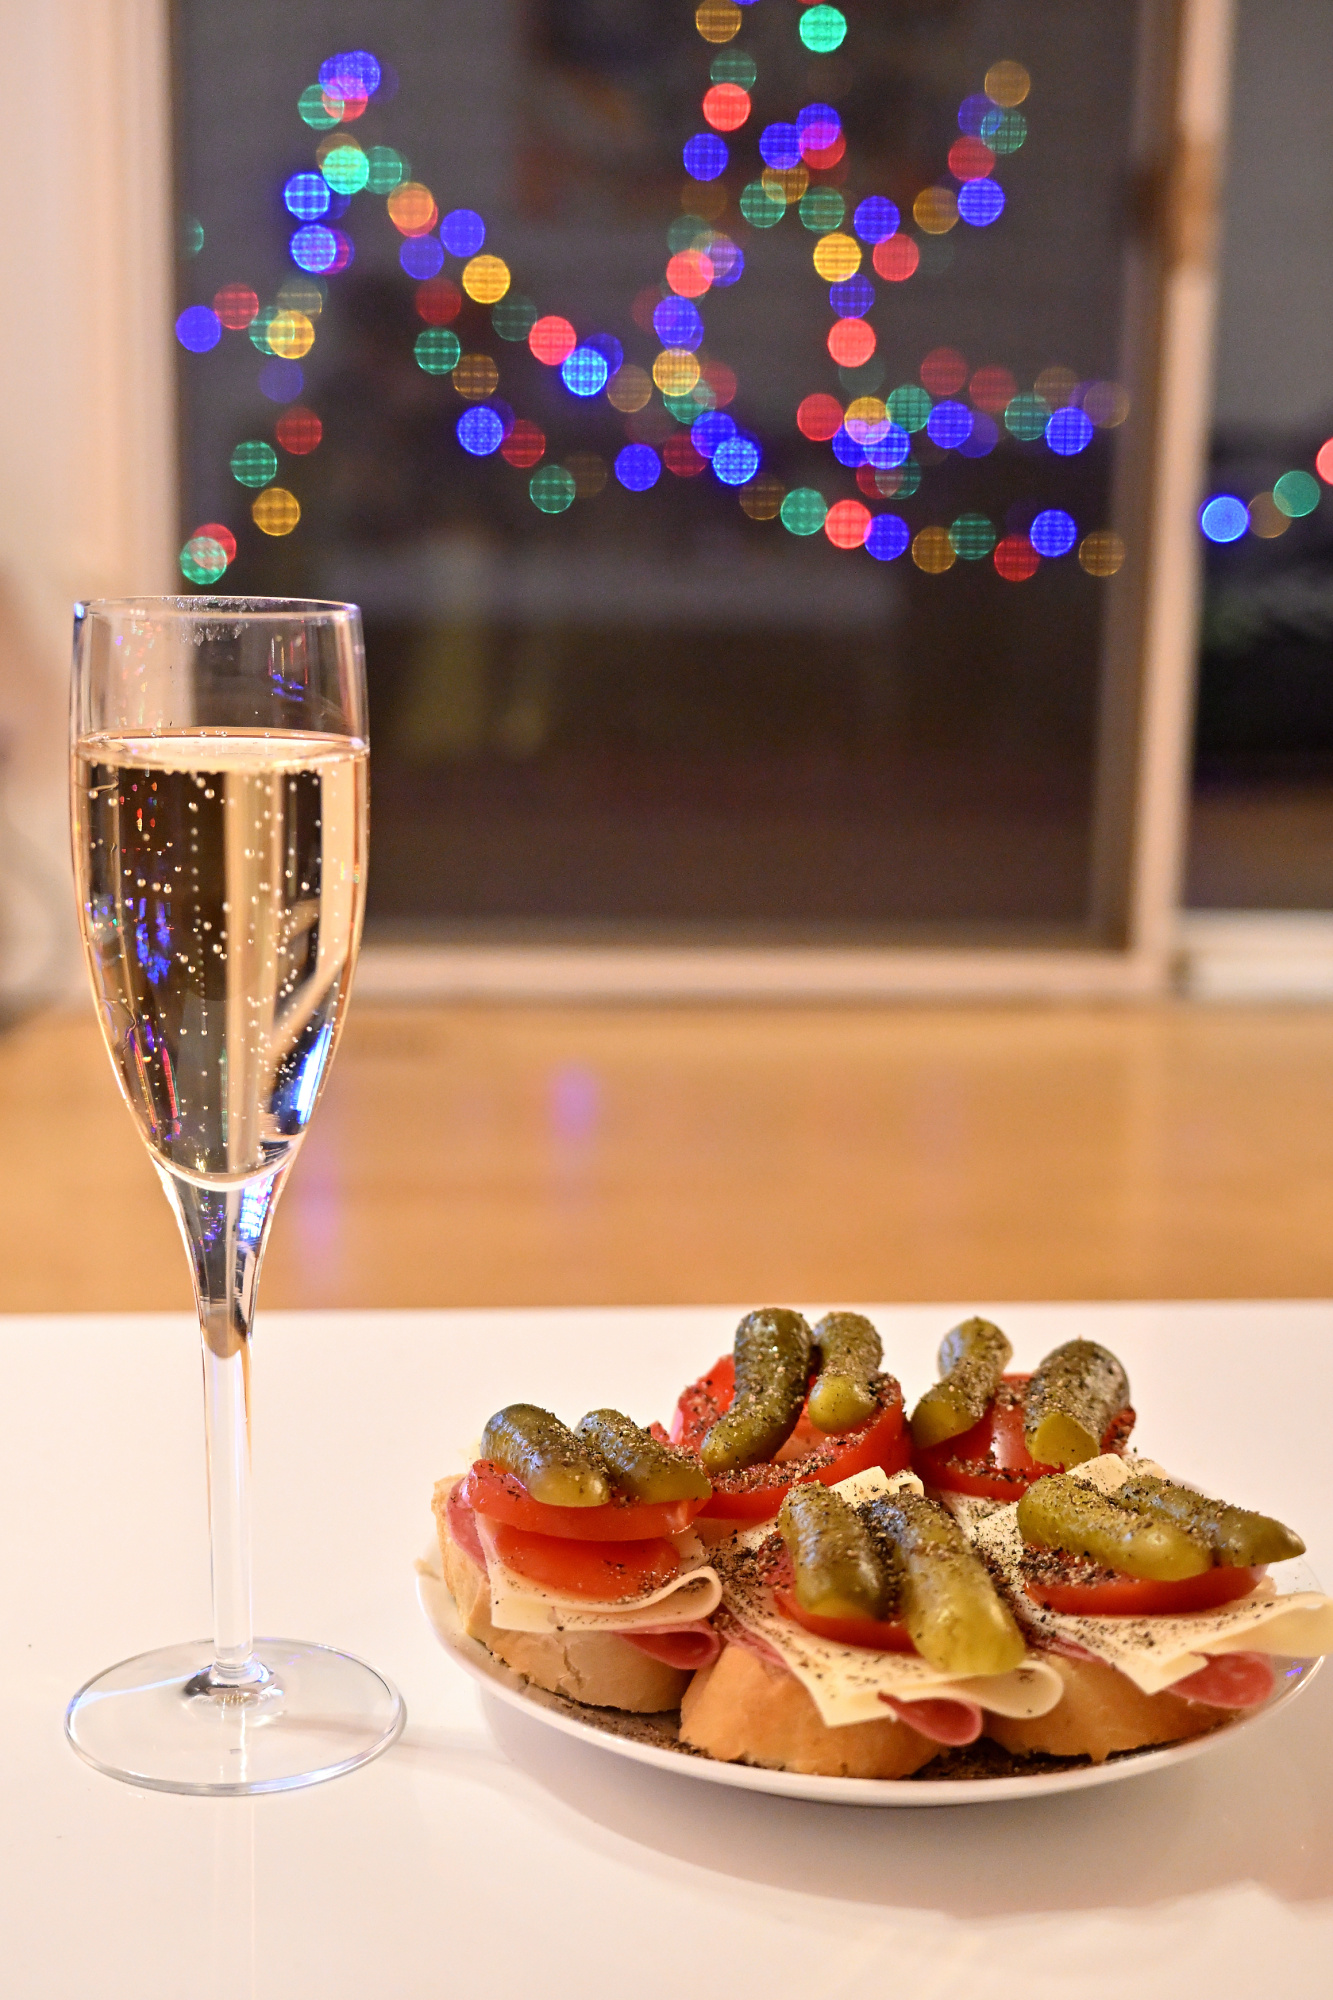
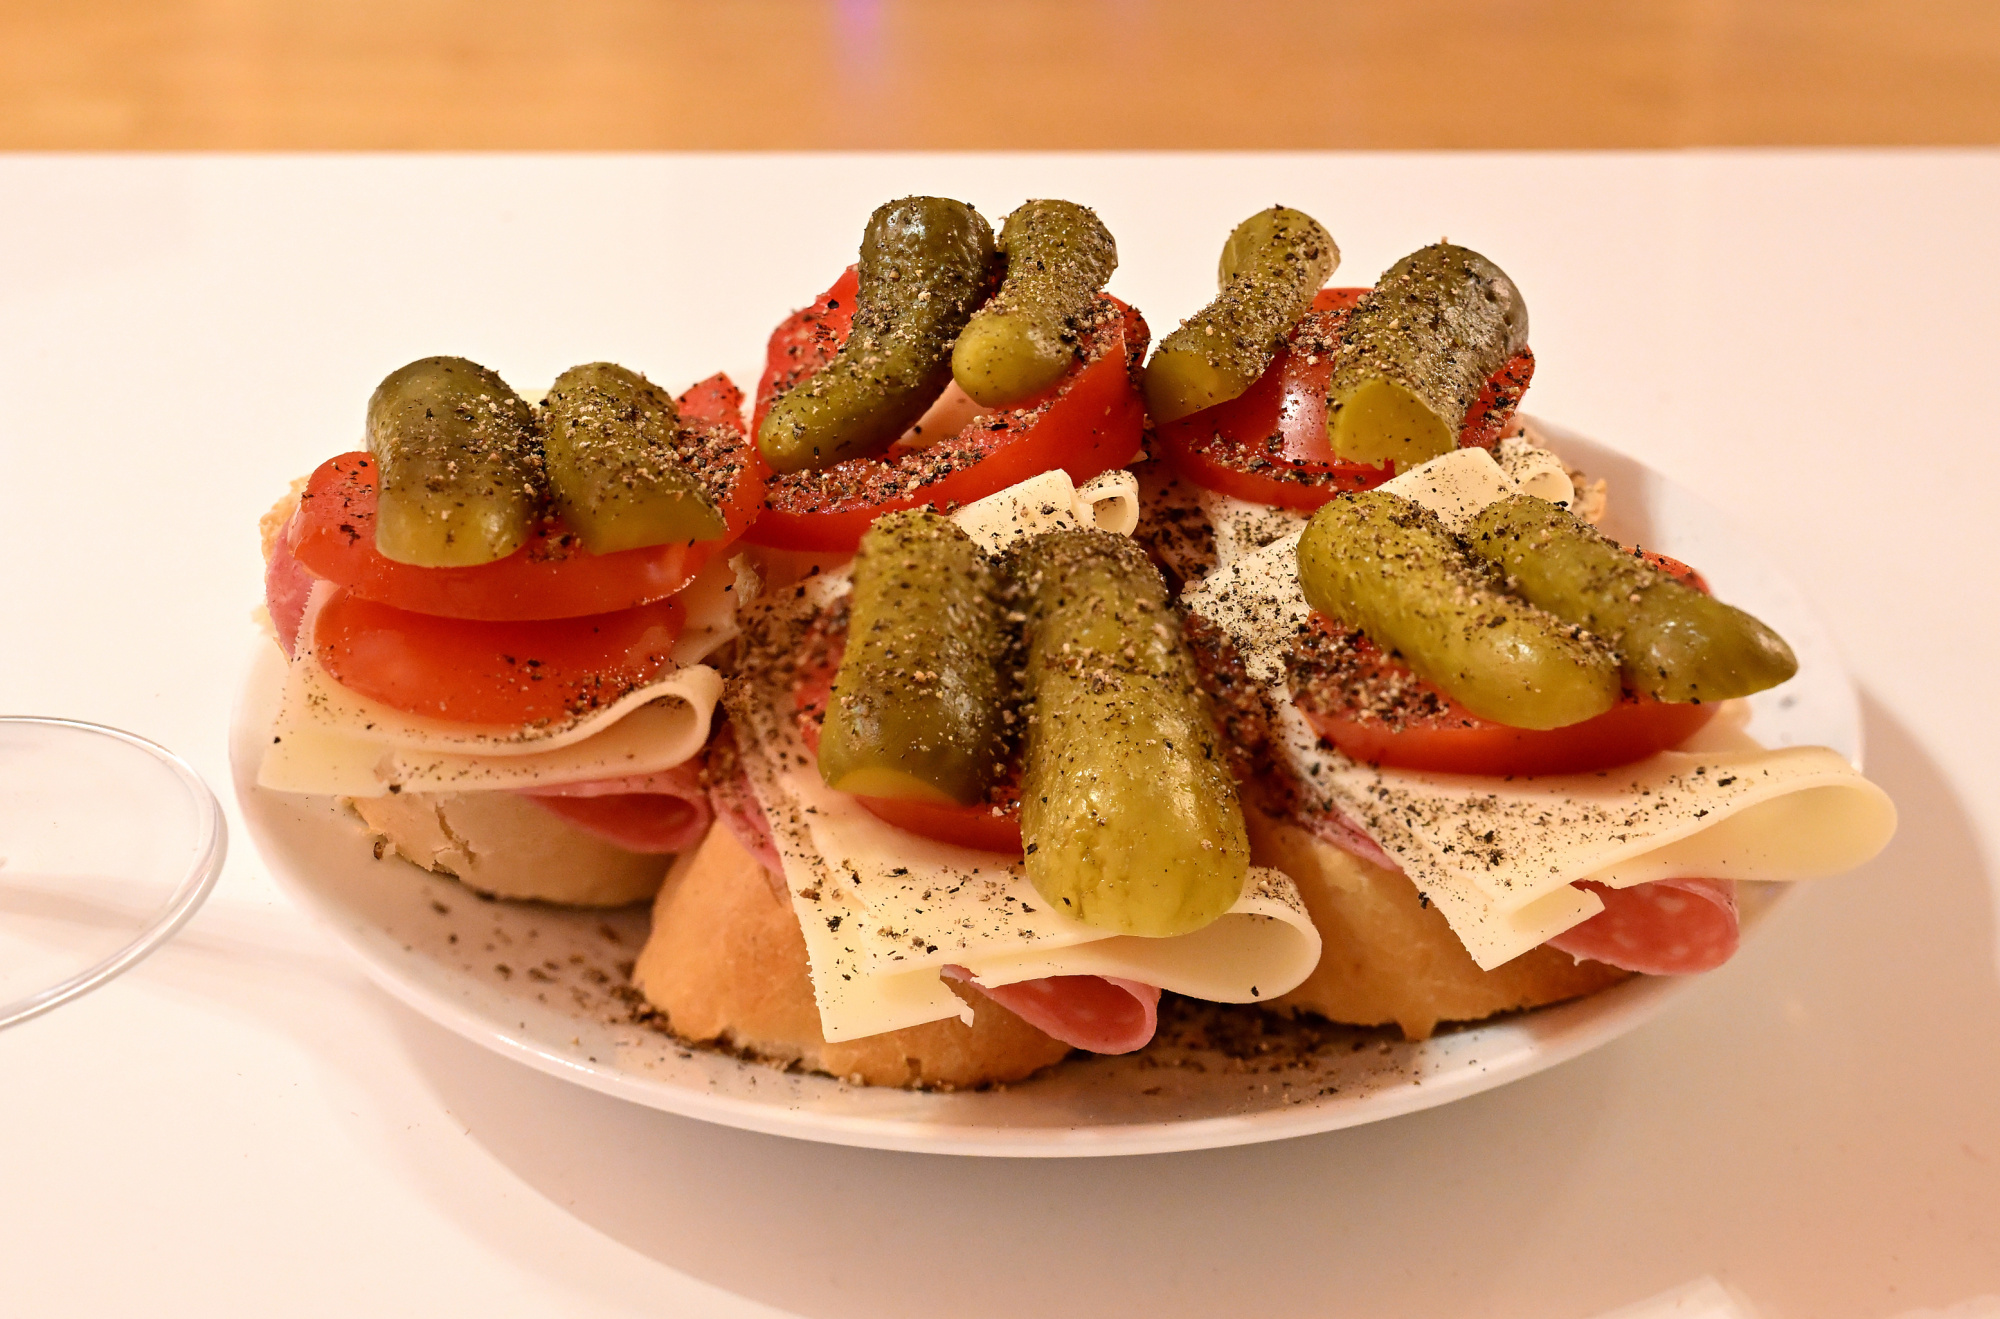
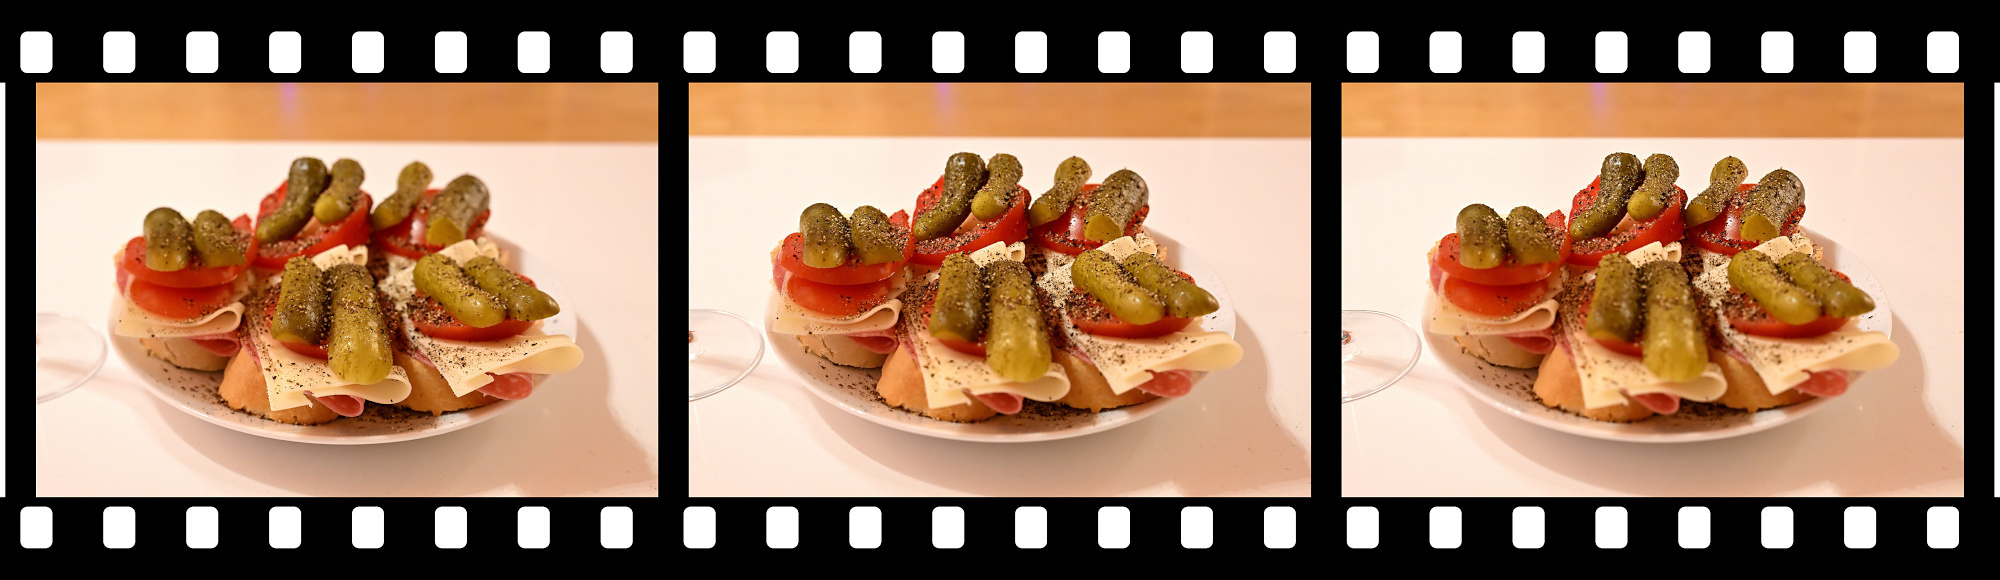
A picture impossible to make with a single exposure
1/25s f/2,8 ISO 400/27° 16-50mm f/2,8 VR f=27mm/41mm
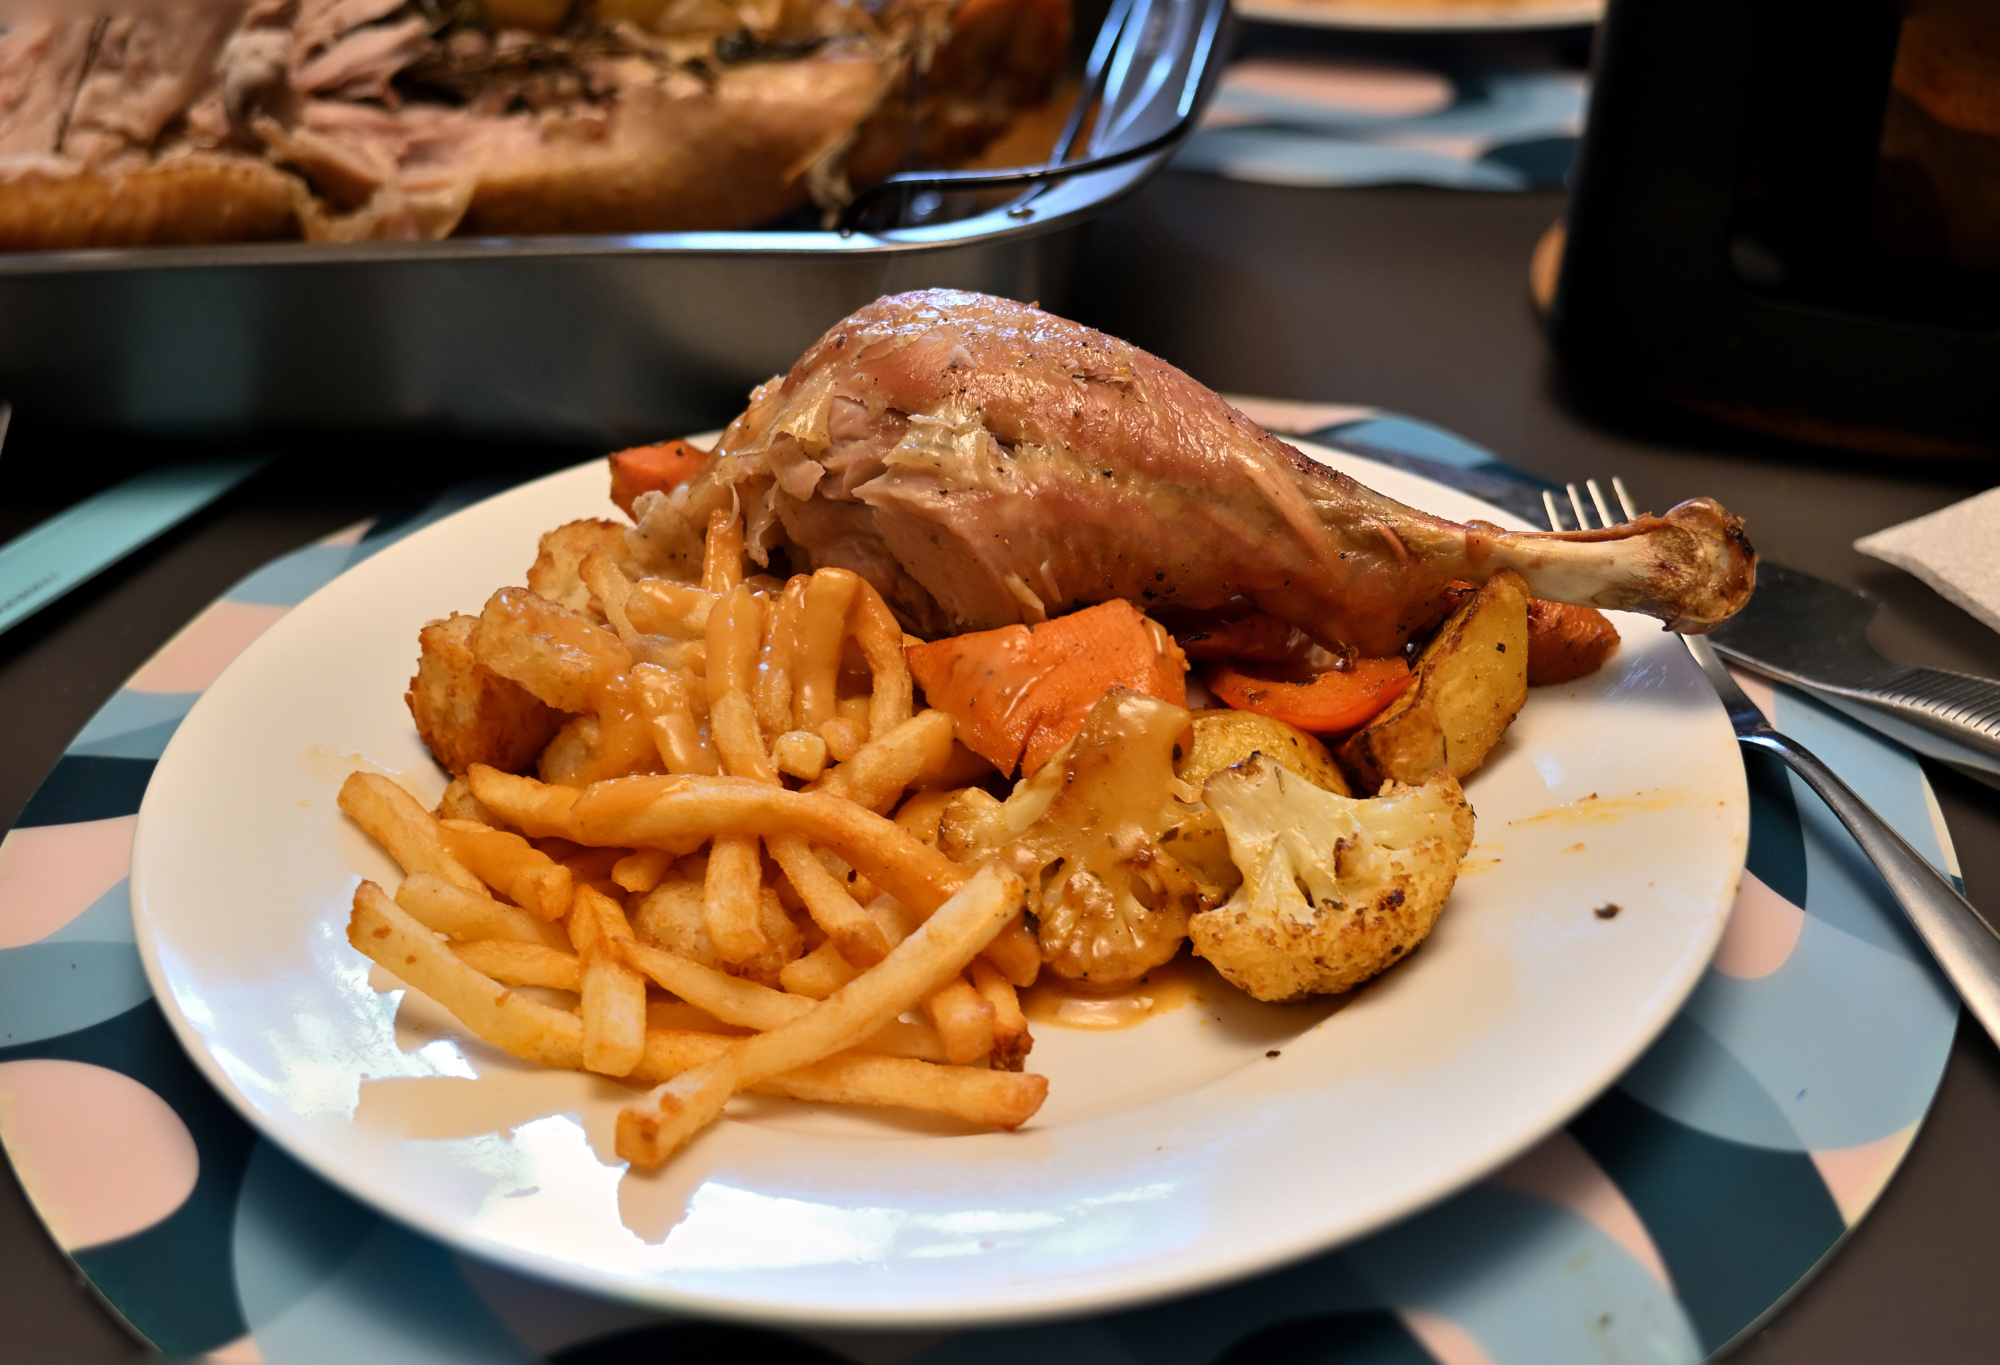
The shallow depth of field creates a beautifully blurred background, something that gives the image its depth and character. To achieve sharpness across the entire plate without losing that blur, two shots were taken: one focused on the front, the other on the back of the plate and then combined using Focus Stacking
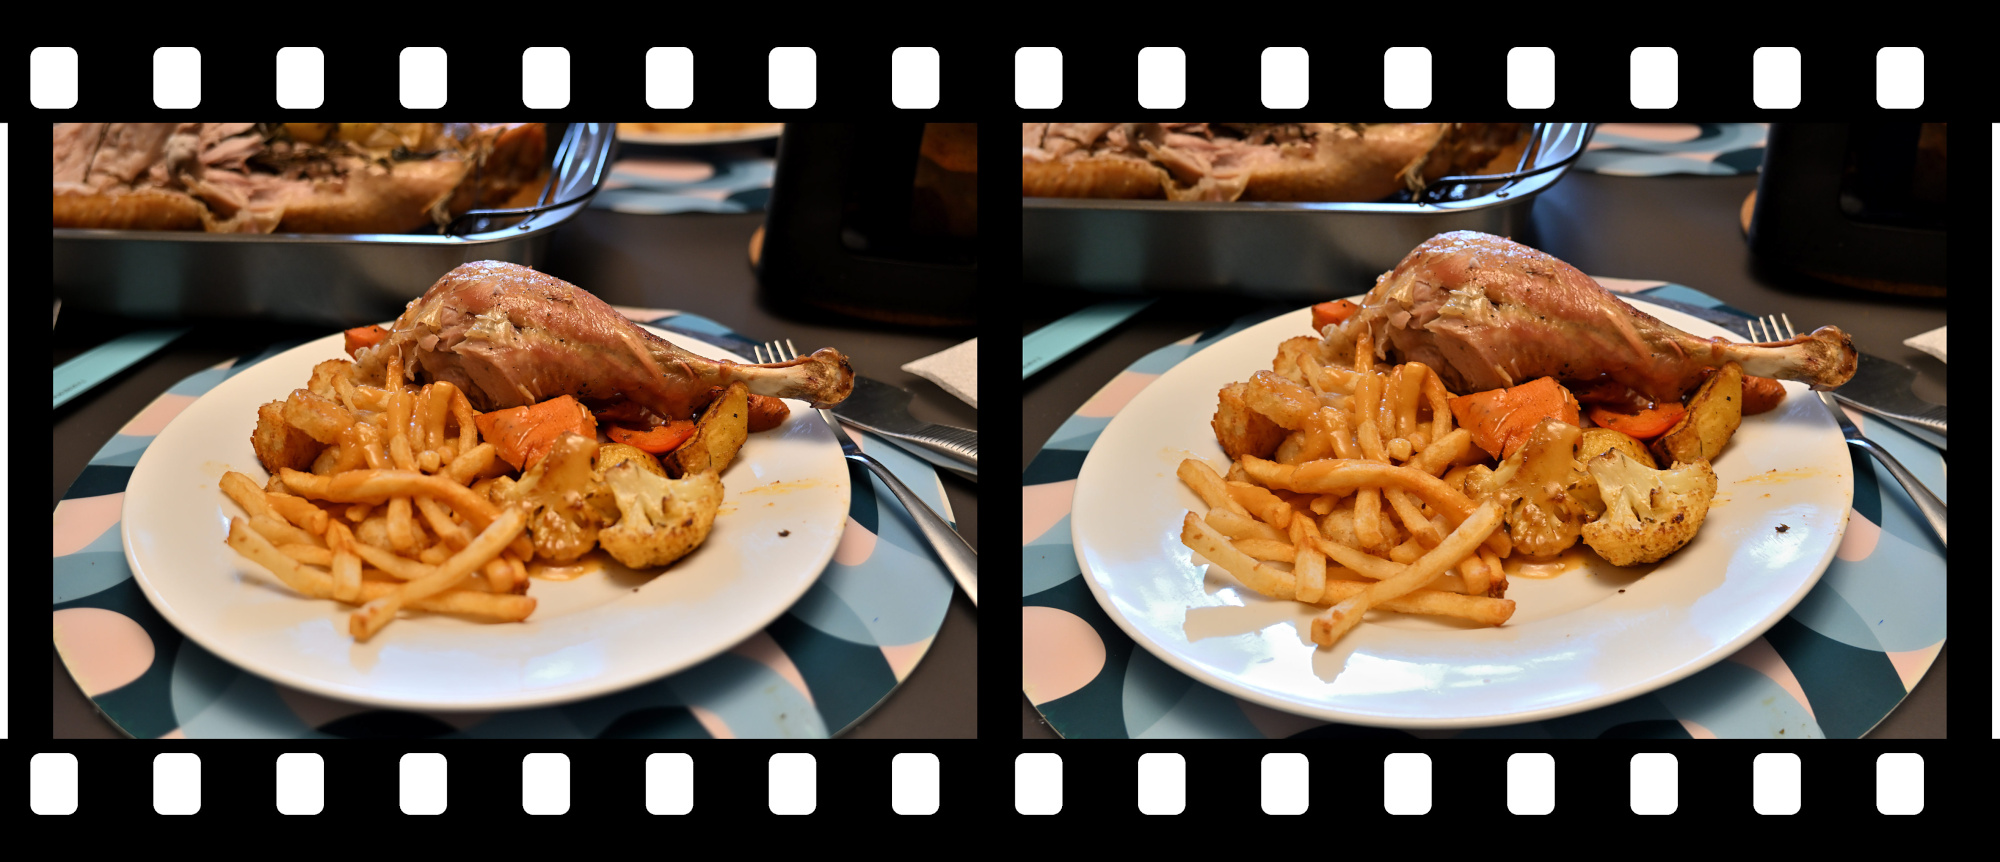
Simply stopping down the aperture for more depth of field would have rendered the plate sharp, but also flattened the scene, turning it into the kind of phone photo where the background looks lifeless. This blend keeps the plate crisp while preserving the softness behind it.
Back to the kitchen:
At first it hides its promise. Add time, heat, and a little seasoning and it becomes a quiet piece of culinary work.
-
Focused manually because autofocus would have locked on the oven glass instead of the turkey inside.
And absolutely no permission from the chef to open the oven for a quick snap. This picture had to be captured through the glass, in the heat and haze, without disturbing the masterpiece in progress. ↩
-
Seite 1 von 51
Ältere Beiträge →